Rent a Server
This tutorial walks you through renting a server on CreateOS in under five minutes.
By the end of this guide, you'll have an active server ready to run workloads, host applications, or power deployments across CreateOS.
Steps
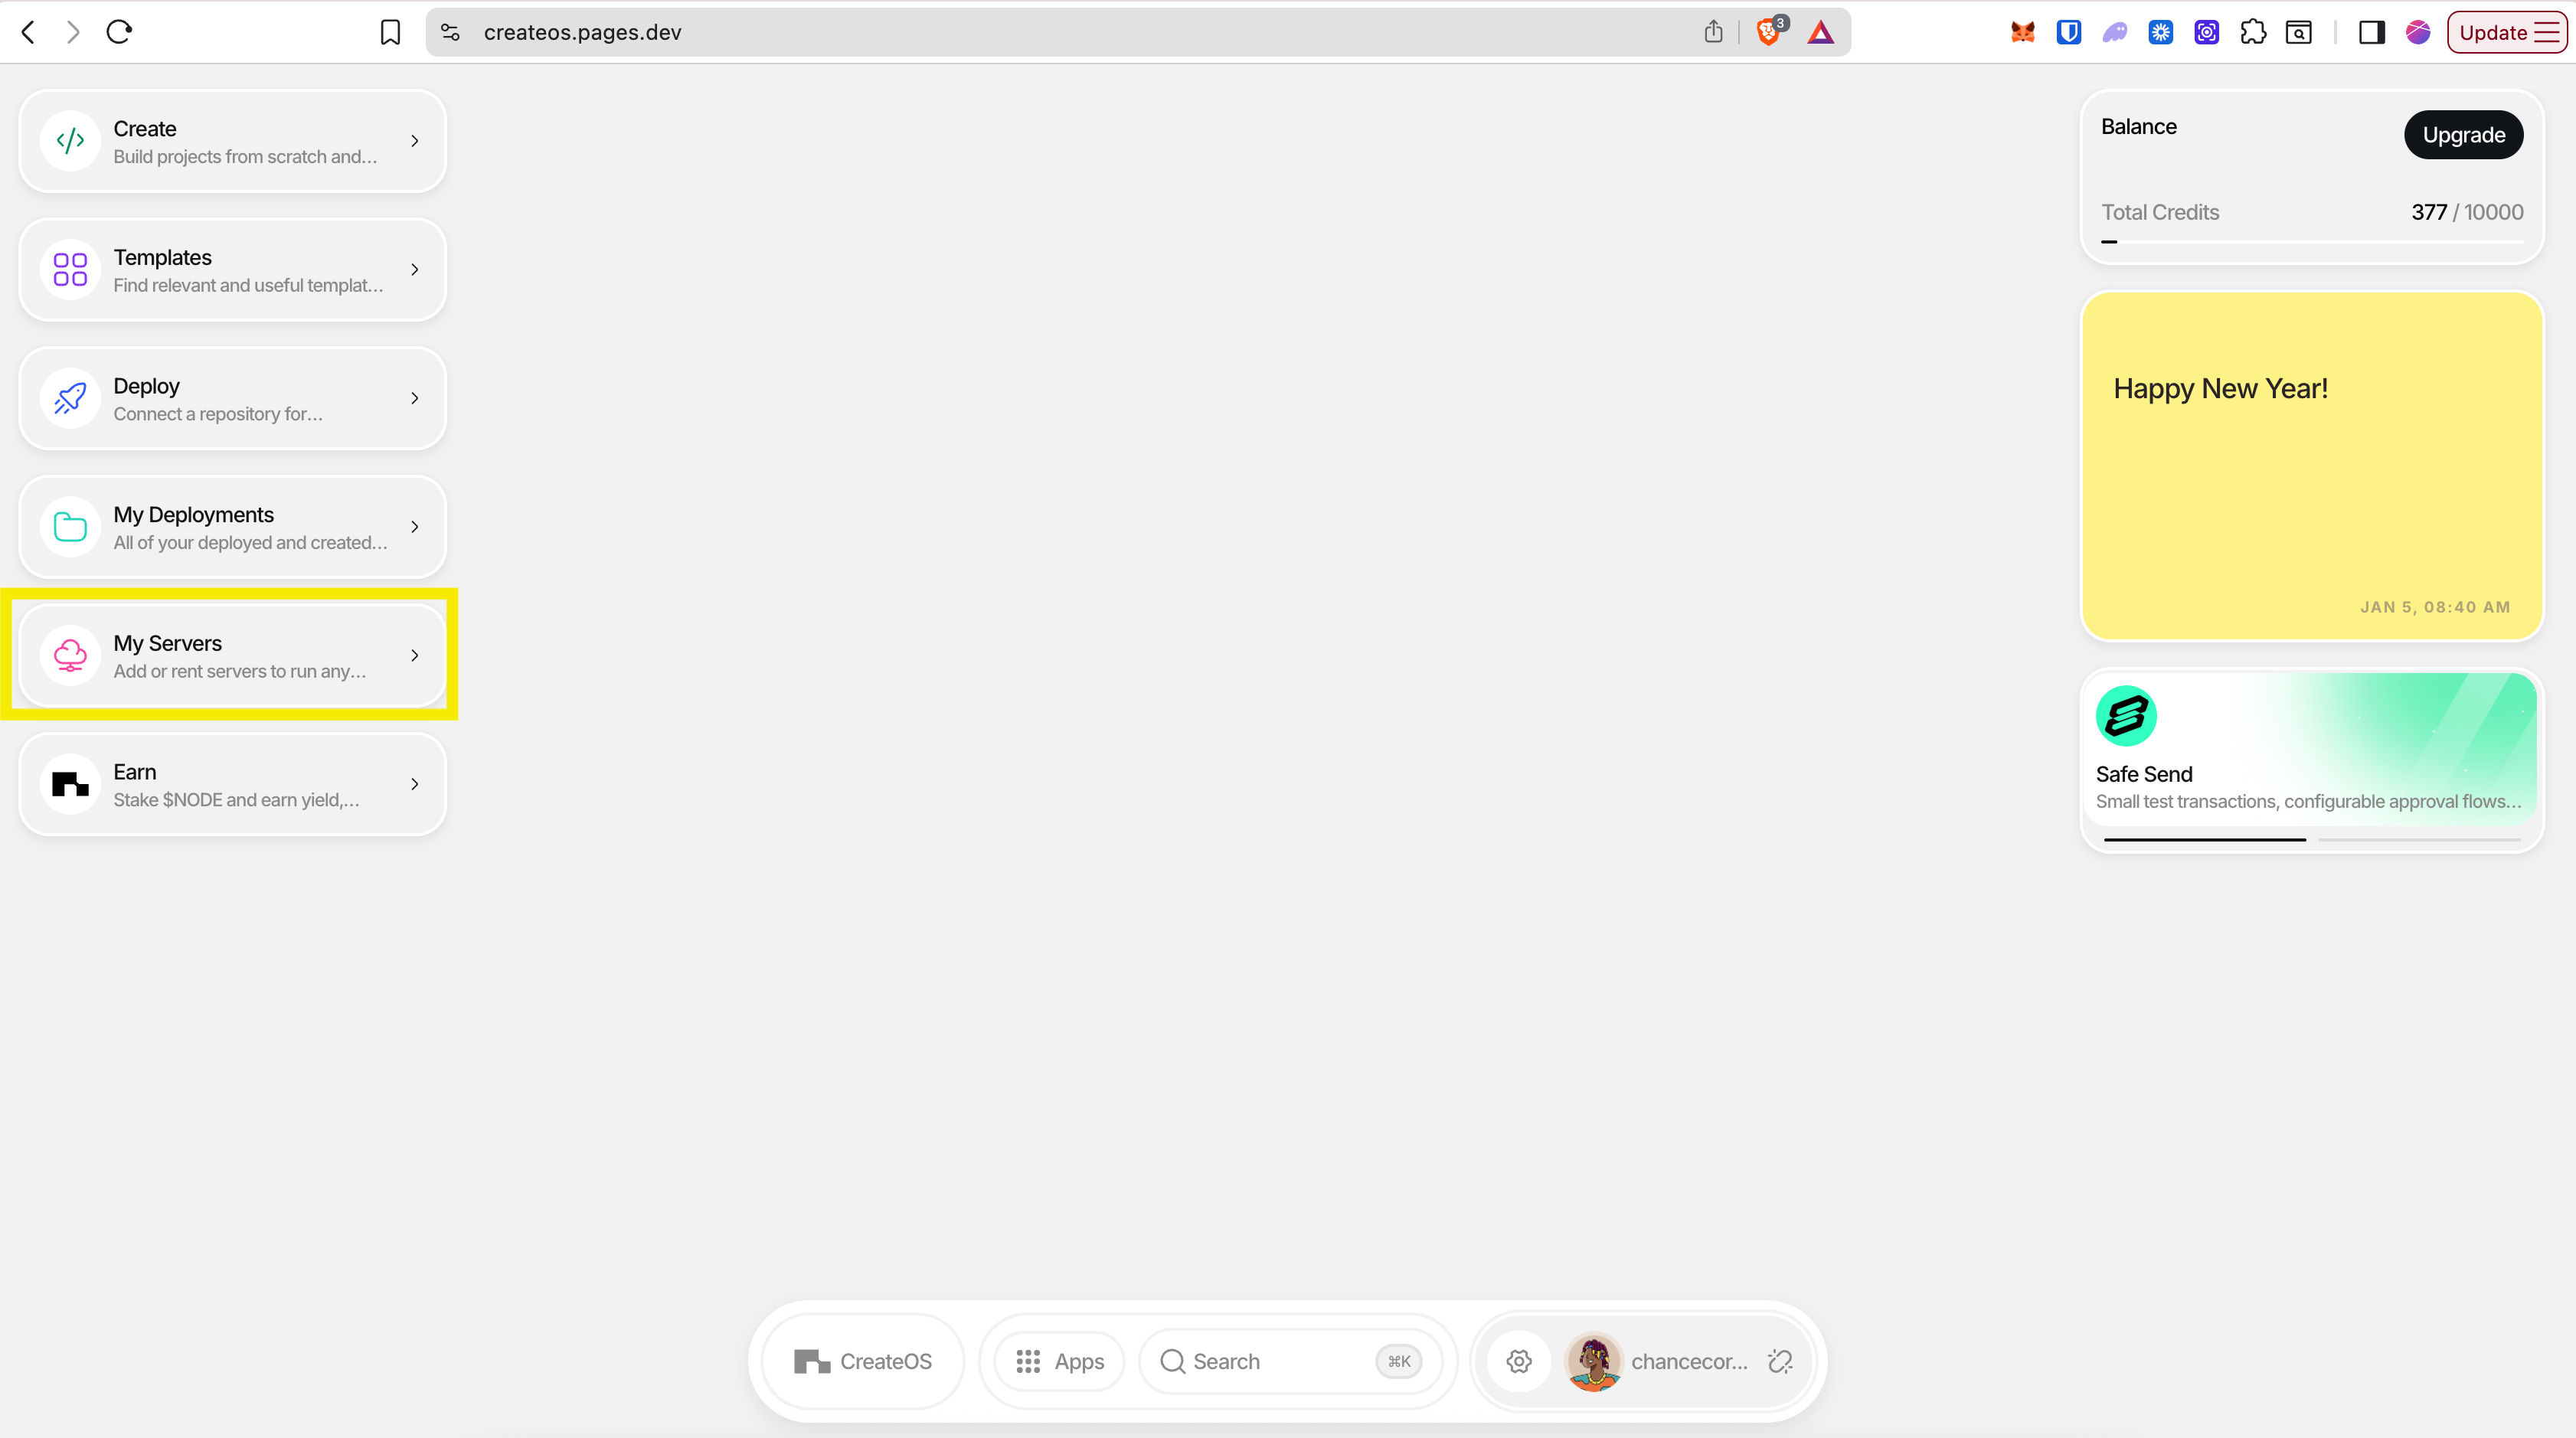
Step 1: Access My Servers
- Go to CreateOS Platform and sign in
- Click "My Servers" from the menu on the left
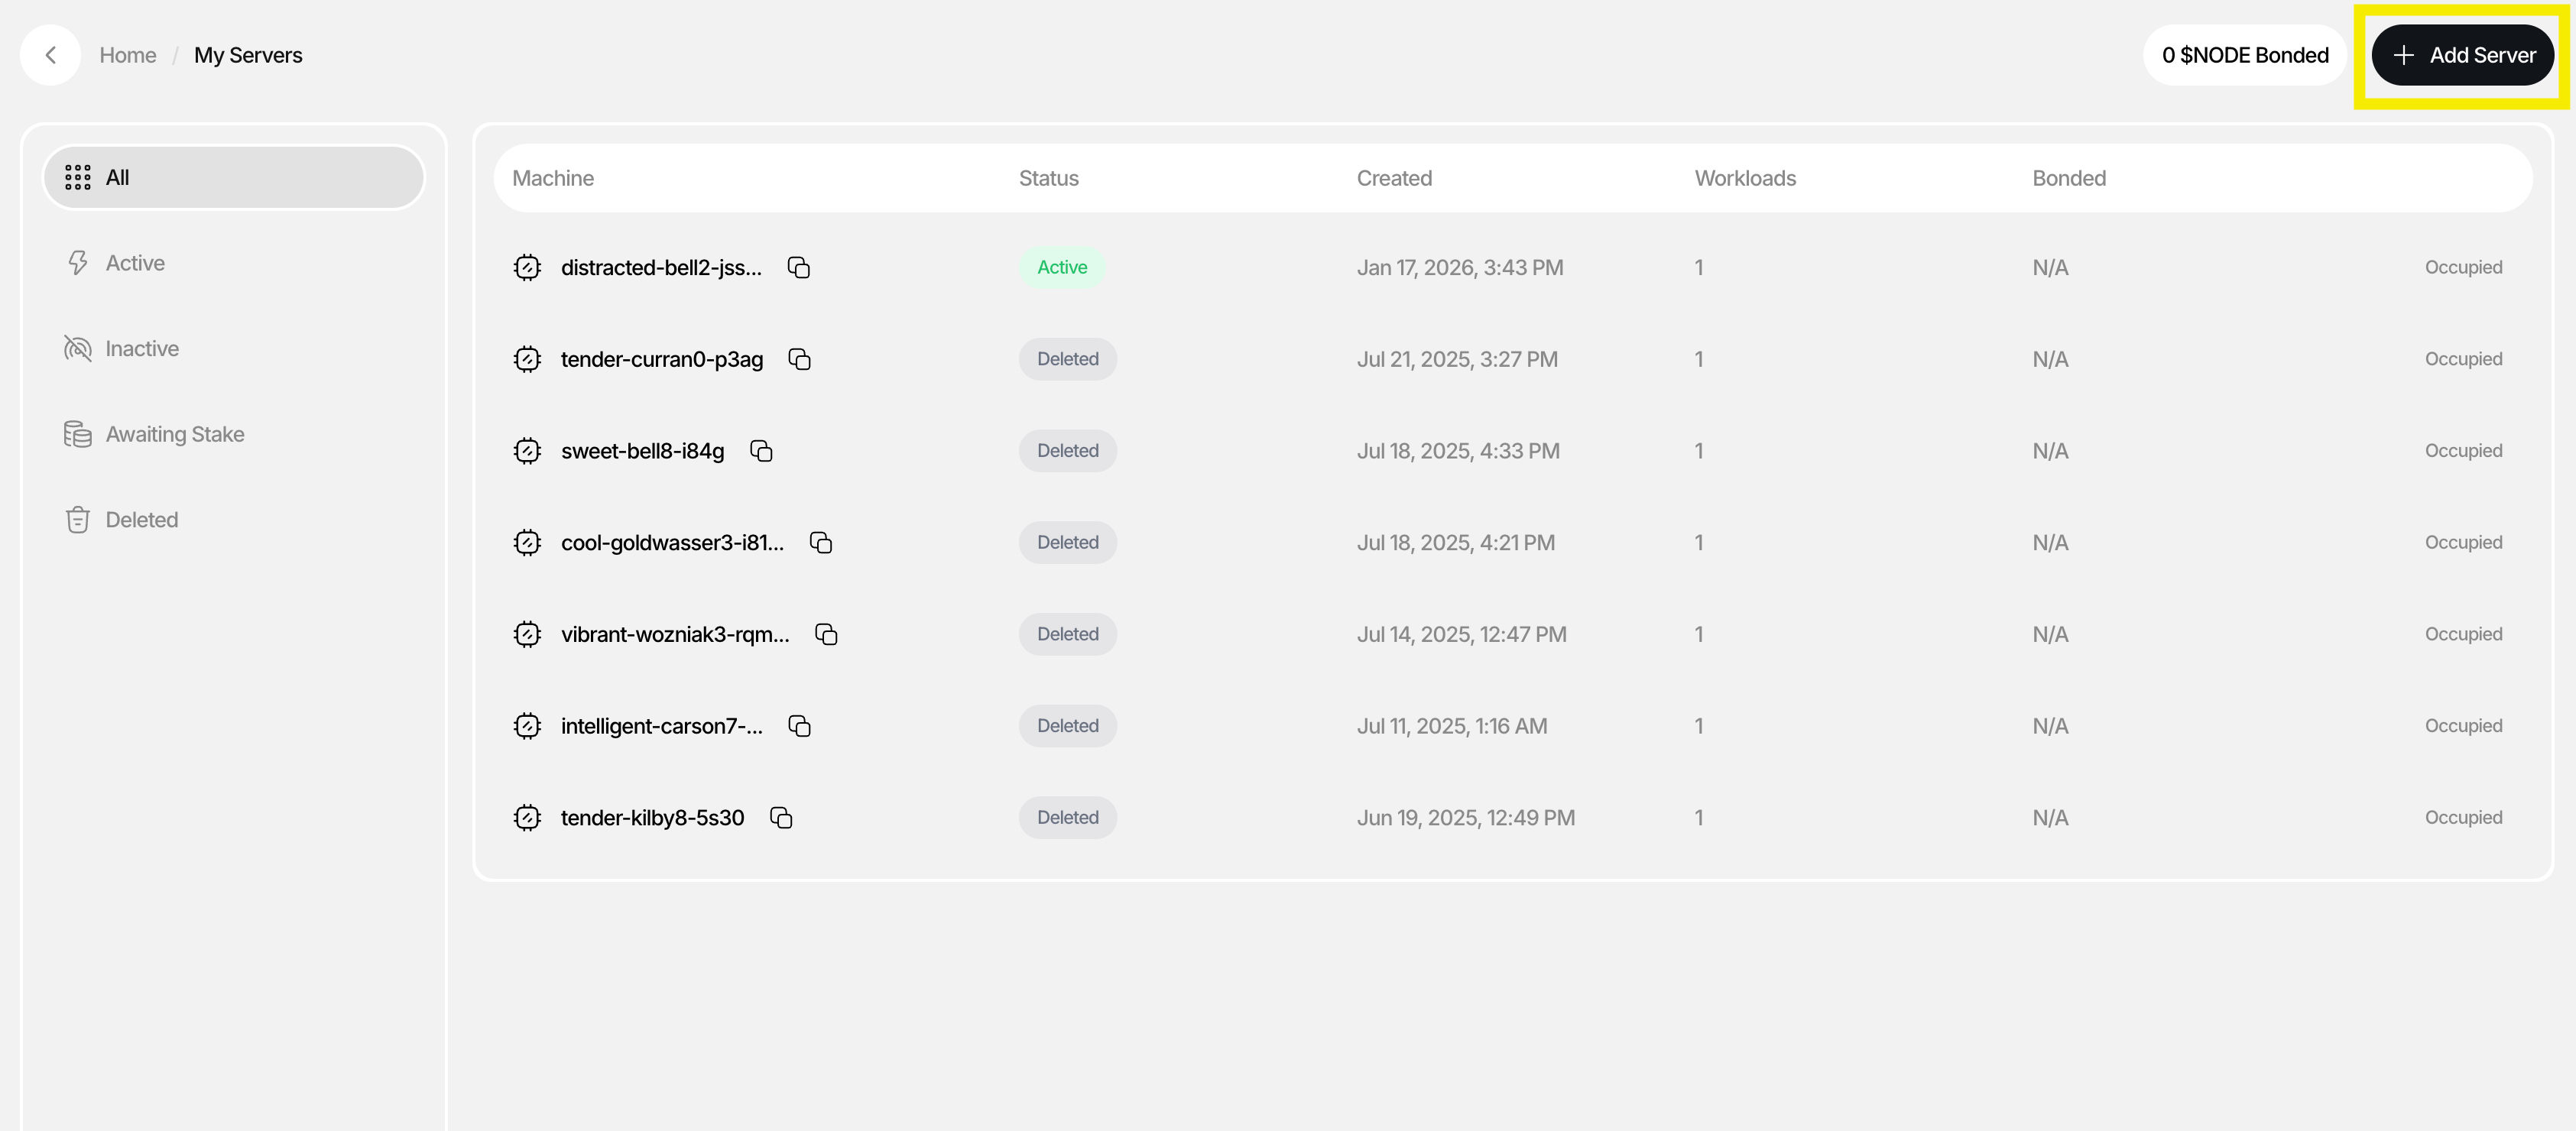
Step 2: Add a New Server
- You'll see the "My Servers" page showing all your active and inactive servers
- Click "Add Server" on the top right
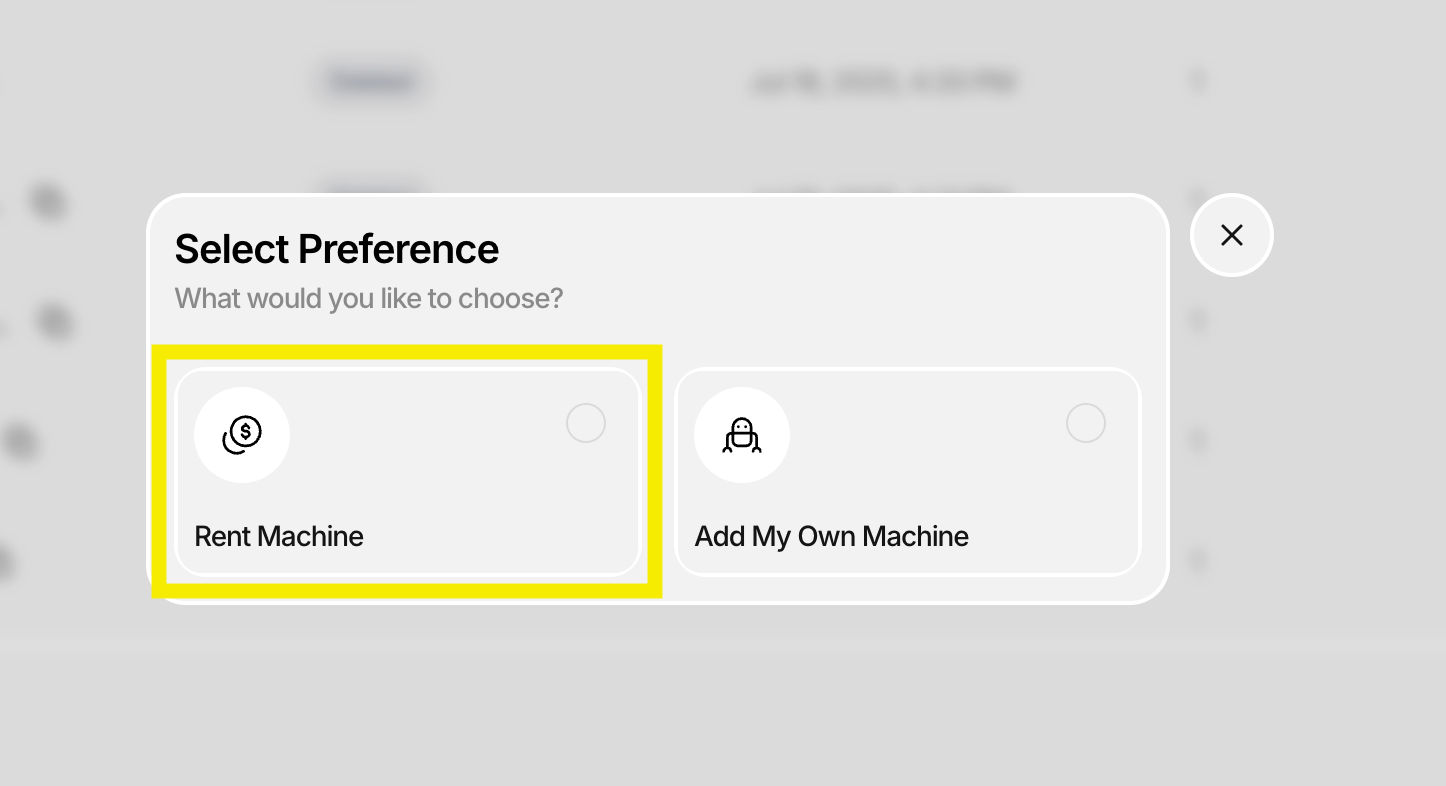
Step 3: Choose Server Type
A dialogue will appear with two options:
- Rent Machine (recommended for this tutorial)
- Add Your Own Machine
Click "Rent Machine"
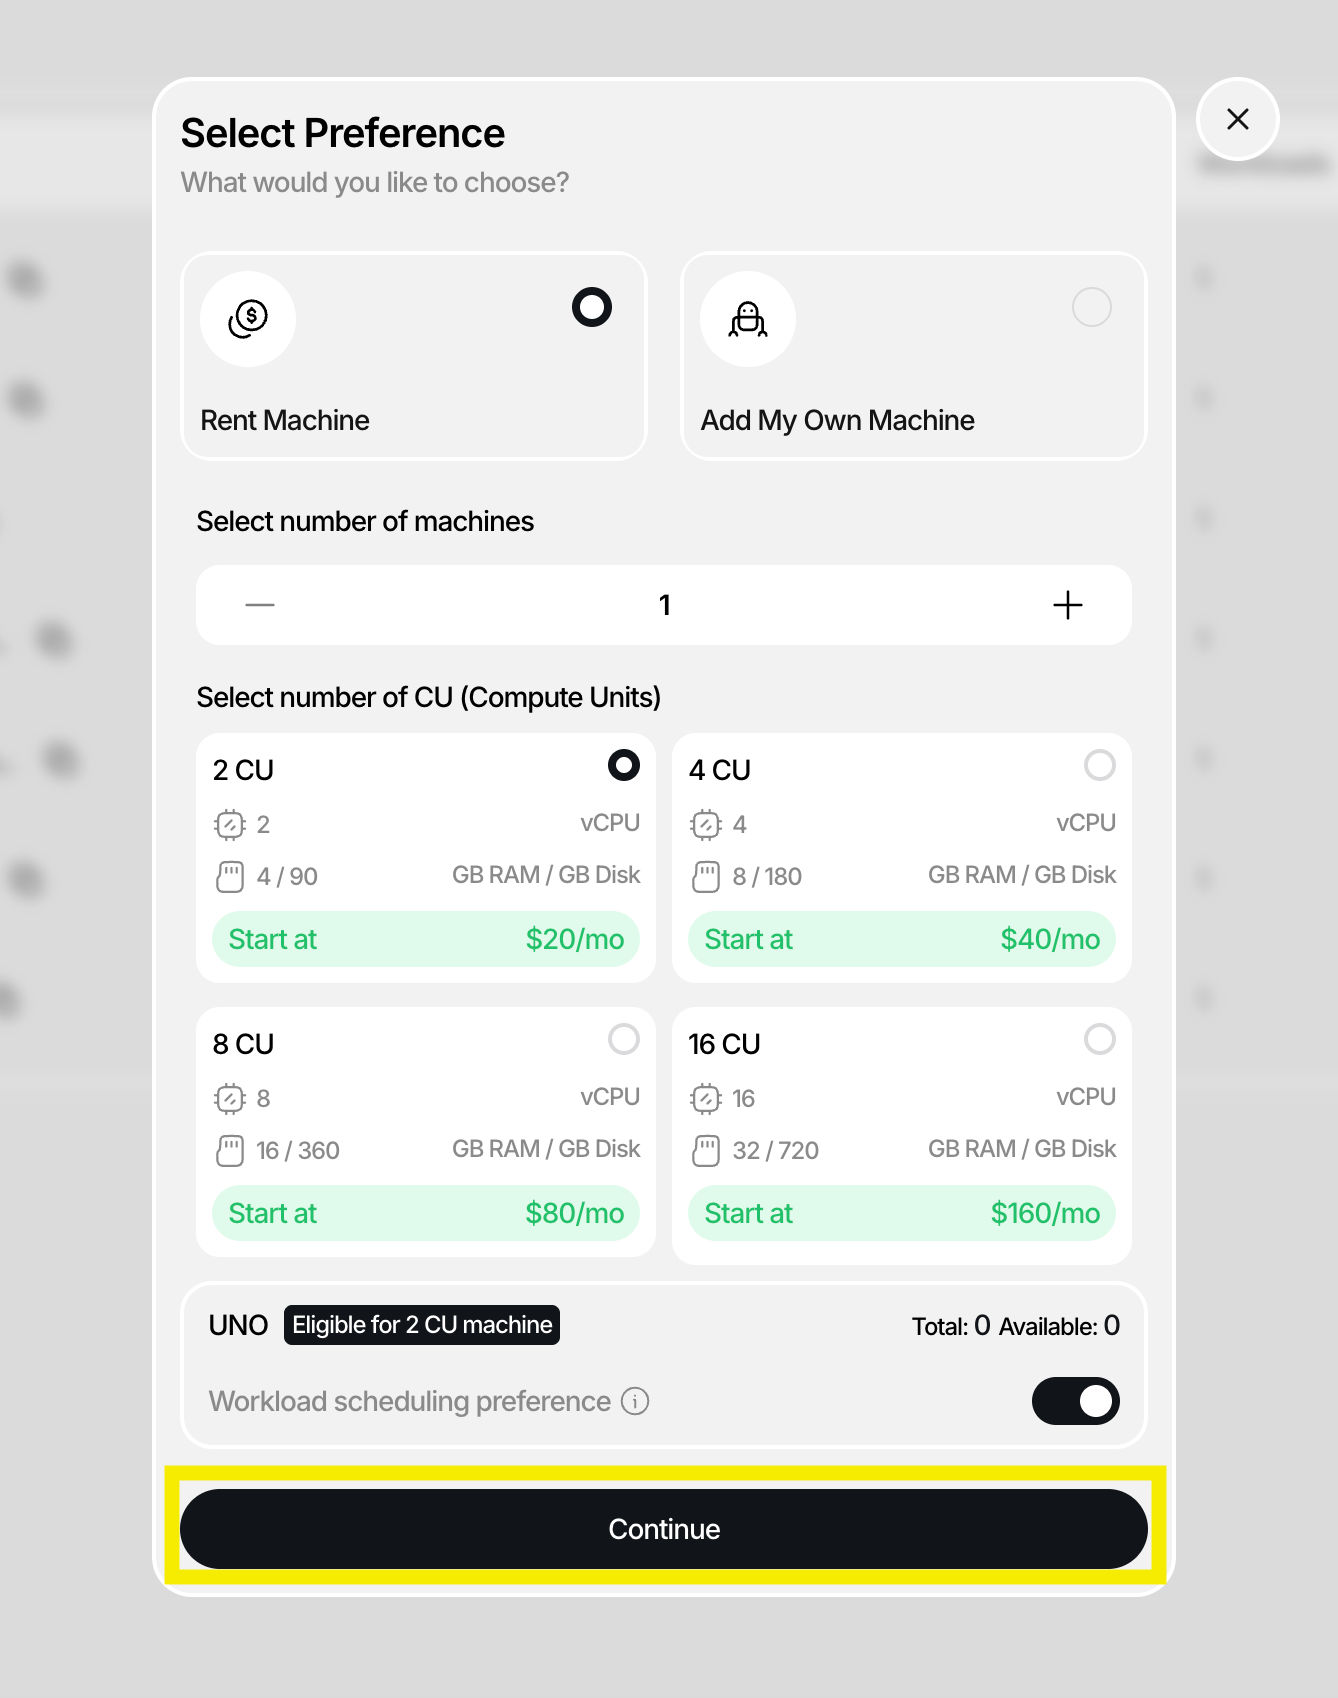
Step 4: Configure Server Resources
Select your server specifications:
| Setting | Description |
|---|---|
| Number of Machines | How many servers you want to rent |
| Compute Units | CPU/GPU resources per machine |
Click "Continue" after configuring.
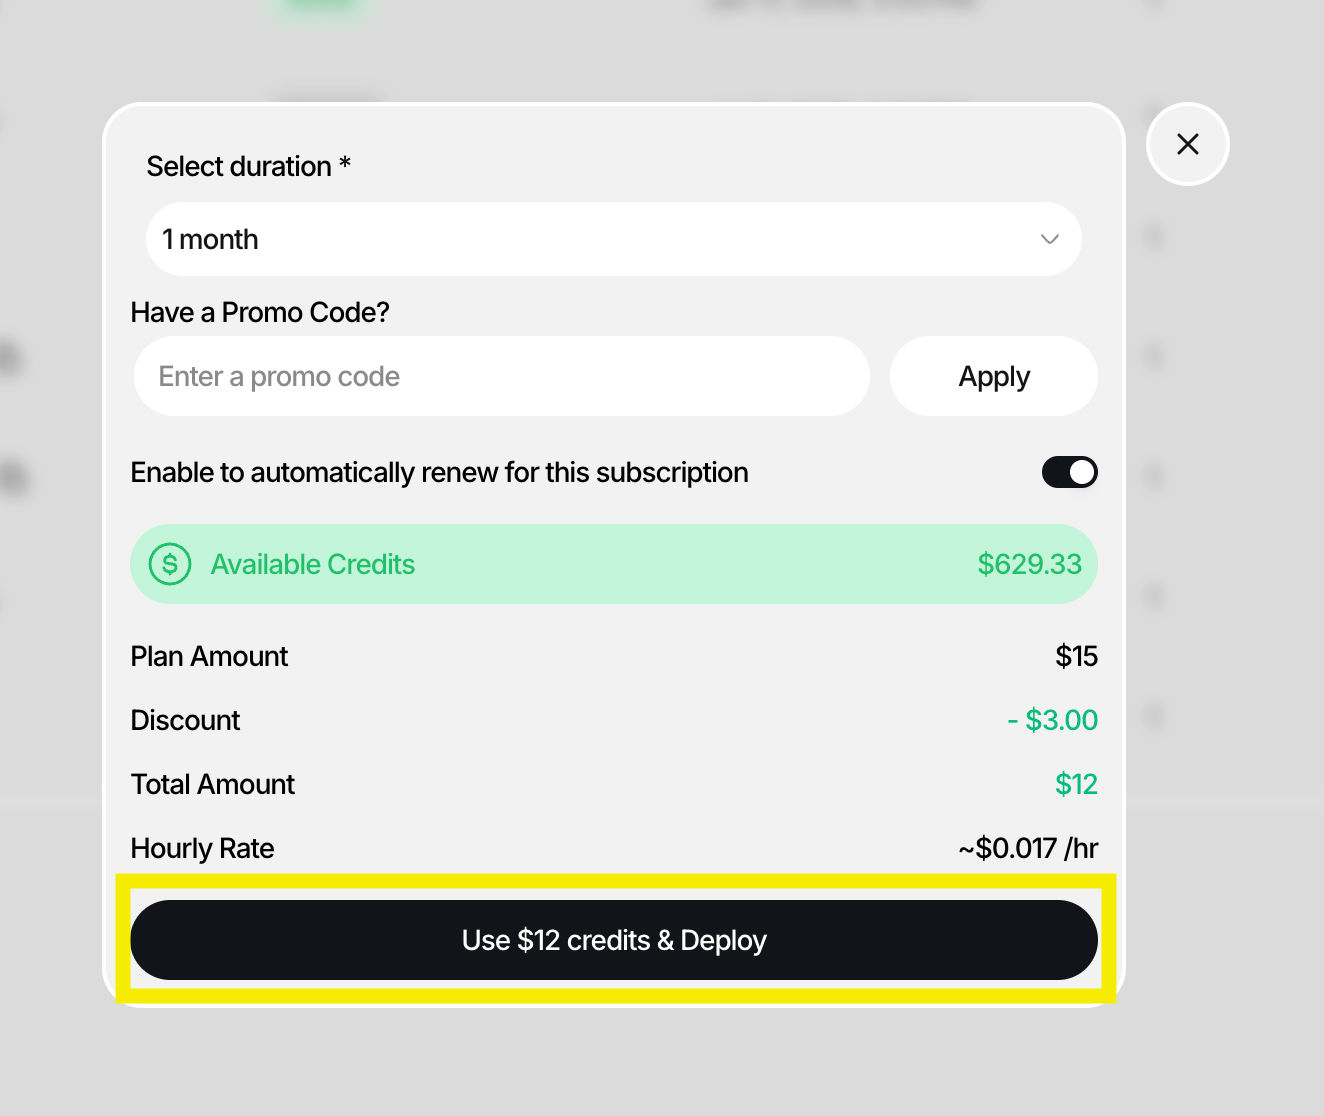
Step 5: Set Deployment Duration
In the final dialogue:
- Select the duration for how long you want the server to be active
- Enter a promo code if you have one
- Click "Deploy"
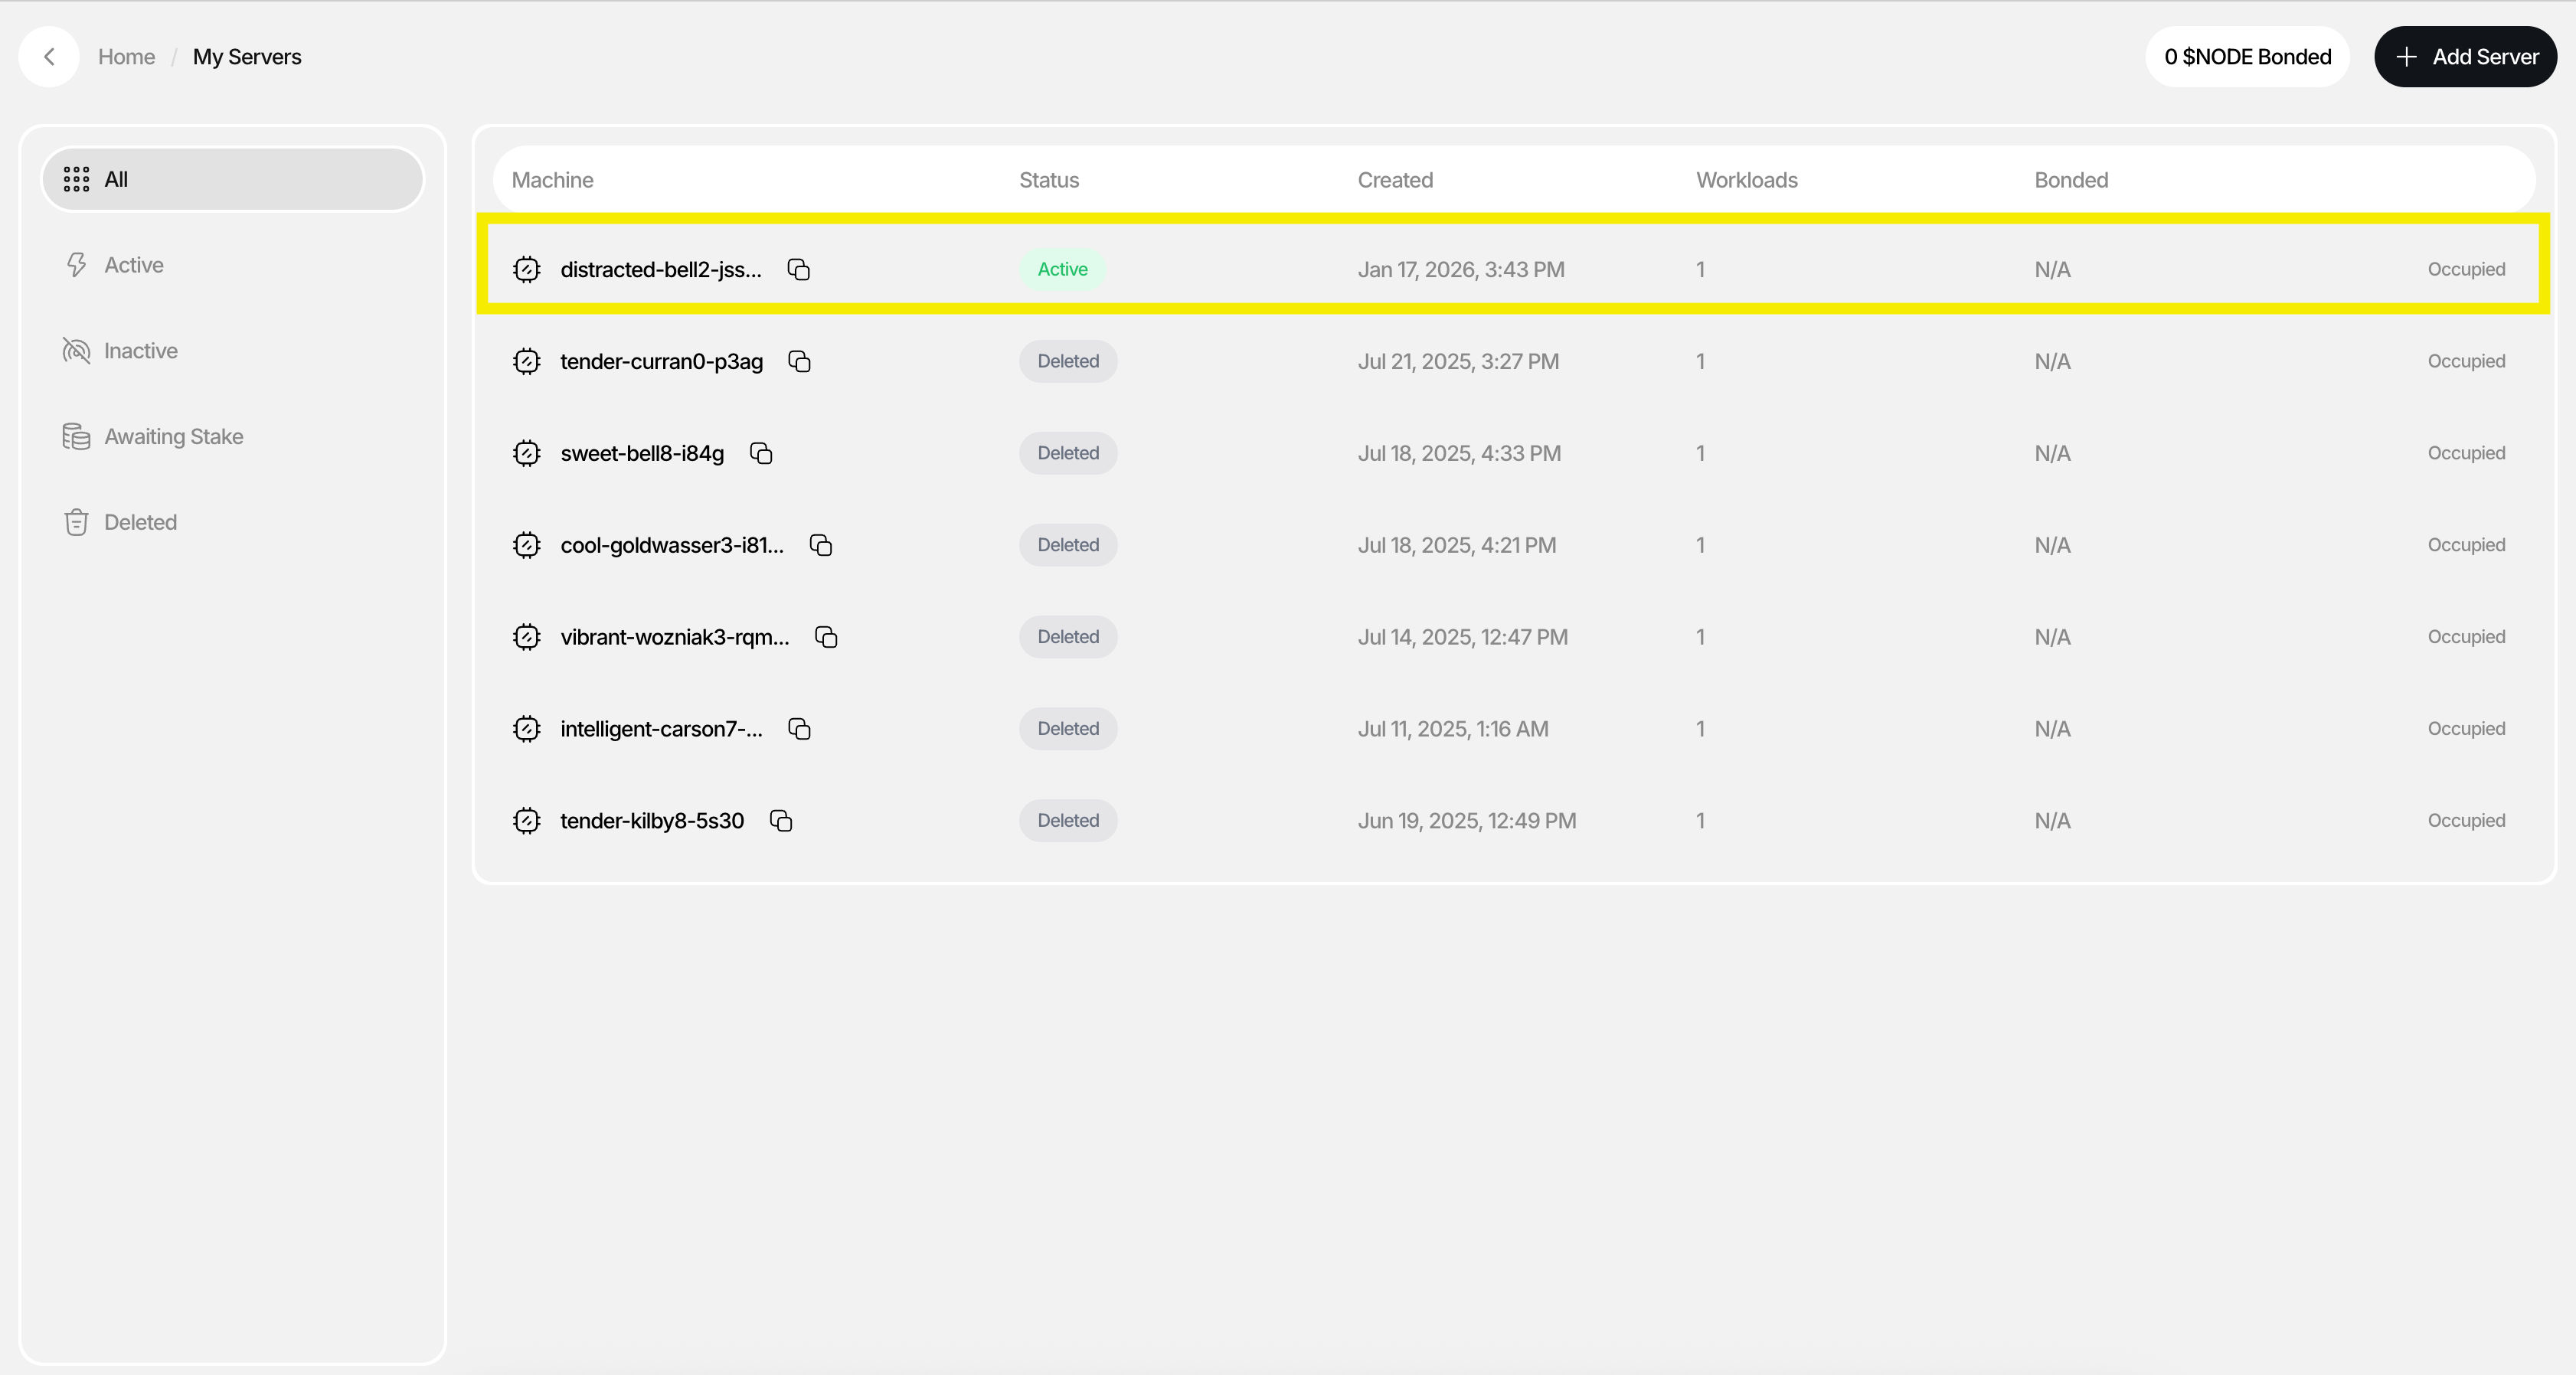
Step 6: Verify Server Deployment
- If deployment was successful, you'll see your new server in the My Servers list with a status of "Active"
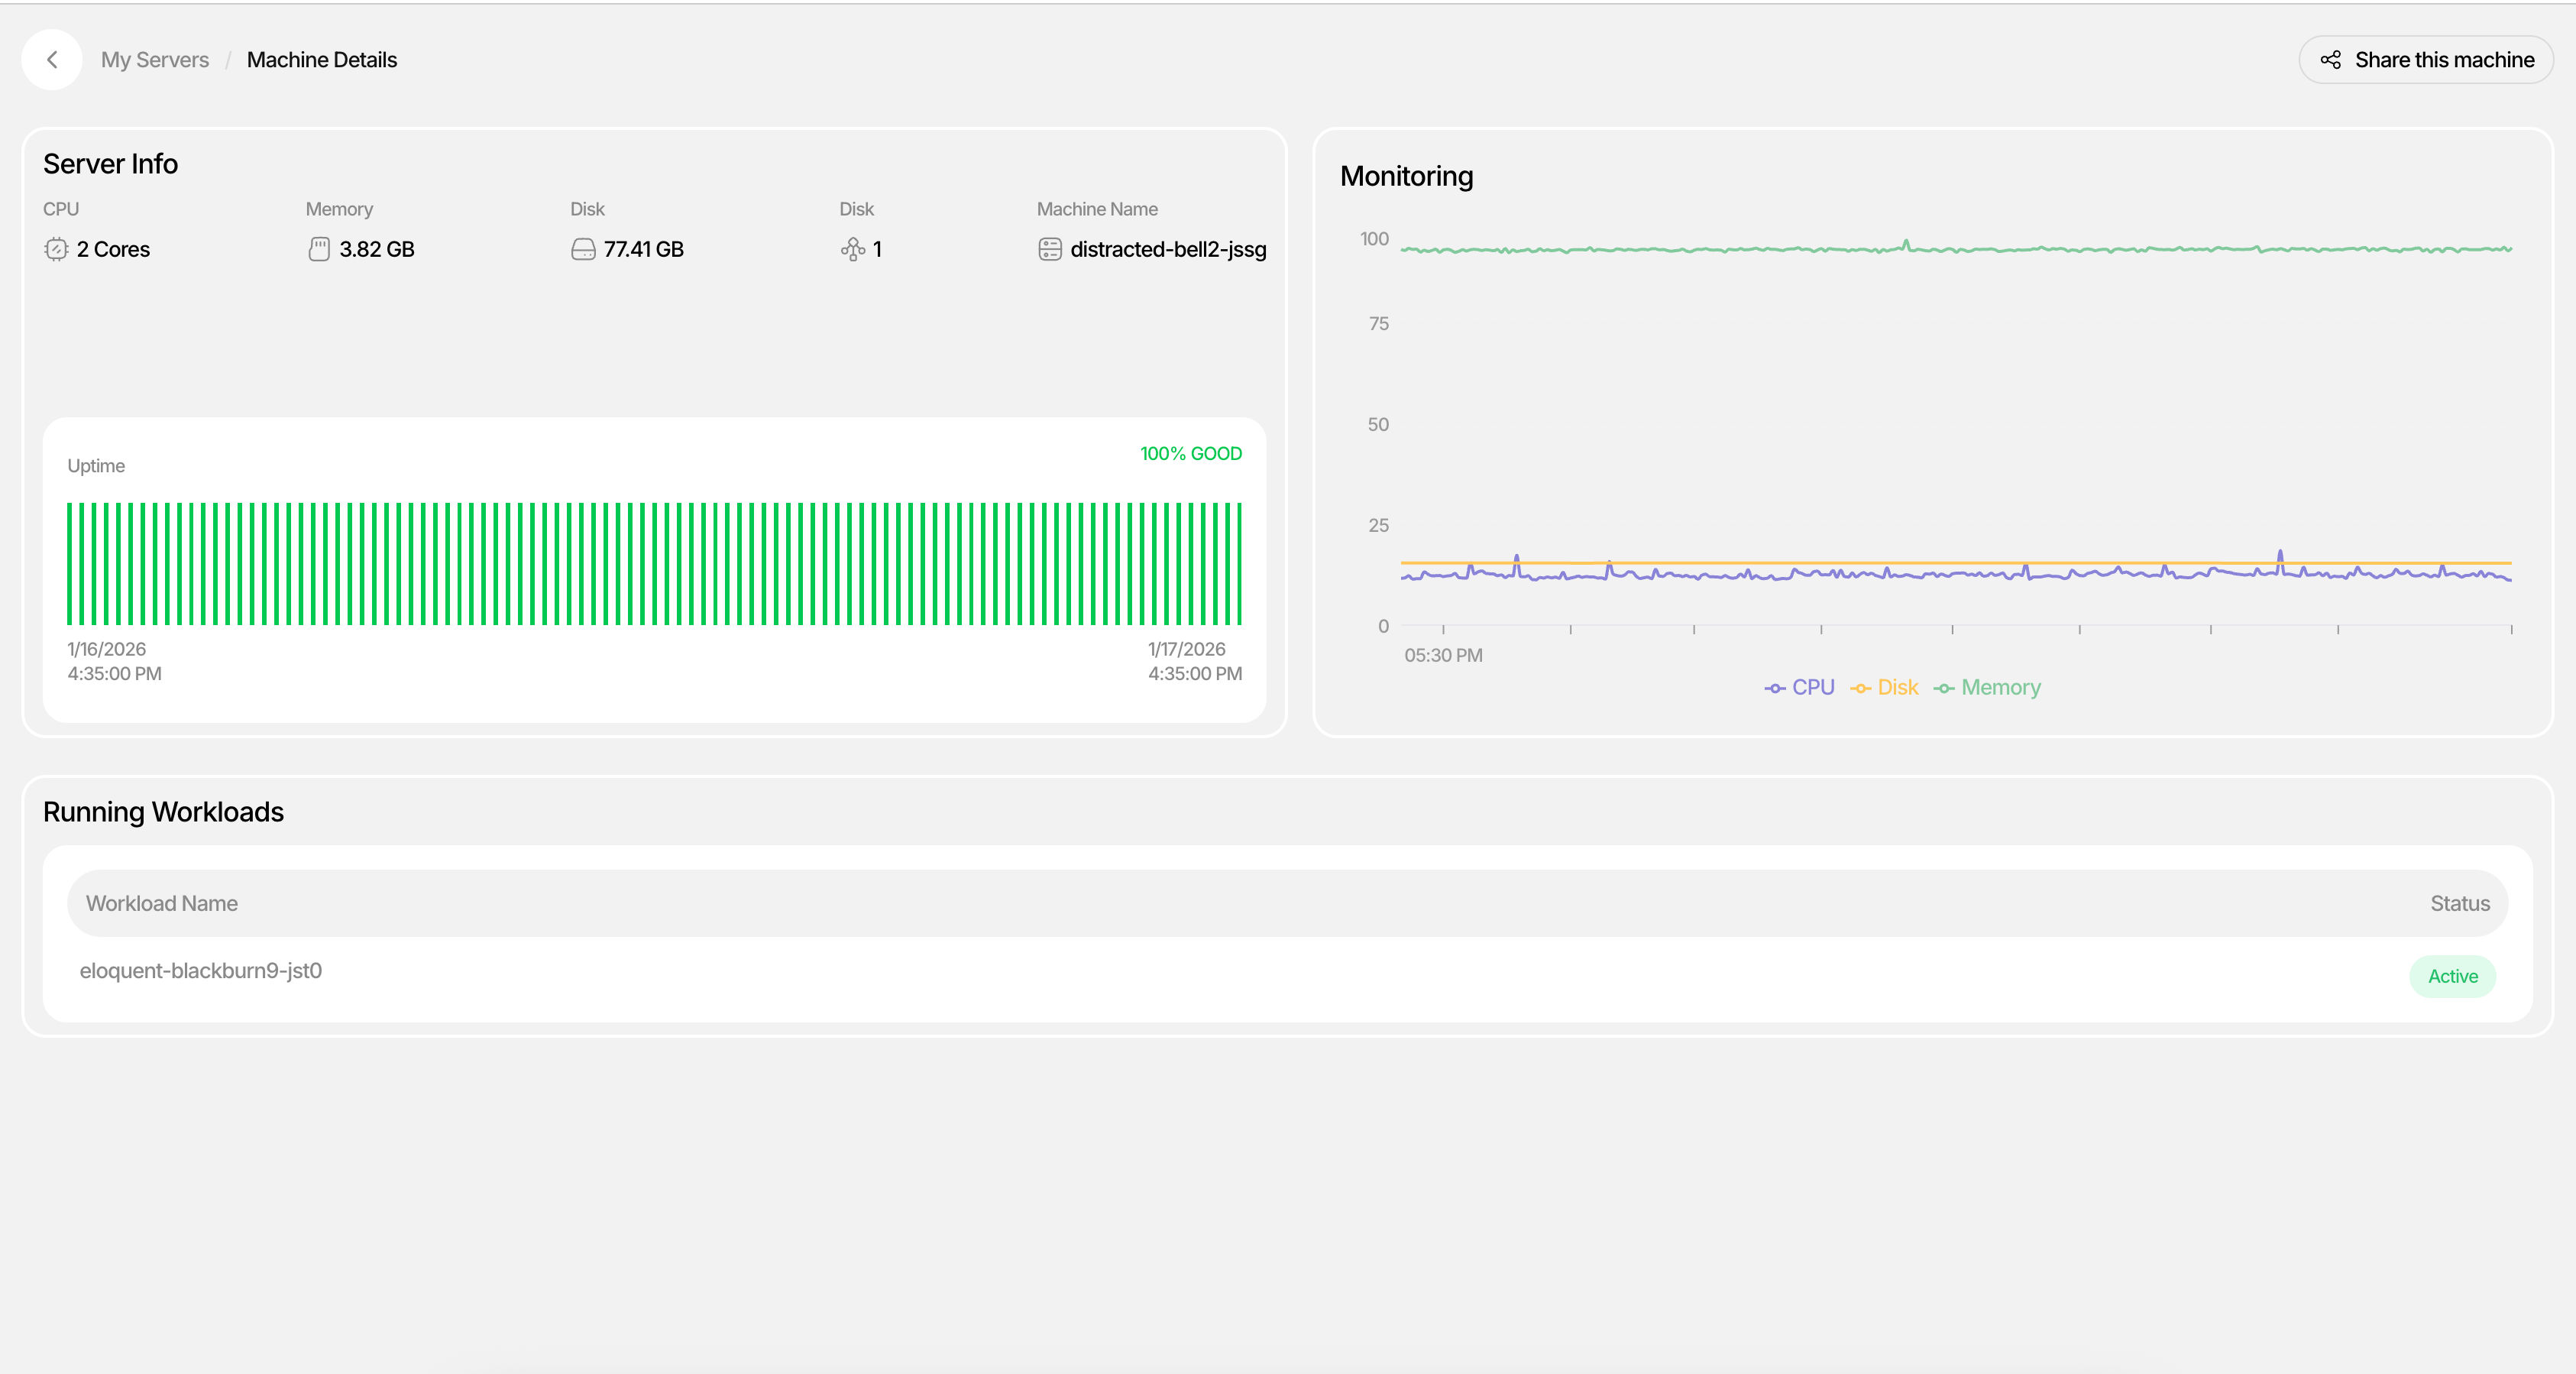
- Click into the server to view Machine Details
- Monitor workloads, CPU usage, and uptime in real-time
Your server is now live. In just a few steps, you've provisioned a machine with the compute resources you need—no setup overhead, no long-term commitments, and no context switching. Once deployed, your server appears under My Servers, where you can monitor status, workloads, CPU usage, and uptime in real time.
What's Next
From here, you can:
- Start deploying applications to your server
- Attach databases and services
- Scale your infrastructure as your project grows
You've rented your first server. Now put it to work.