Deploy
Deploy is a unified deployment and operations platform designed to help developers move from code to production without managing custom CI/CD pipelines or DevOps infrastructure. It provides a simple, guided deployment experience while offering the flexibility required to run and scale real-world applications.
CreateOS Deploy supports multiple deployment sources, allowing you to deploy applications directly from:
- GitHub repositories
- Docker images
- Uploaded project files
- AI-generated projects from the CreateOS ecosystem
By abstracting infrastructure complexity, CreateOS Deploy allows builders to focus on shipping features, iterating quickly, and scaling confidently.
Quickstart: Deploy Your First Application
CreateOS Deploy is designed to get your application live in minutes. This section walks you through the initial setup and project creation process.
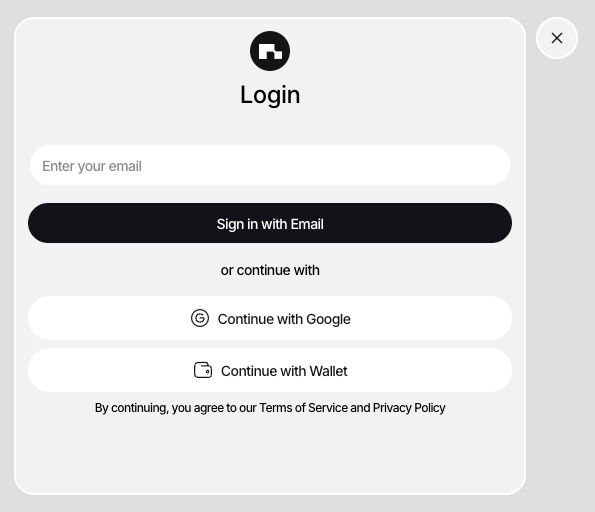
Step 1: Sign In
To get started with CreateOS Deploy:
- Visit createos.nodeops.network
- Sign in using one of the supported methods:
- GitHub
- Wallet (not recommended)
Once authenticated, you will be redirected to the CreateOS dashboard.
Step 2: Create a New Project
Creating a project initializes the deployment workflow and defines how your application will be built and run.
- Click + New Project from the dashboard
- Choose a deployment method:
- GitHub Repository
- Docker Image
- Template
- Manual Upload
Each method is optimized for different use cases and levels of control.
Project Deployment
CreateOS Deploy supports multiple deployment strategies, giving you flexibility depending on how your application is structured and where it lives.
1. Deploying via GitHub Repository
Deploying from GitHub is the most common workflow and supports both AI-assisted and manual configuration modes.
Option 1: Build with AI (Recommended)
This option is ideal for the fastest path to deployment.
Steps:
- Select GitHub Repository
- Click Browse Repositories
- Choose your repository
- Enter a project name (optional)
CreateOS AI automatically:
- Detects the framework
- Configures build and run commands
- Assigns the correct server port
- Sets up the deployment pipeline
This option requires minimal input and is best for standard projects.
Option 2: Manual Configuration
Choose this option if you want full control over the deployment configuration.
Steps:
- Select GitHub Repository
- Browse and select your repository
- Choose the branch to deploy (
main,master,develop, etc.) - Select the framework (Node.js, Python, React, Next.js, etc.)
- Configure the server port (e.g.,
3000,8000,8080) - Set a project name (optional)
- This becomes your subdomain:
myproject.createos.nodeops.network
- This becomes your subdomain:
- Add build commands (optional)
- Example:
npm install,pip install -r requirements.txt
- Example:
- Add run commands (optional)
- Example:
npm start,python app.py
- Example:
- Configure environment variables (optional)
- Click Deploy
CreateOS will build and deploy your application based on the provided configuration.

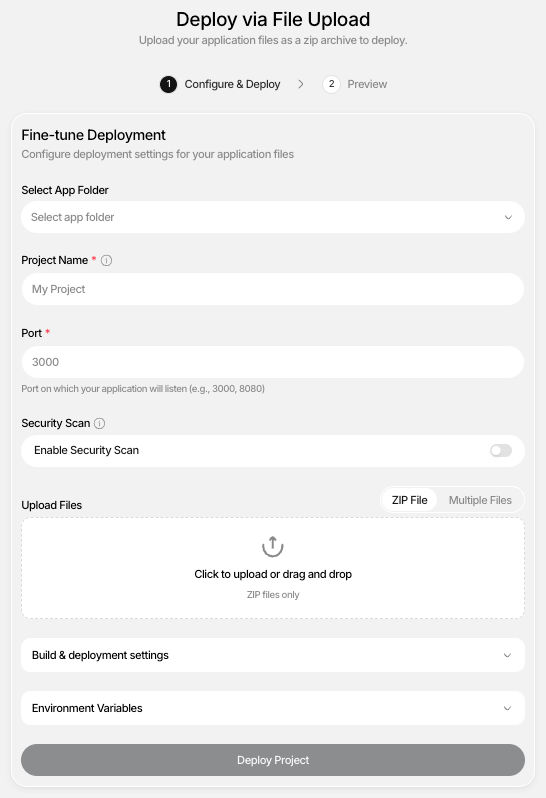
2. Manual Project Uploads
Manual uploads allow you to deploy applications without connecting a repository.
This deployment method is well-suited for:
- Local projects
- AI-generated code
- Prototypes and demos
- One-off applications
Steps:
- Select Manual Upload
- Upload your project files
- Configure build and run commands
- Set environment variables if needed
- Click Deploy
CreateOS will build and deploy the uploaded project immediately.
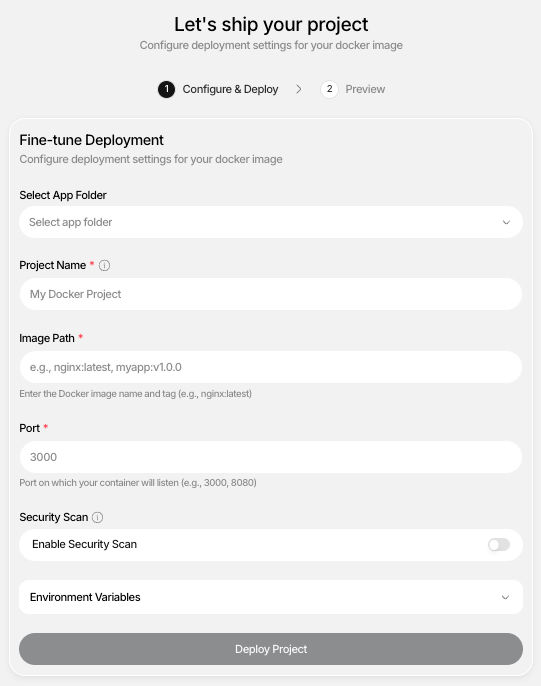
3. Deploying via Docker Image
Docker-based deployment is ideal for containerized applications or advanced use cases.
Steps:
- Select Docker Image
- Enter the Docker image URL
- Specify the exposed port
- Configure environment variables (optional)
- Click Deploy
CreateOS pulls the image and deploys it without requiring additional setup.
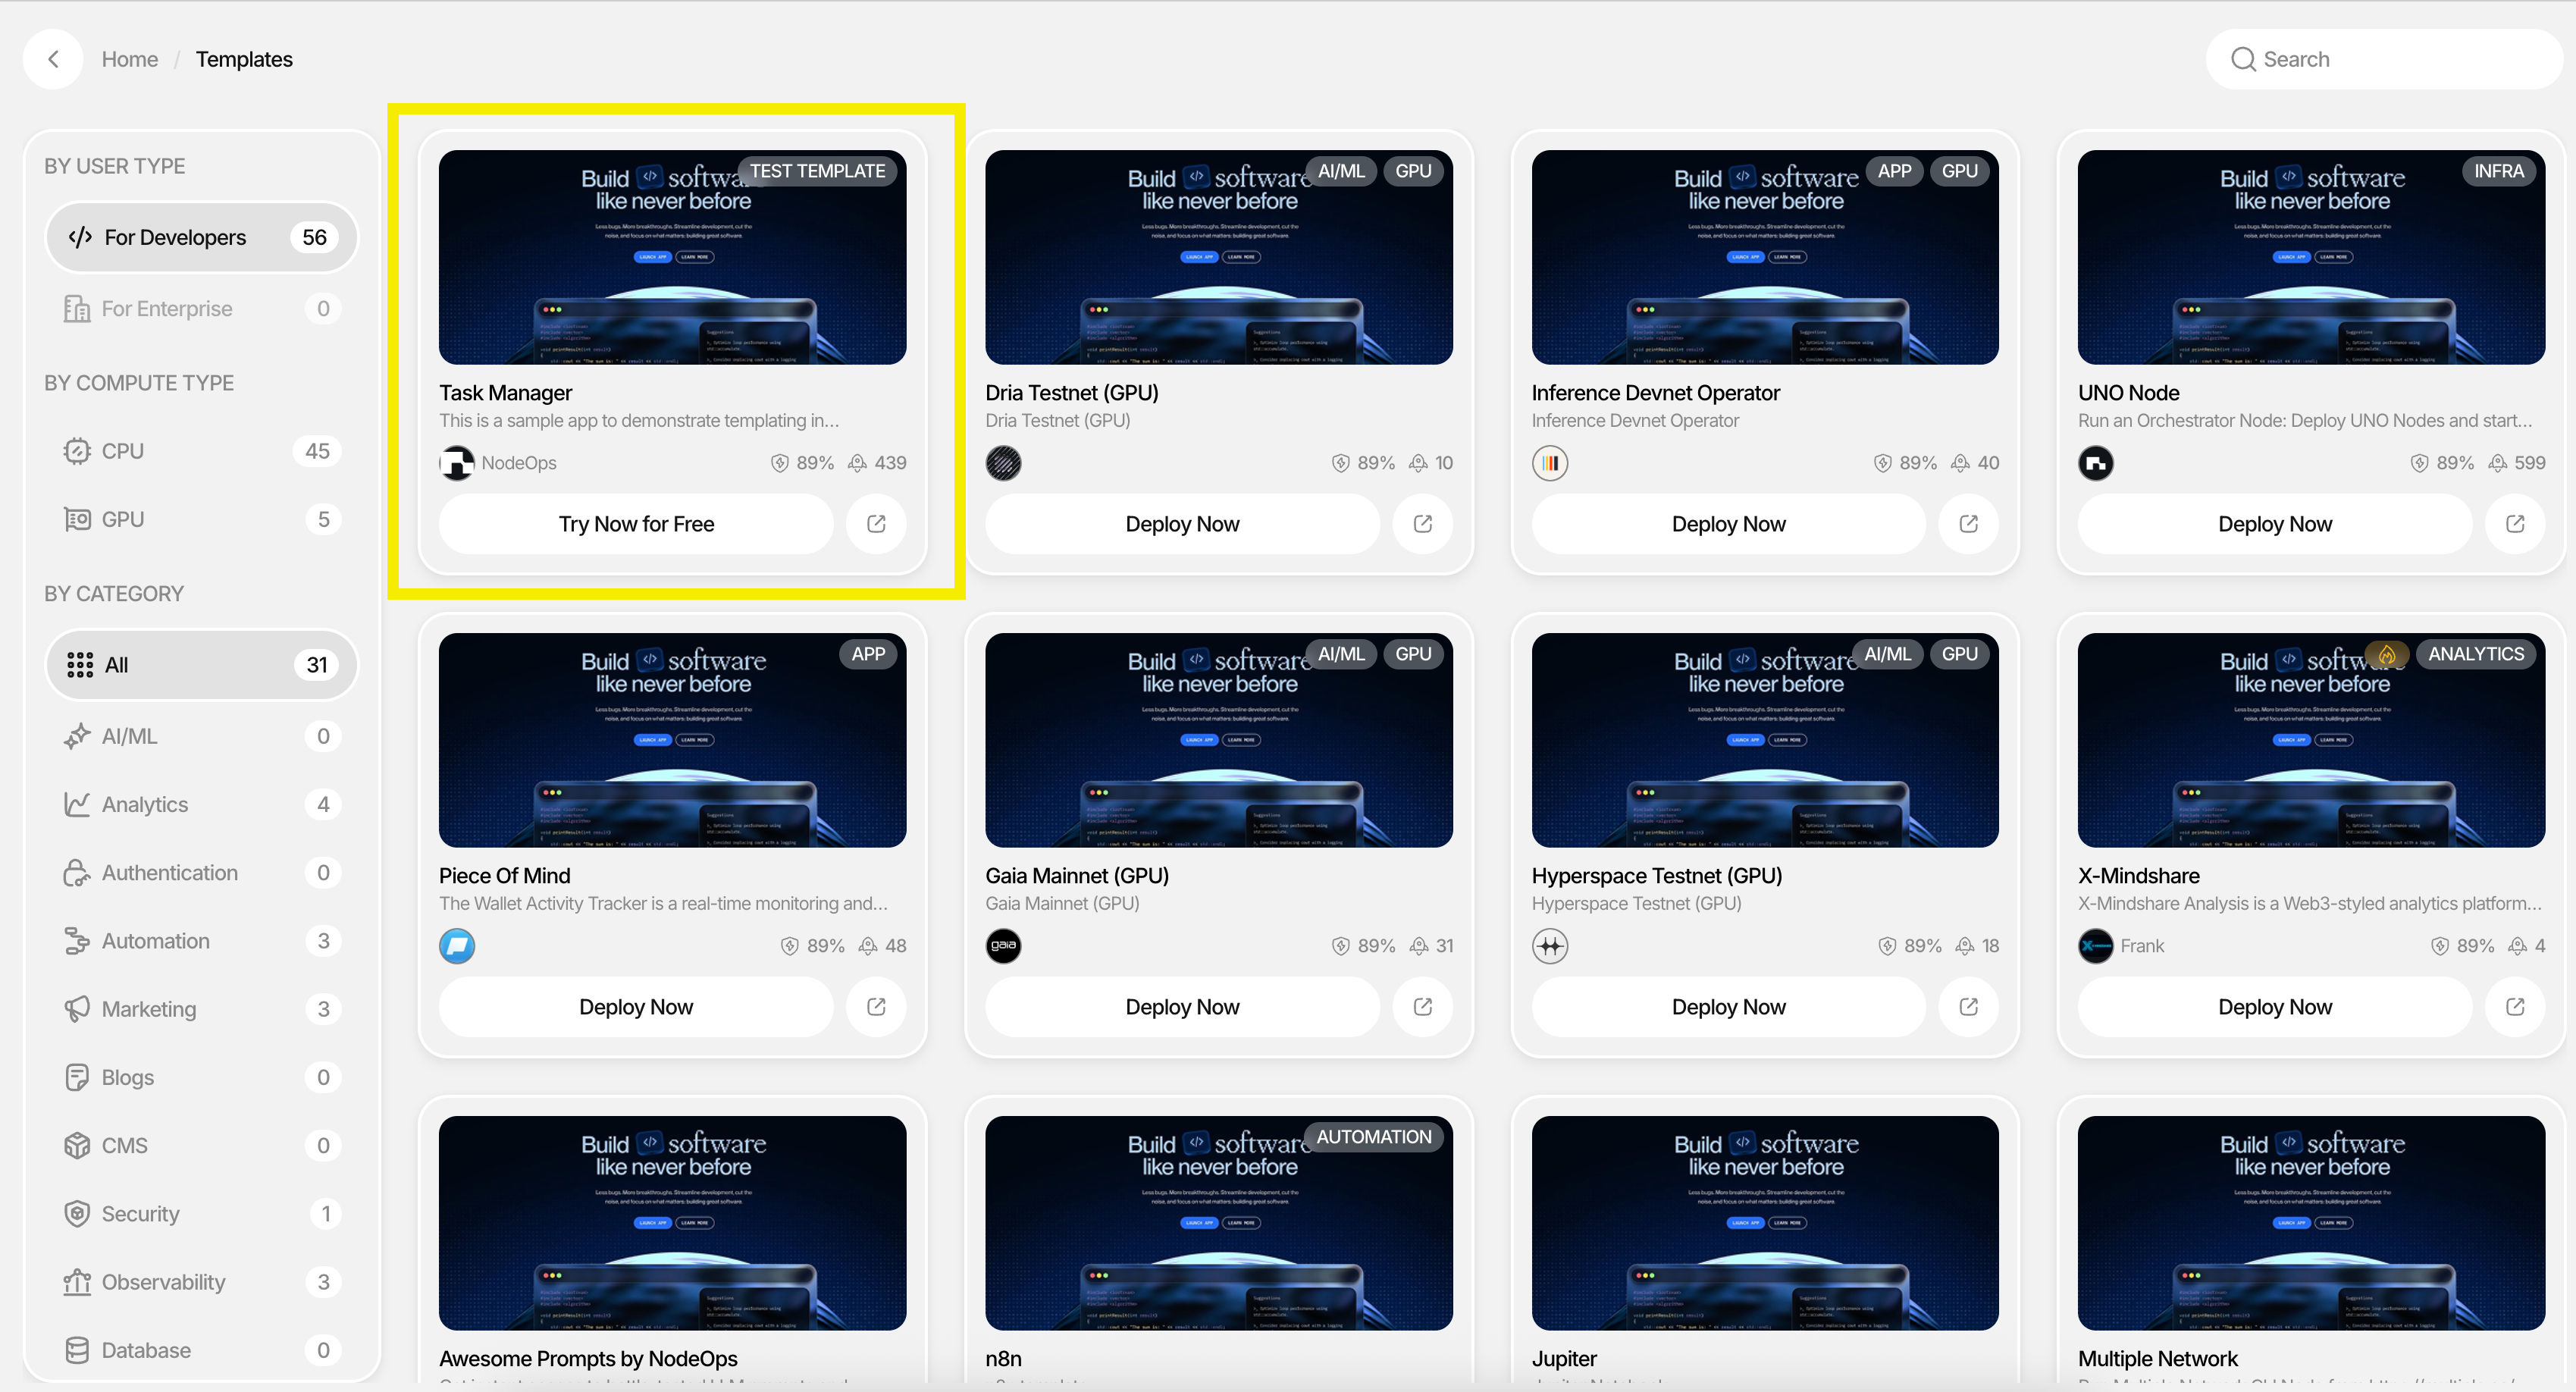
4. Deploying via Templates
Templates provide a pre-configured starting point for common application types.
Steps:
- Select Template
- Choose a template (e.g., web app, API service)
- Customize project details
- Click Deploy
Templates help you get started quickly with recommended defaults.
App Folder (Multi-Project Applications)
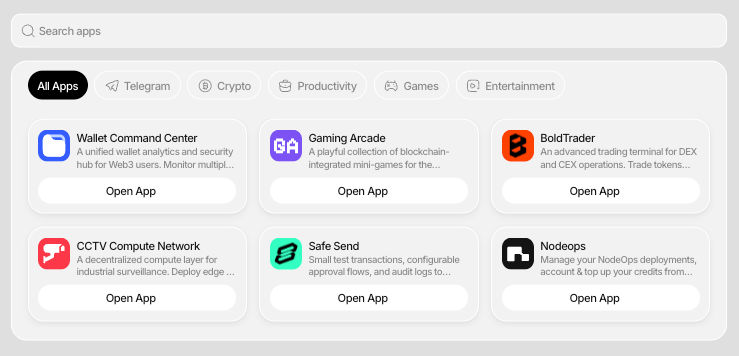
CreateOS Deploy supports an App Folder model that allows you to group multiple related projects under a single logical application. This is designed for real-world systems that consist of multiple services rather than a single deployable unit.
Managing Your Deployment
After deployment, CreateOS provides a centralized dashboard that allows you to monitor, operate, and iterate on your application throughout its lifecycle.
Available Capabilities:
- Build & application logs
- Application analytics
- Alerts
- Environment management
- Compute scaling
- Security scanning
- Custom domain configuration
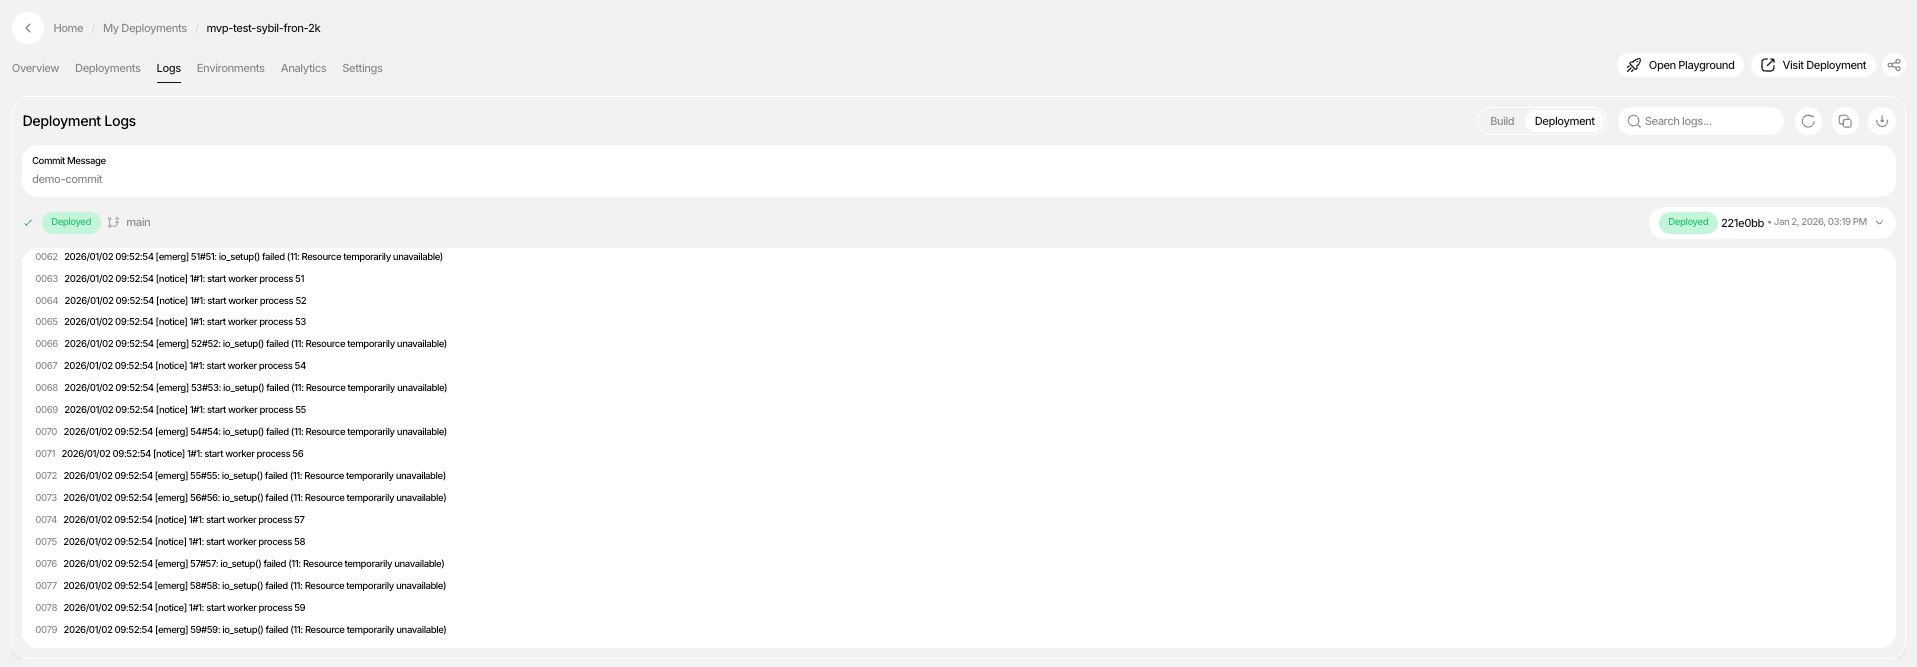
Build & Application Logs
Build & application logs provide full visibility into the deployment lifecycle and are essential for debugging and verification.
You can view:
- Dependency installation
- Build steps
- Compilation output
- Deployment status
- Errors and warnings
Logs update in real time, making issue resolution faster and more transparent.
Cron Jobs
The Cron Jobs tab lives inside each project in CreateOS. You configure a job once, giving it a name, a schedule, and a target endpoint and CreateOS runs that HTTP call on repeat according to your schedule. You can inspect every past run, pause or resume jobs at any time, and edit job configuration without touching your deployment.
What you can do
- Schedule an HTTP call to any endpoint in your application on a recurring basis
- Choose from preset schedules or build a custom schedule using a visual builder
- Use any HTTP method —
GET,POST,PUT,PATCH, orDELETE - Pass custom headers and an optional request body with each job
- Pause and resume jobs without deleting them
- Edit job configuration after creation
- View the full execution history of every job, including logs
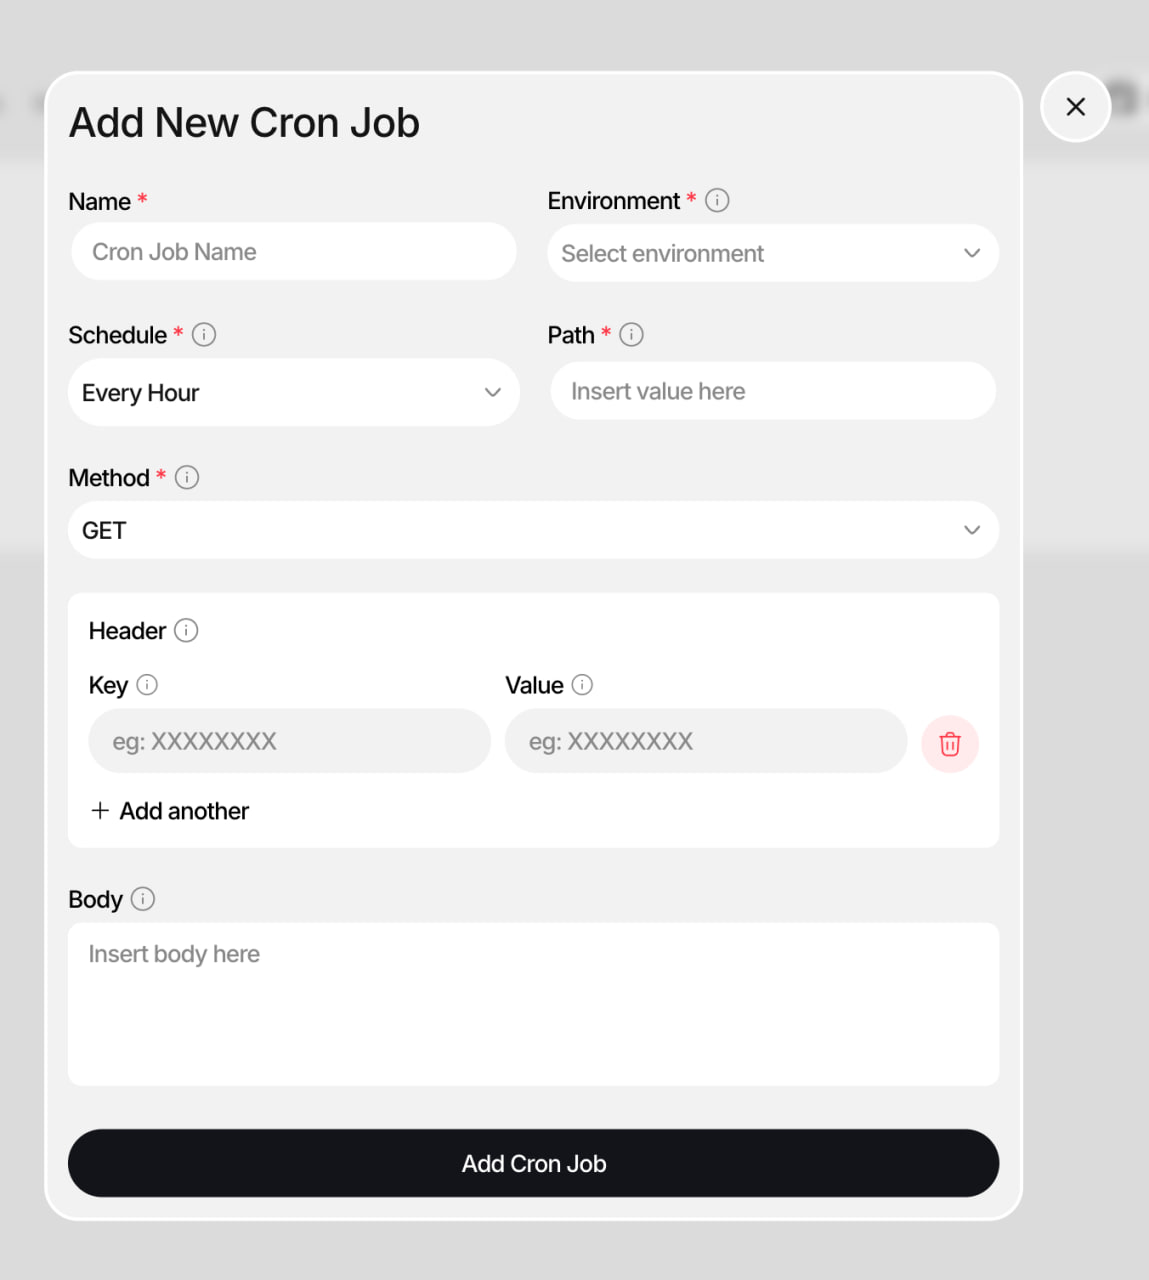
How it works
Create a cron job
Open the Cron Jobs tab inside your project and fill out the creation form:
- Enter a Name to identify the job
- Select an Environment — staging or production (this cannot be changed after creation)
- Set a Schedule — see schedule options below
- Enter the Endpoint path to call, for example
/api/send-emails - Choose an HTTP Method —
GET,POST,PUT,PATCH, orDELETE - Optionally add Headers as key-value pairs, for example an authorization token
- Optionally add a Body — for example a JSON payload for
POSTrequests - Click Create to activate the job
Set a schedule
The schedule picker offers preset intervals and a custom builder.
| Preset | Behavior |
|---|---|
| Every Minute | Runs 60 times per hour |
| Every Hour | Runs once per hour |
| Every Day | Runs once per day at midnight |
| Every Week | Runs every Sunday at midnight |
| Custom | Opens the visual schedule builder |
The Custom builder lets you configure:
- Every X minutes — 2, 5, 10, 15, 20, or 30
- Hourly at a specific minute
- Daily at a specific time (
HH:MM) - Weekly on selected days at a specific time
- A raw cron expression for advanced scheduling
As you configure, a live plain-English description and the predicted next run time update in real time before you confirm.
Manage your jobs
The Cron Jobs tab lists all configured jobs. Each job card shows the job name, last run time, current status, schedule in plain English, and the endpoint it calls.
Pause or resume a job
Each card has a toggle switch. Switching it off suspends the job — it stops running but is not deleted. Switching it back on resumes the job from its next scheduled interval.
Edit a job
Select Configure on any job card to open the creation form pre-filled with the job's current values. You can update any field except Environment, which is locked after creation.
Delete a job
⚠️ Important: Deleting a job permanently removes it and all of its execution history. A confirmation prompt appears before the deletion completes.
View execution history
Each job has a collapsible History section. The history table shows:
- The scheduled run time for each execution
- Whether the run succeeded or failed
- The HTTP status code returned
- A snippet of the log output
Select any row to open a log drawer with the full output. From the drawer you can copy the log or download it as a .txt file.
Current limitations
- There is no Run Now option. Jobs run on schedule only — manual triggers are not supported in this release.
Analytics
Analytics help you understand how your application is performing in production.
You can track:
- Request volume and traffic patterns
- Response times
- Error rates
- CPU, memory, and bandwidth usage
- Geographic distribution of traffic
These insights enable informed scaling and optimization decisions.

Alerts
CreateOS Deploy includes built-in alerts to help you stay informed about the health and stability of your applications.
Alerts notify you when important events occur, such as:
- Deployment failures
- Application errors
- Resource usage crossing defined thresholds
- Availability or health check issues
By surfacing issues in real time, alerts allow teams to respond quickly, reduce downtime, and maintain reliable production systems without constant manual monitoring.
Environments & Deployment Promotion
CreateOS Deploy supports environment-based workflows for managing live versions of your application.
You can:
- Create environments such as staging and production (production is the default environment created at setup)
- Promote deployments between environments
- Enable auto-promotion to always keep environments up to date
What is Deployment Promotion?
Promote deployments between environments allows you to move a specific deployment from one environment (such as staging) to another (such as production) without rebuilding or redeploying the application.
When you promote a deployment:
- The exact same build artifact is reused
- Code, dependencies, and configuration remain unchanged
- Only the target environment mapping is updated
This ensures consistency between environments and eliminates issues caused by rebuilding the same code multiple times.
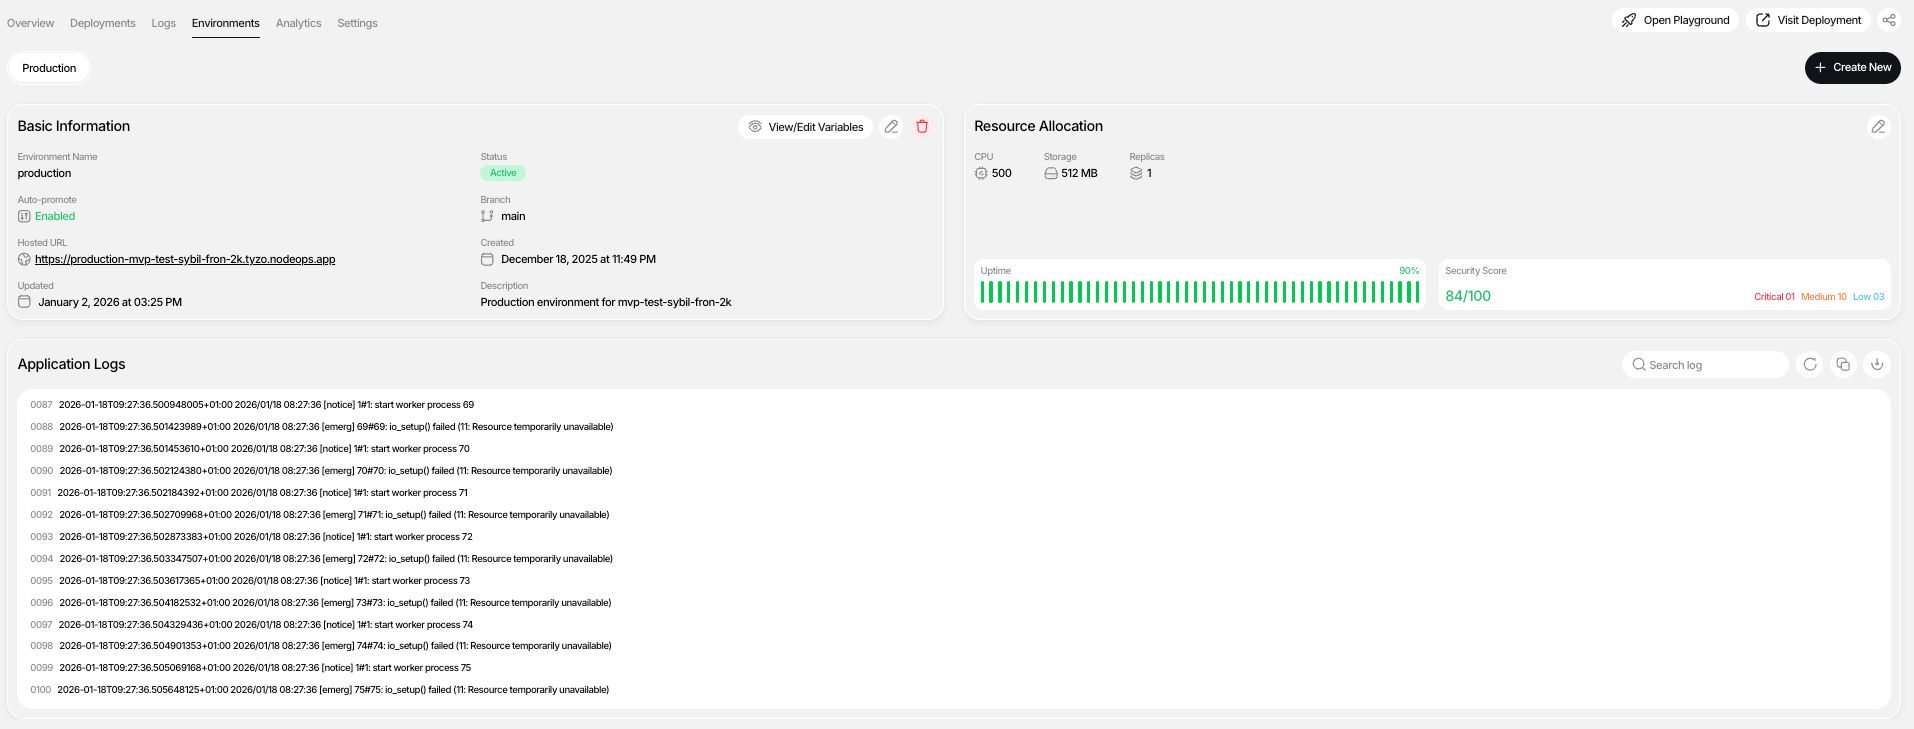
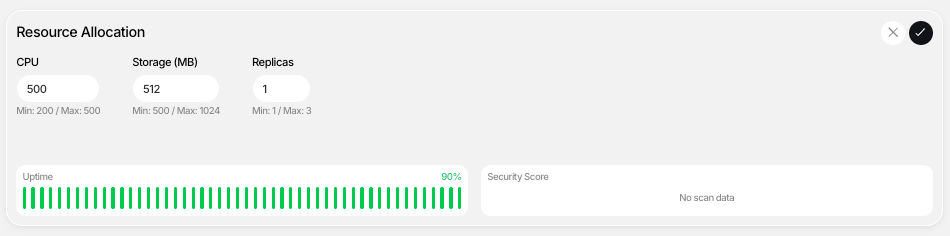
Compute Configuration & Scaling
CreateOS Deploy makes compute resources transparent and configurable.
You can:
- Scale CPU and memory vertically
- Adjust replica counts horizontally
- View active compute configurations per deployment
Changes take effect immediately without rebuilding pipelines.
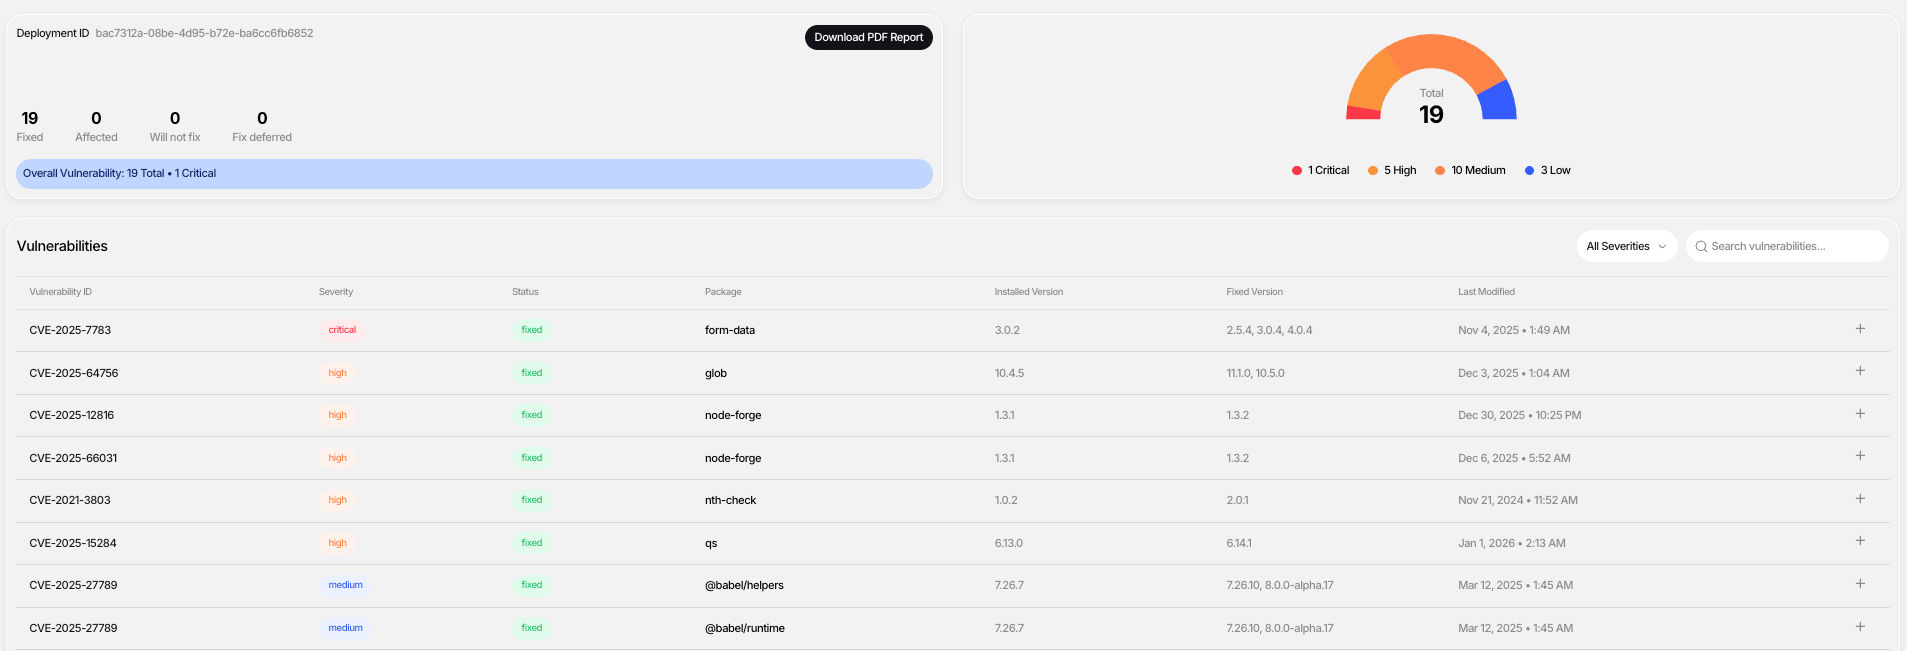
Built-In Security Scanning
Every deployment includes an automatic security scan to surface vulnerabilities early.
You can:
- View a security score
- Inspect vulnerability details
- Fix issues and re-scan
- Download a detailed PDF security report
Security is integrated directly into the deployment workflow.
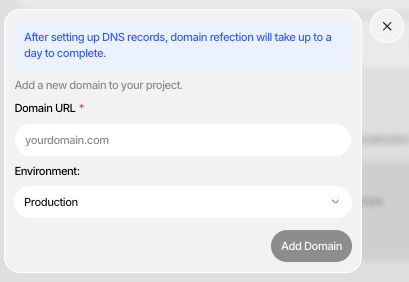
Custom Domains
Each project is automatically assigned a CreateOS subdomain.
You can also configure a custom domain by:
- Navigating to project settings
- Adding your domain name
- Configuring DNS records
- Waiting for DNS propagation
- Activating the domain
GitHub Integration & Code Ownership
CreateOS Deploy maintains GitHub as the source of truth.
You can:
- Push projects to GitHub in a few clicks
- Download files and manage repositories manually
- Trigger redeployments automatically on every commit

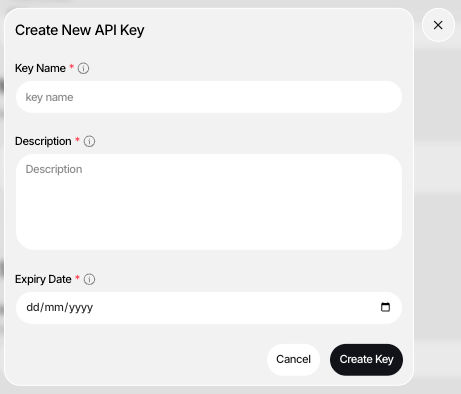
API Keys & External Integrations
CreateOS Deploy supports API keys for secure integrations. You can configure your API keys in your Profile section.
You can:
- Generate API keys from your profile
- Integrate with external tools
- Automate workflows and deployments
AI Playground
The AI Playground is a browser-based, AI-assisted coding environment connected directly to your GitHub repository.
Key Capabilities:
- No local cloning required
- Inline code edits
- AI agent assistance
- Automatic deployments on commit
Prerequisite: GitHub Actions must be enabled.
Multiple Projects & Session Management
CreateOS Deploy supports managing multiple projects simultaneously with clear separation and searchability.
Deleting Projects
Projects can be deleted from the dashboard when no longer needed.
⚠️ Important: Deleted projects cannot be recovered.