Deploy Your First App on CreateOS
CreateOS is a unified workspace where ideas move seamlessly from concept to live deployment—without context switching across tools, infrastructure, or workflows.
It combines creation, deployment, and coordination into a single AI-assisted environment, so builders can go from idea to working application in minutes, not weeks. Instead of stitching together fragmented tools, CreateOS keeps execution fluid, end-to-end, and owned by the person building.
This tutorial walks you through deploying your first app on CreateOS, so you can experience that execution flow firsthand.
Deployment Steps
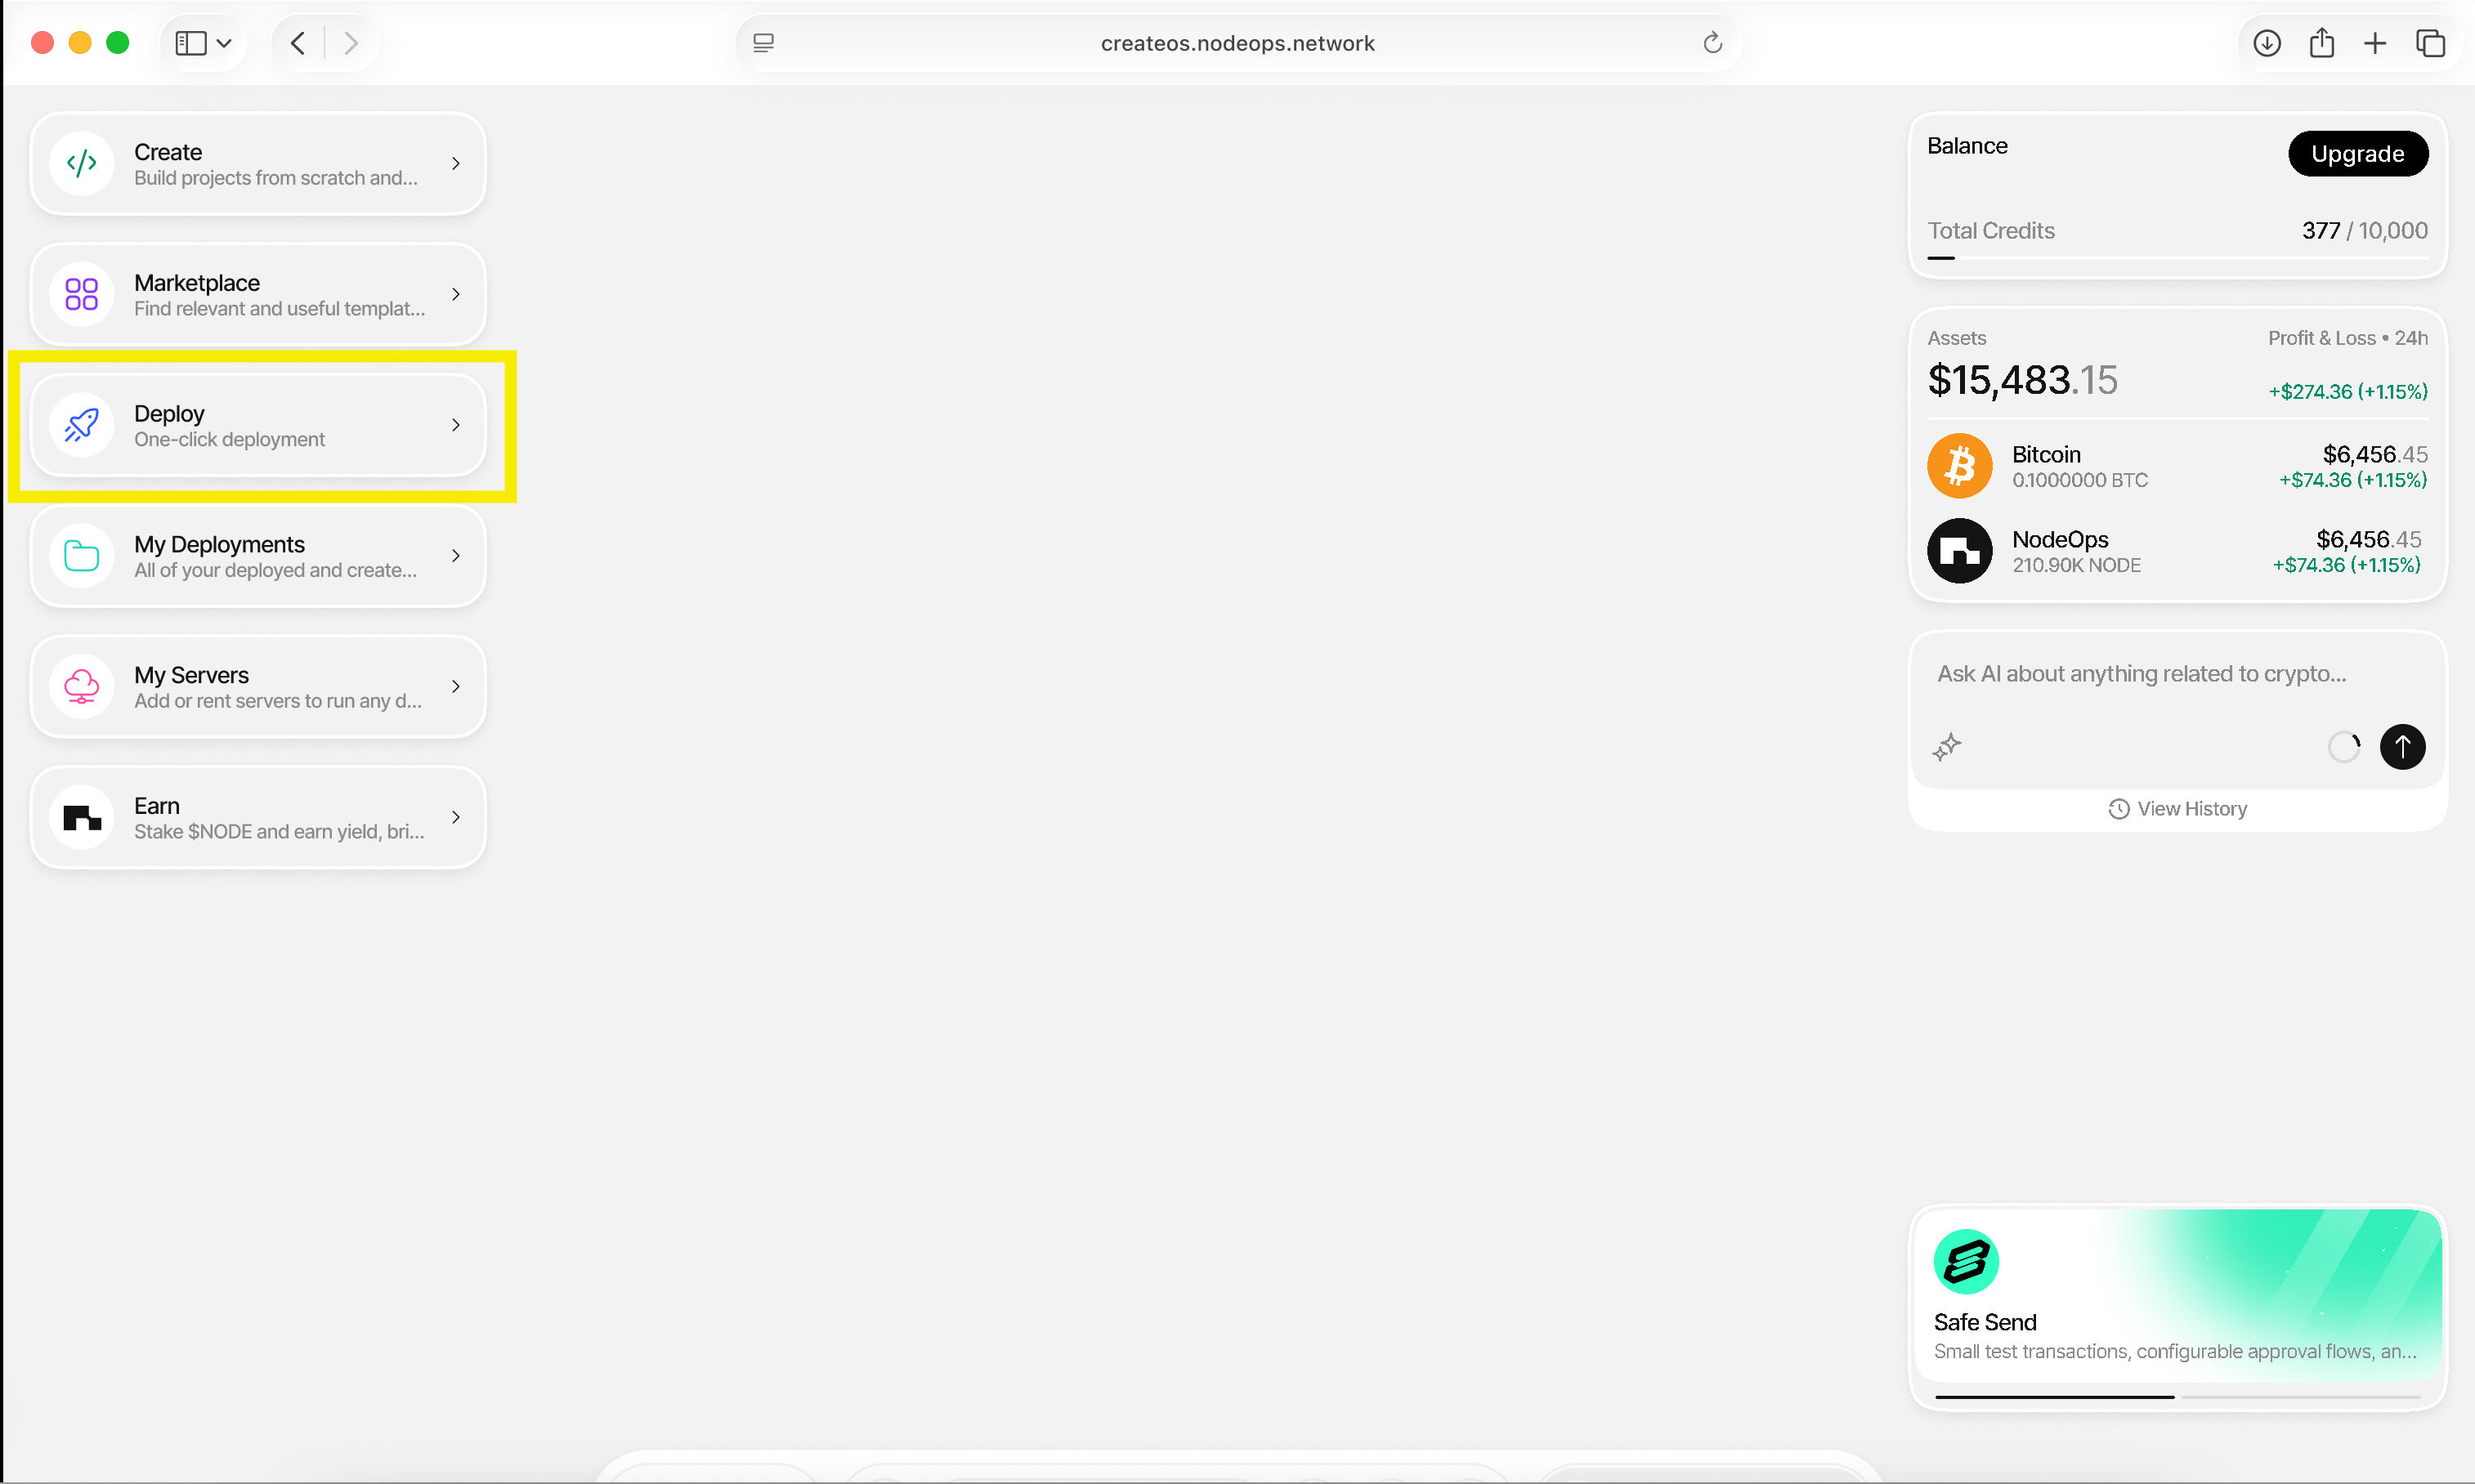
Step 1: Access the Deploy Section
- Go to CreateOS Platform and sign in
- Click "Deploy" from the menu on the left
Step 2: Choose Deployment Method
CreateOS offers multiple deployment options:
- Import from GitHub (recommended for this tutorial)
- Deploy from Docker image
- Upload a file
- Deploy from template
Click "Import from GitHub" to connect your GitHub account.
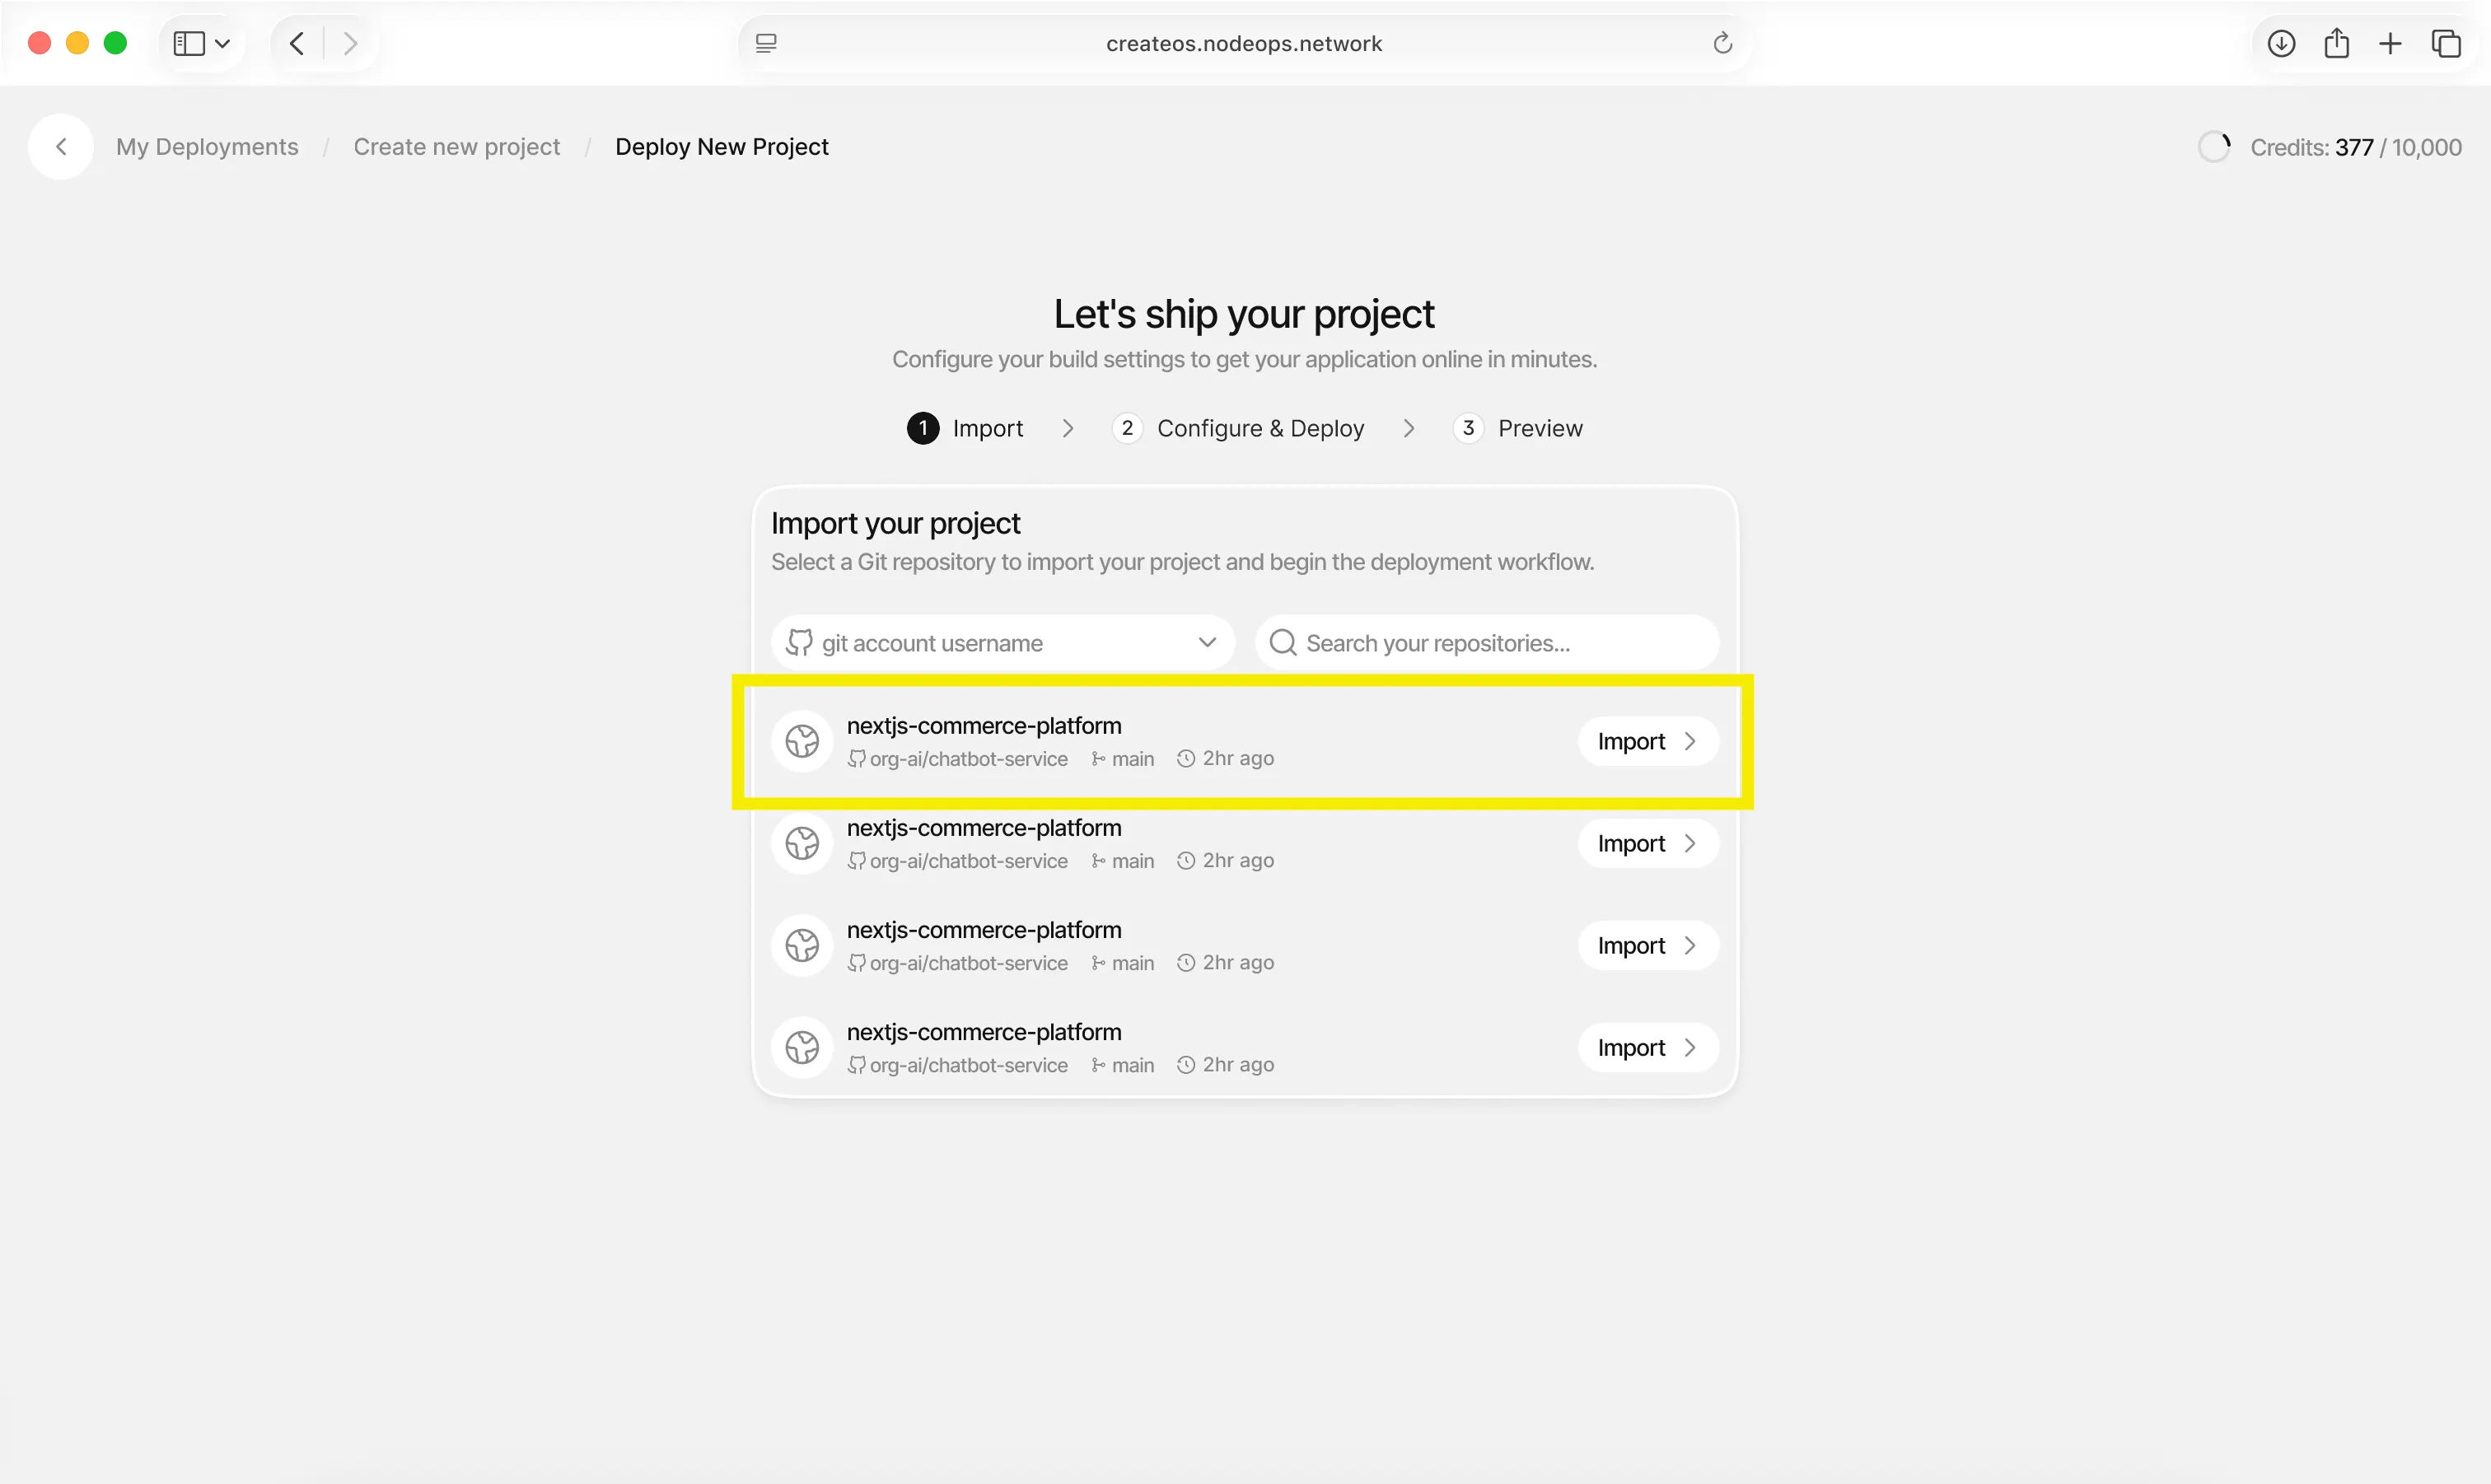
Step 3: Authorize GitHub Access
- Complete the GitHub OAuth authentication
- You'll see a list of your repositories
- Select the repository you want to deploy
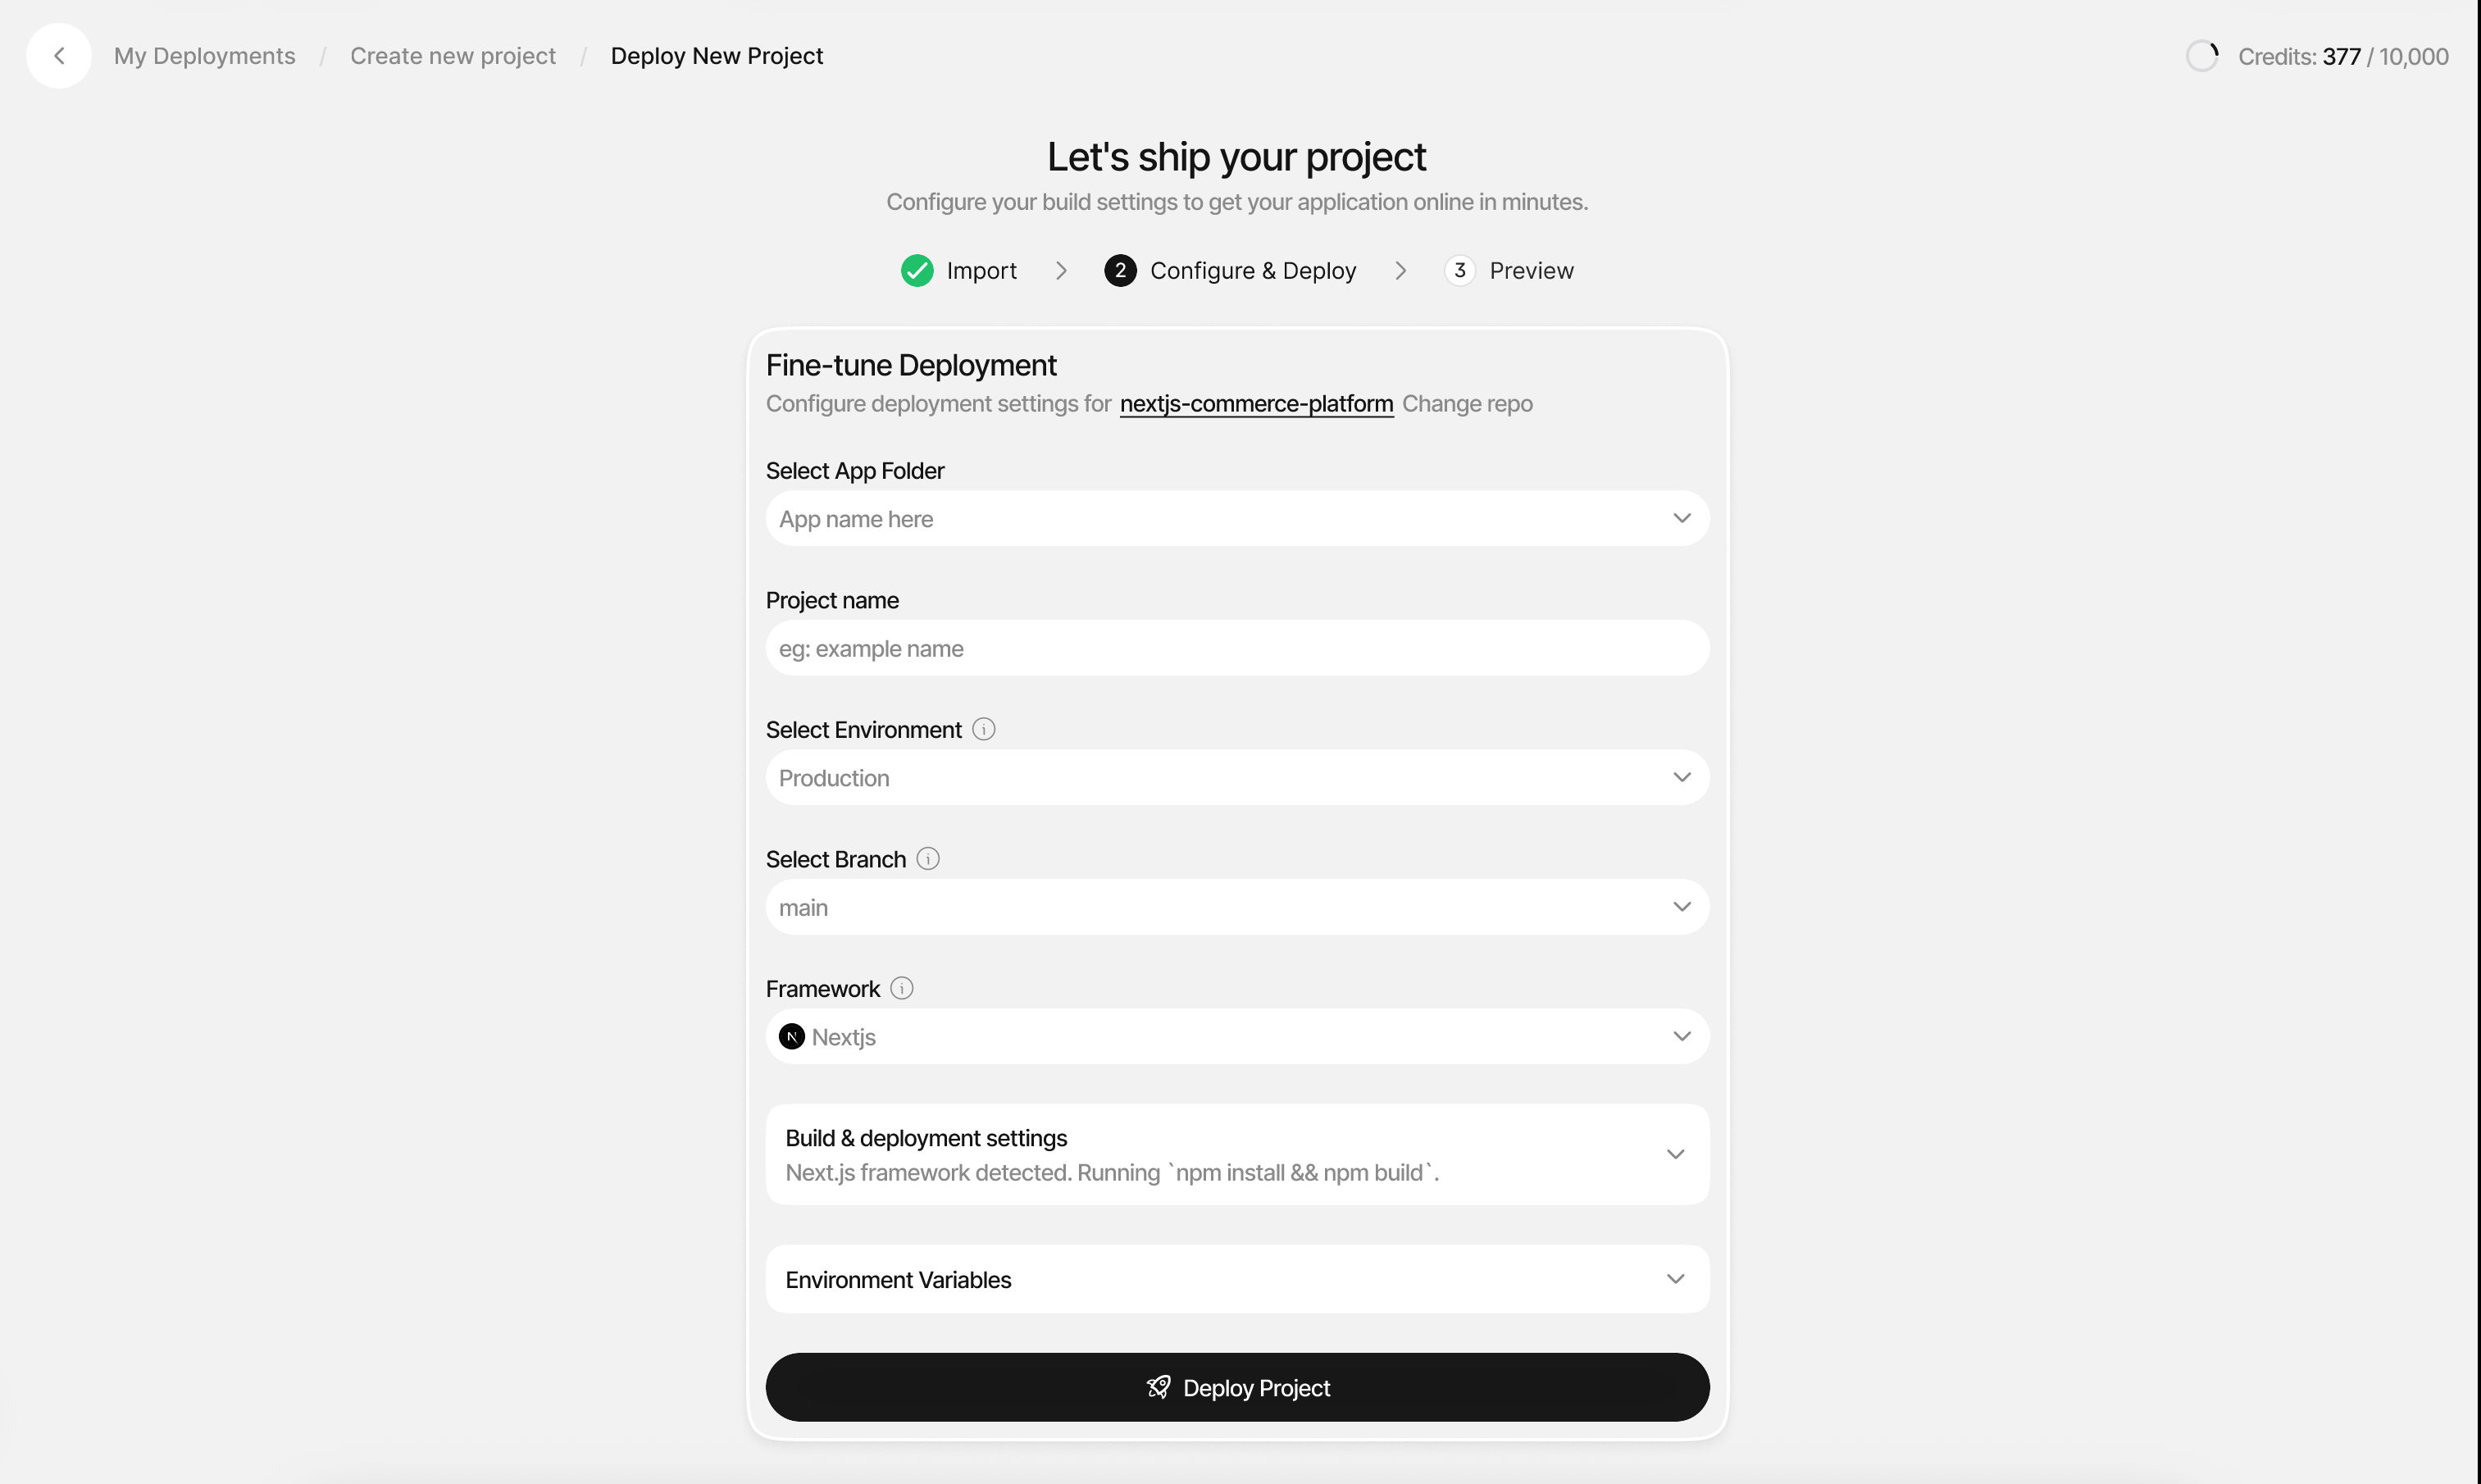
Step 4: Configure Project Details
Fill in the following project information:
| Setting | Description |
|---|---|
| Folder | Select or create a folder to organize your deployment |
| Project Name | Give your project a descriptive name |
| Environment | Choose between Production, Staging, or custom |
| Branch | Select the Git branch to deploy from |
| Framework | Select your project's framework |
💡 Tip: Folders keep deployments of one project together. For example, you can organize your frontend, backend, and database deployments into a single folder.
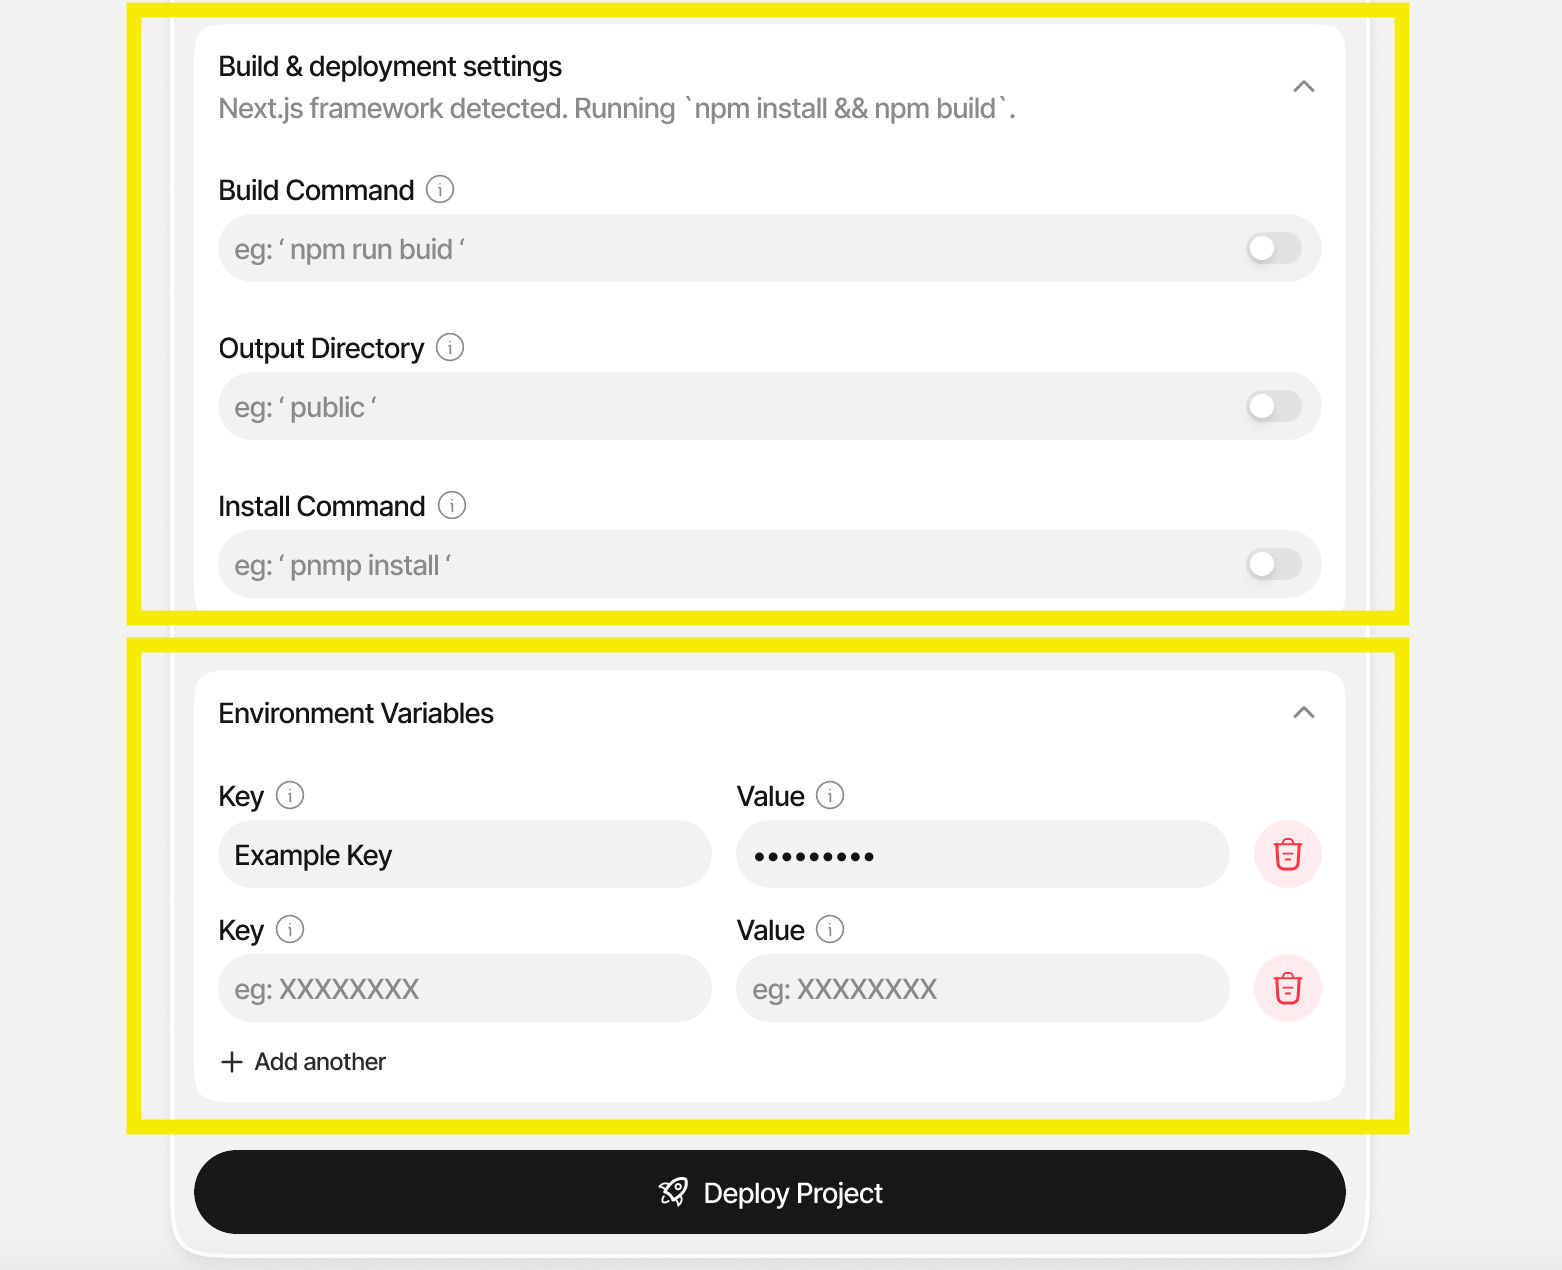
Step 5: Configure Build Settings
- Environment Variables: Add any required environment variables for your application
- Build Commands: CreateOS will auto-detect your framework, but you can customize build and deployment commands if needed
- Review the auto-detected configuration and make any necessary adjustments
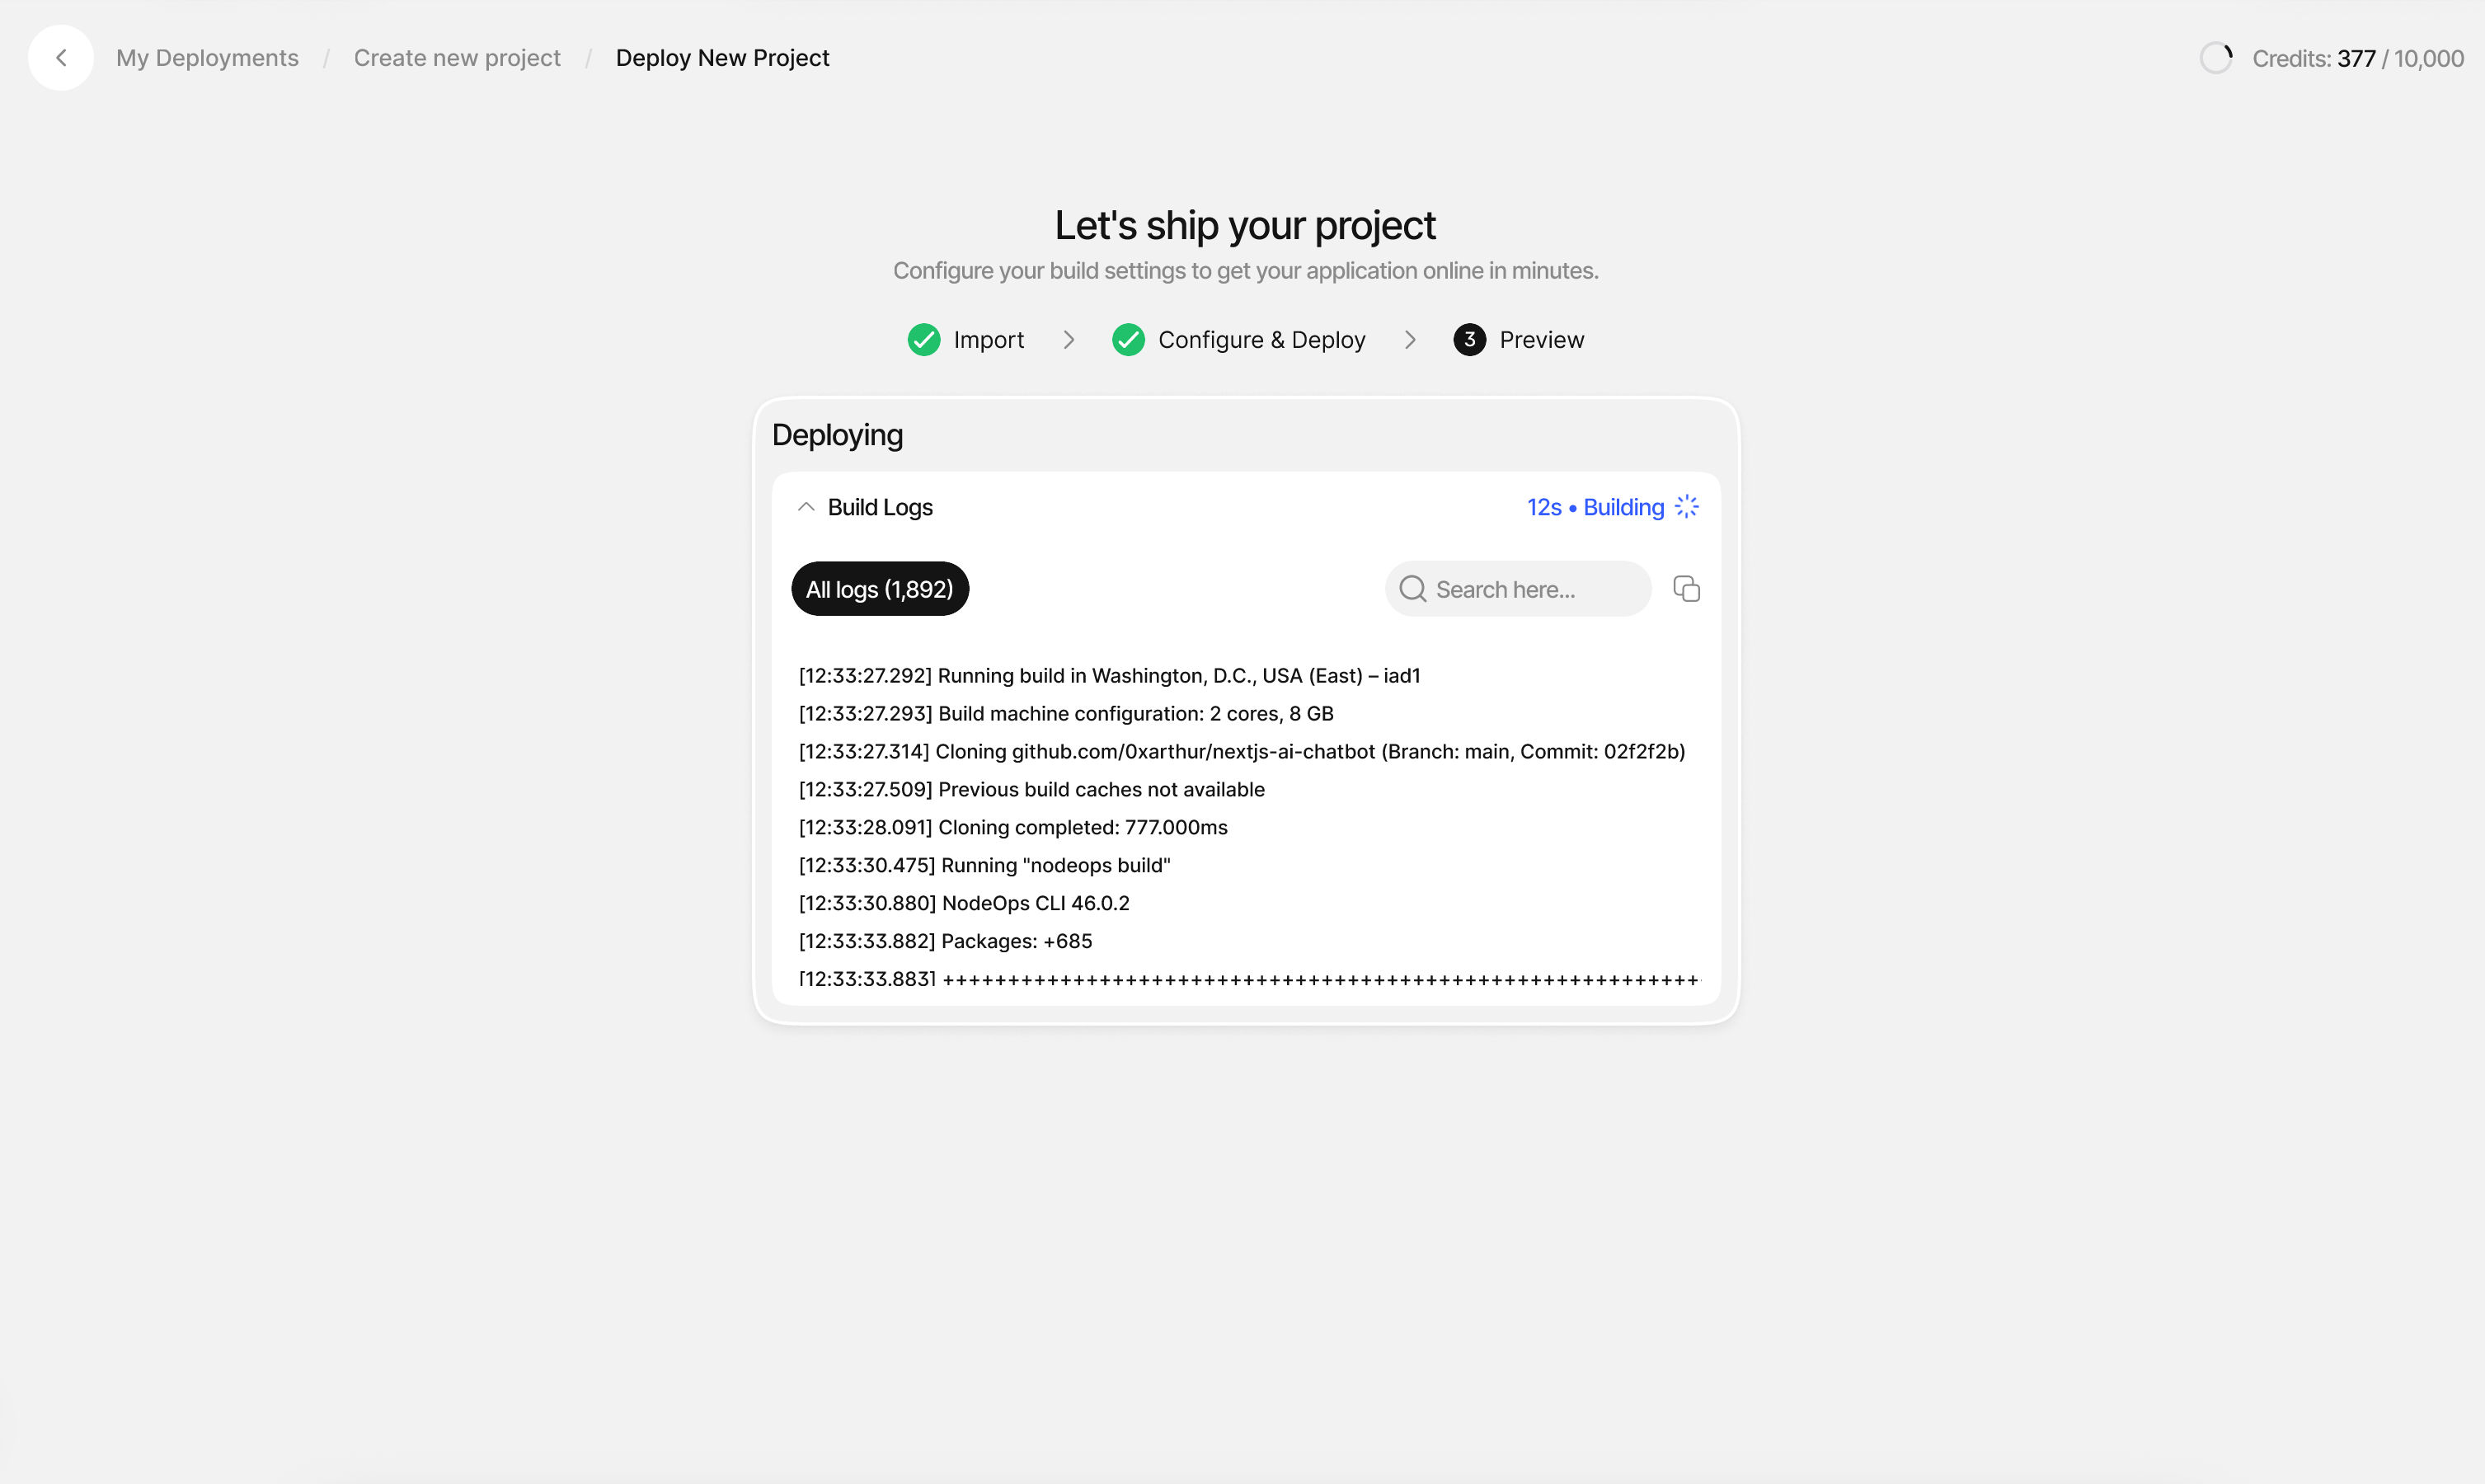
Step 6: Deploy Your Project
- Click "Deploy Project" when ready
- Watch your deployment progress with visible running logs in real-time
- Monitor the build process as CreateOS containerizes your code and provisions infrastructure
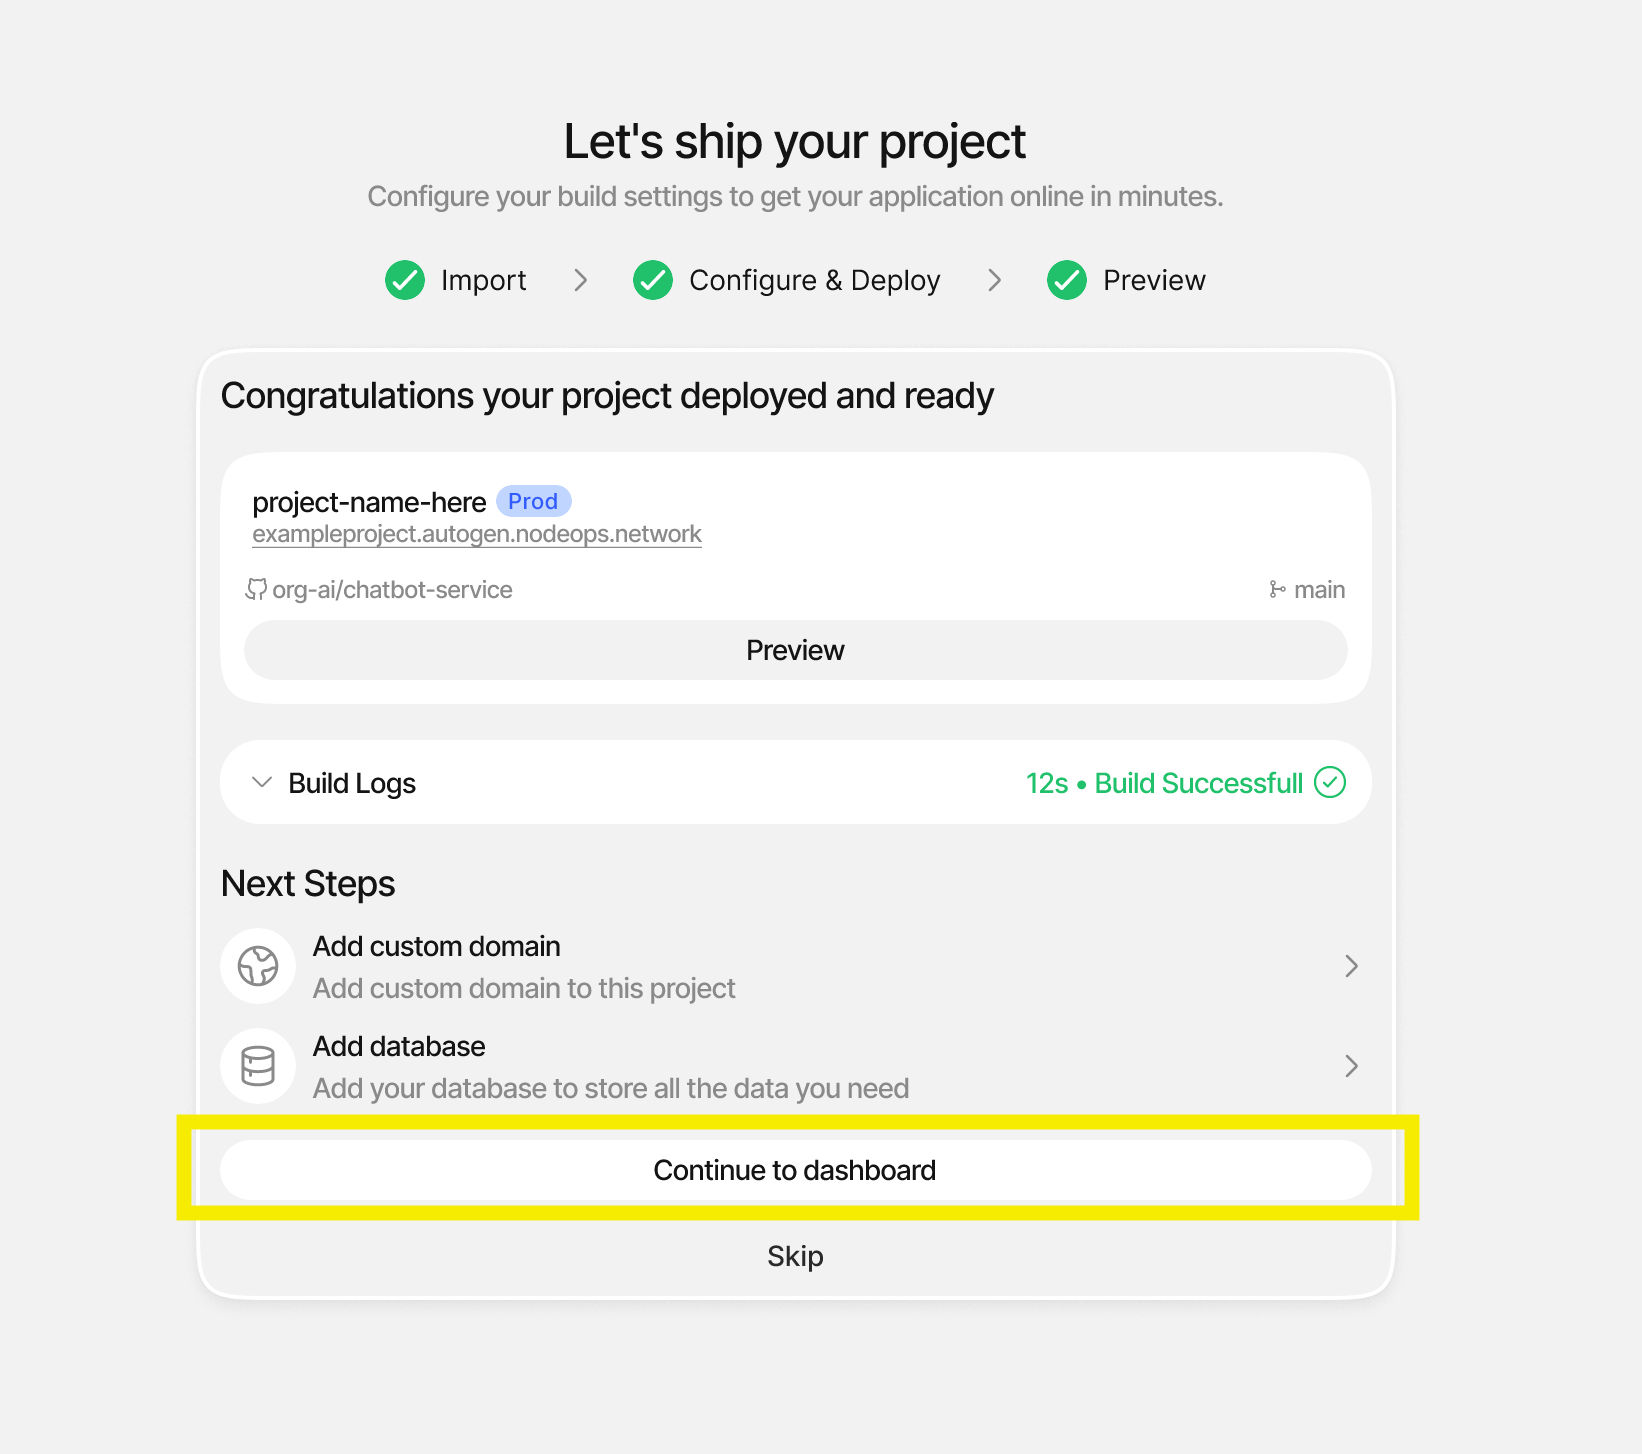
Step 7: Deployment Complete
Once your build is complete, you can:
- Preview your app: View your live application
- Add a custom domain: Map your own domain to the deployment
- Add a database: Connect backend services with one click
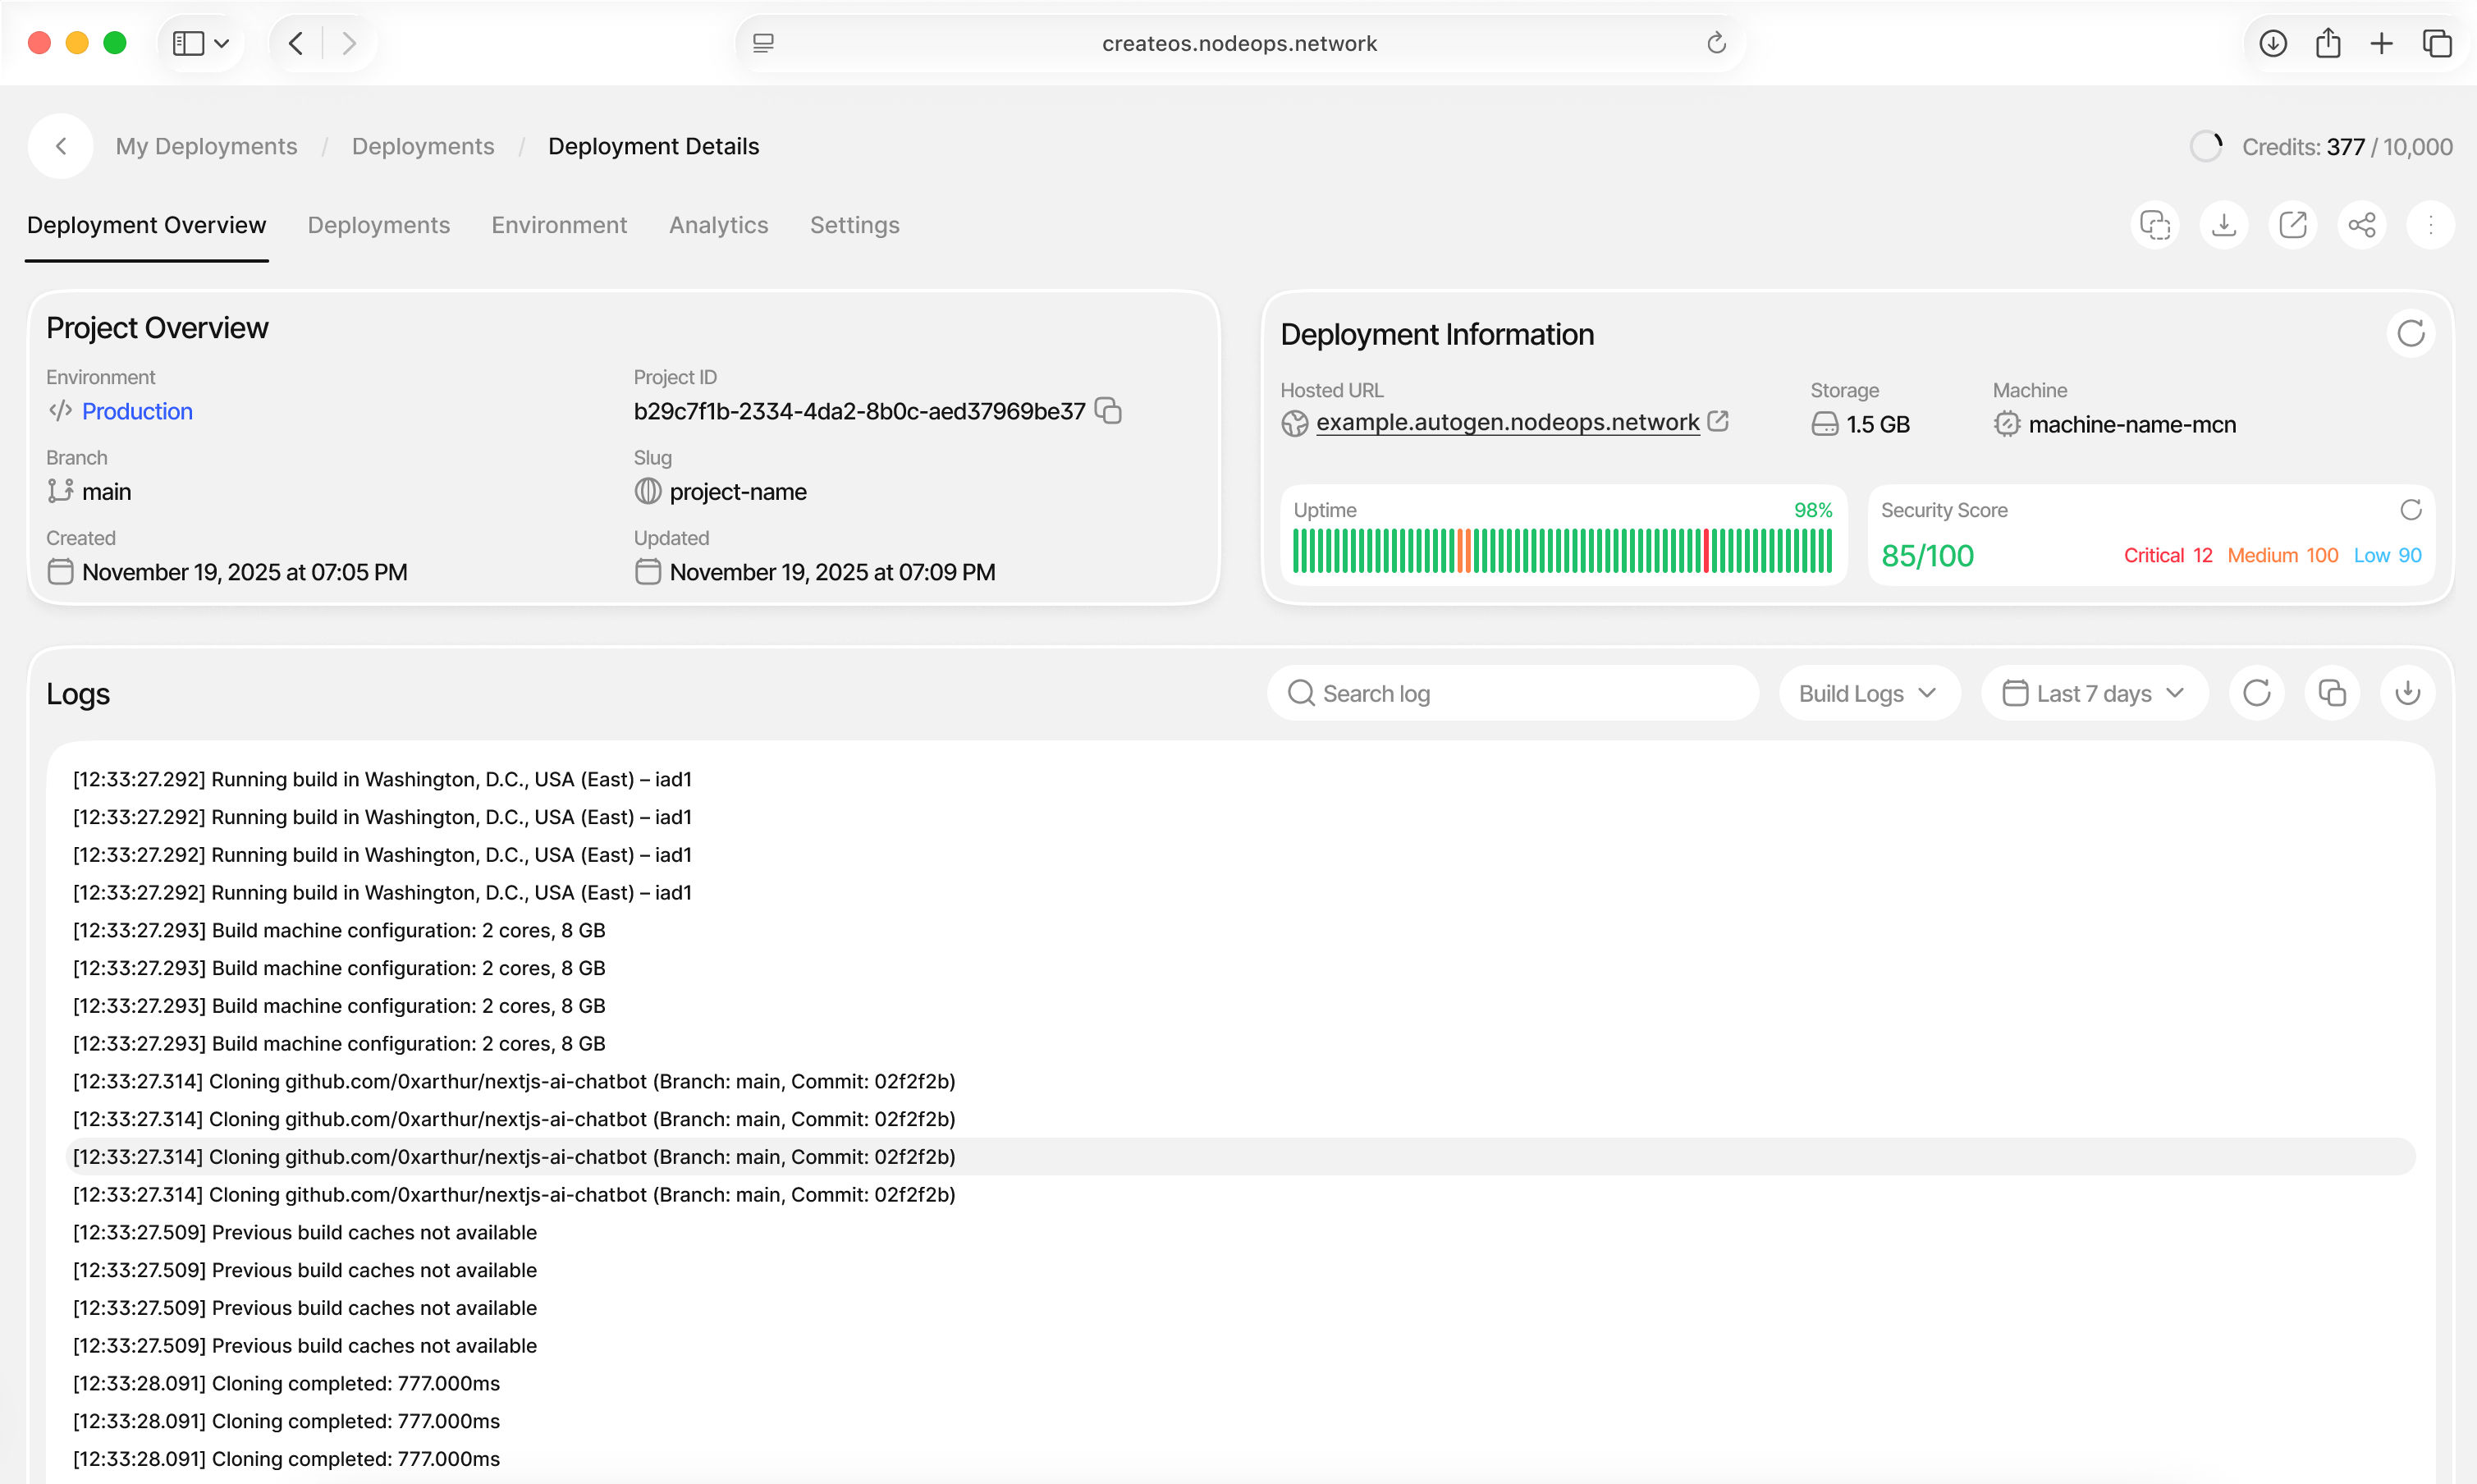
Step 8: Explore the Dashboard
🎉 Congratulations! Your application is now live and running.
From the deployment dashboard, you can:
- Monitor Deployments: Track all active deployments and their status
- Manage Environments: Switch between Production, Staging, and custom environments
- View Analytics: Access performance metrics and usage data
- Modify Settings: Configure custom domains, build commands, and environment variables
- Access Logs: Review build and runtime logs
- Rollback Builds: Instantly revert to previous versions if needed
What's Next
You've just deployed a live application on CreateOS using the GitHub flow. Your app is now running, accessible, and fully under your control.
This is only one way to deploy on CreateOS. GitHub is ideal when you already have a repo and want a fast, familiar path to production—but it's not the only execution flow available.
Continue Your Journey
From here, you can:
- Explore Dashboard Settings: Deep dive into deployment configuration and optimization
- Iterate and Redeploy: Push updates to GitHub and trigger automatic redeployments
- Monetize Your Work: List your project as a template or application on the CreateOS marketplace
- Scale Your Infrastructure: Add databases, caching layers, and compute resources
- Automate Workflows: Set up CI/CD pipelines and environment promotions
Other Deployment Methods
Deploy from Docker Image: Use pre-built containers for faster deployment and consistent environments.
Upload a File: Deploy directly from ZIP archives or compressed project files.
Deploy Manual project folder ->
Deploy from Template: Start with production-ready templates from the CreateOS marketplace.