Deploy an Application
This tutorial walks you through deploying a ready-made application on CreateOS in just a few minutes.
There are no repositories to configure, no infrastructure decisions to manage. As soon as deployment finishes, your app is live at a unique, persistent, and shareable URL.
By the end of this guide, you'll have a running application you can immediately test, share, and build on.
Steps
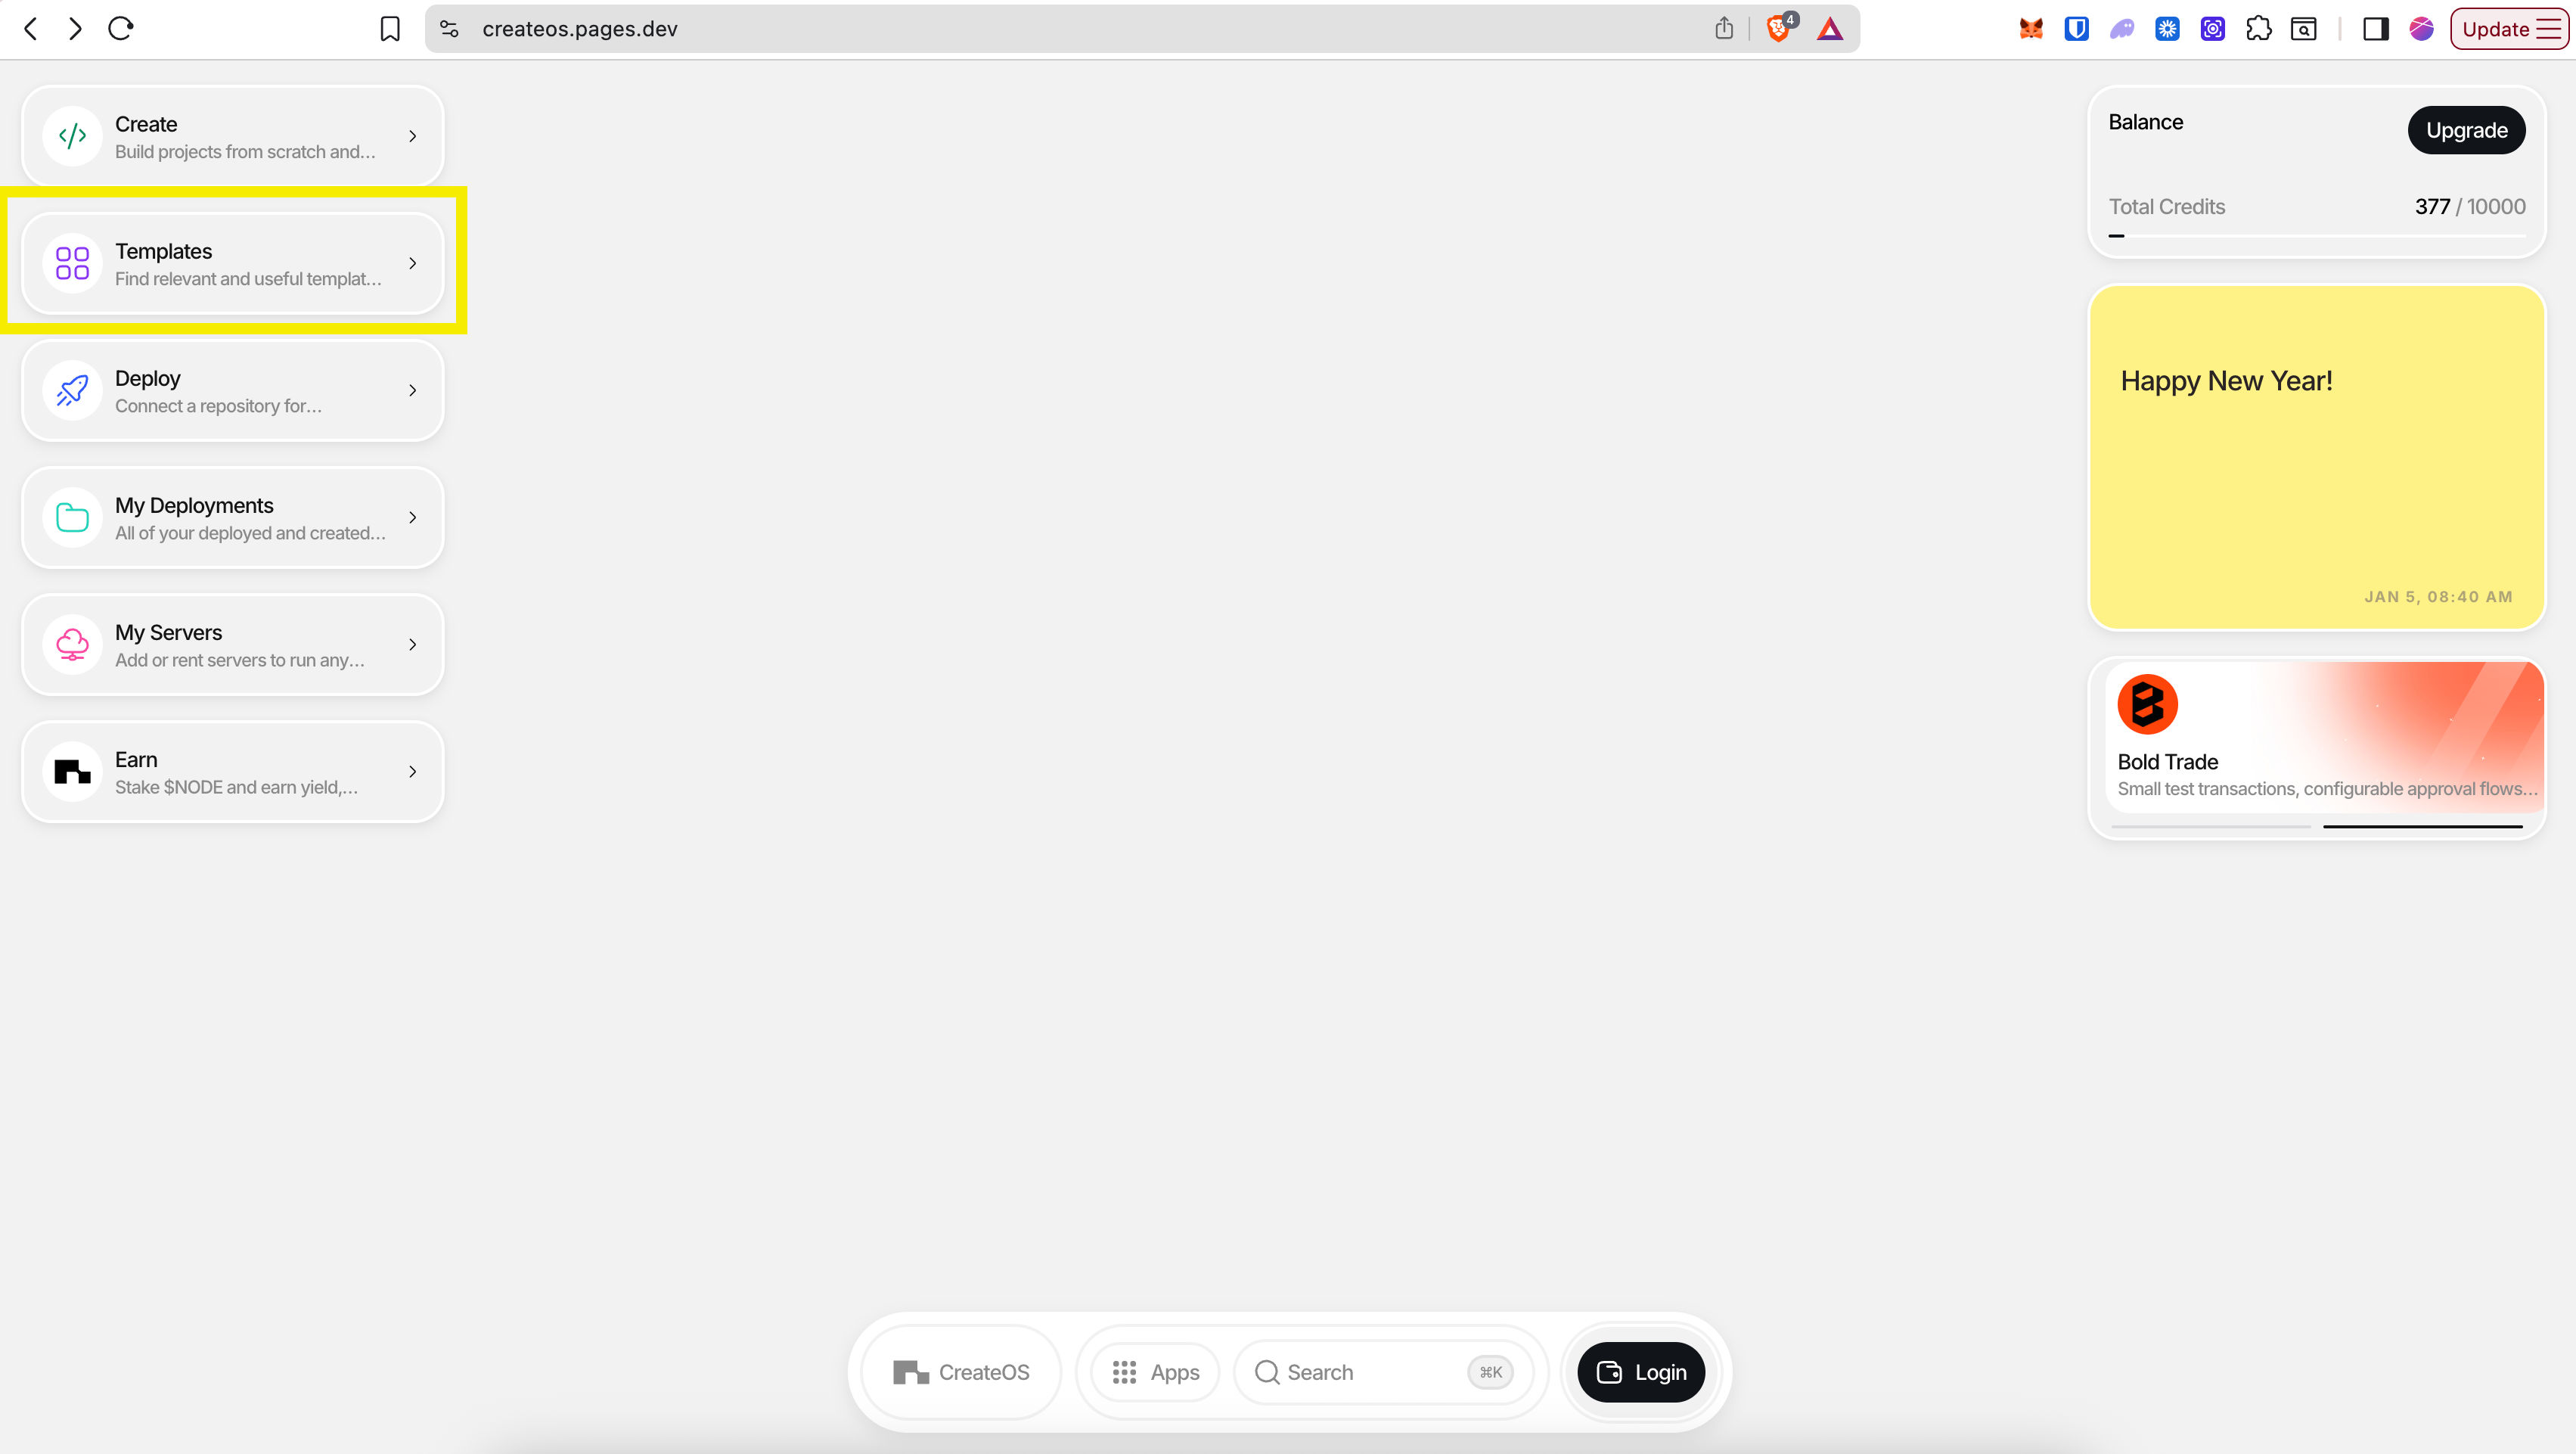
Step 1: Access the Templates Section
- Go to CreateOS Platform and sign in
- Click "Templates" from the menu on the left
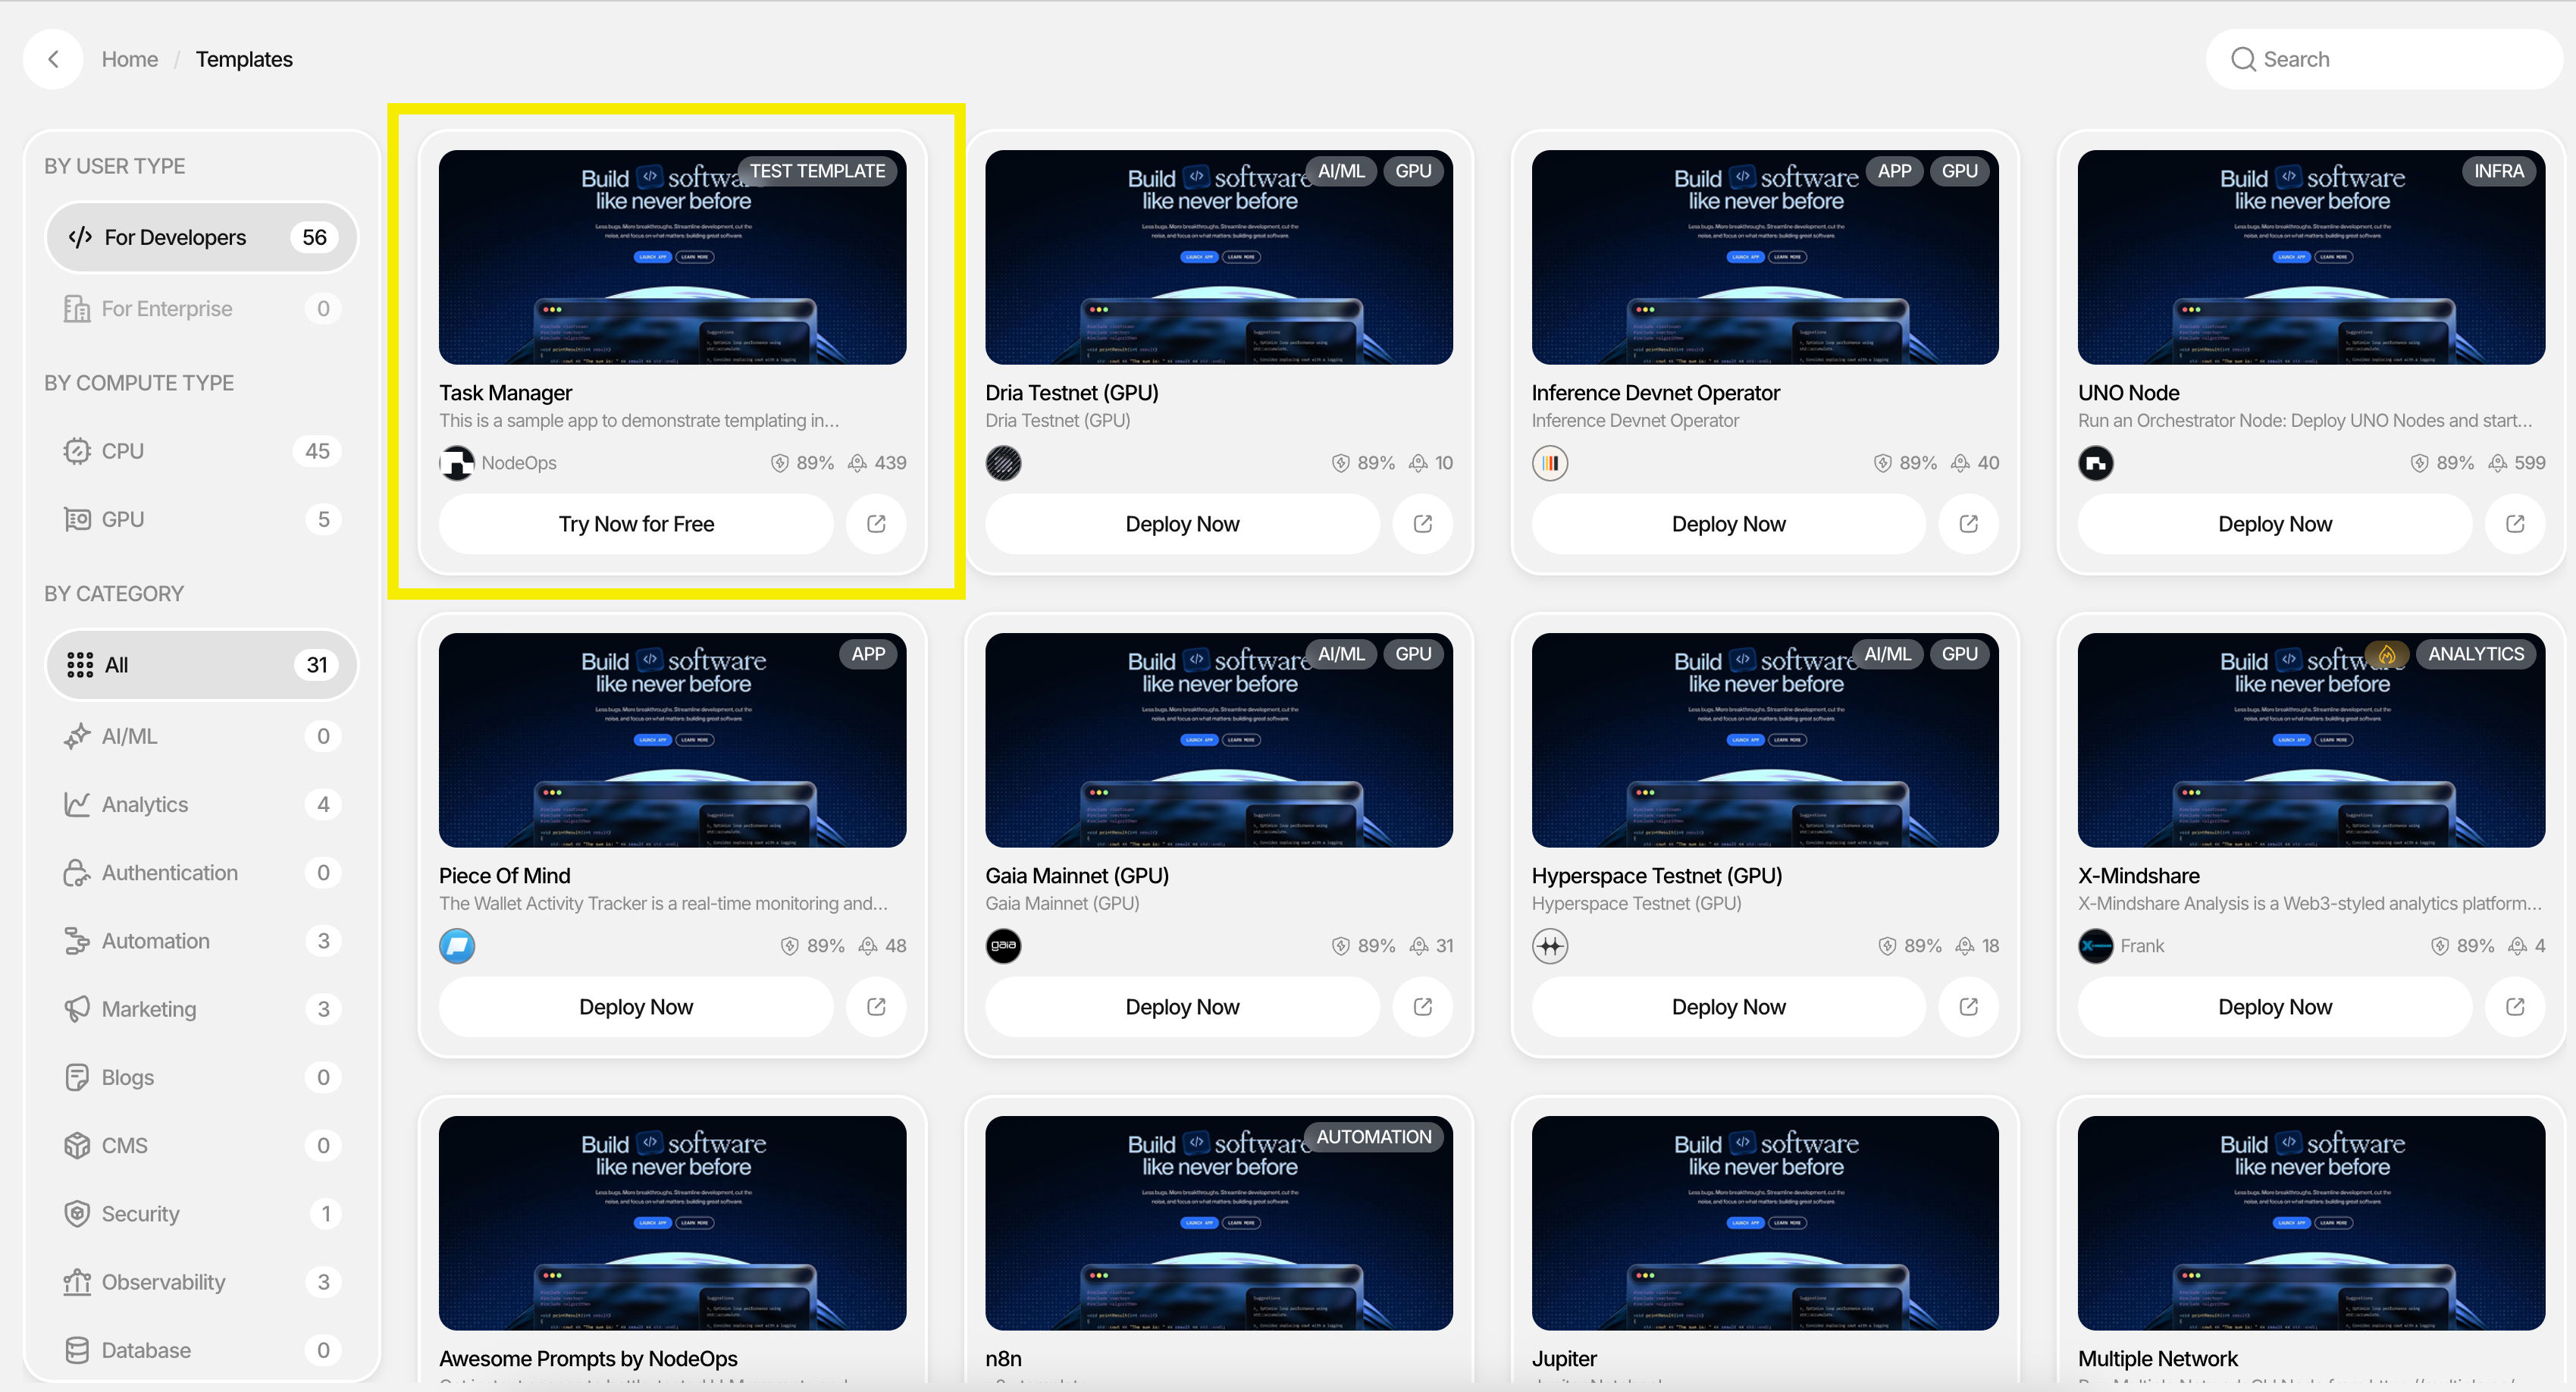
Step 2: Browse and Select a Template
- You'll be brought to the templates marketplace
- Filter templates by:
- Category (AI/ML, Analytics, Authentication, etc.)
- Compute Type (CPU/GPU)
- User Type (Developer/Enterprise)
- For this tutorial, try the free starter template "Task Manager" on the top left
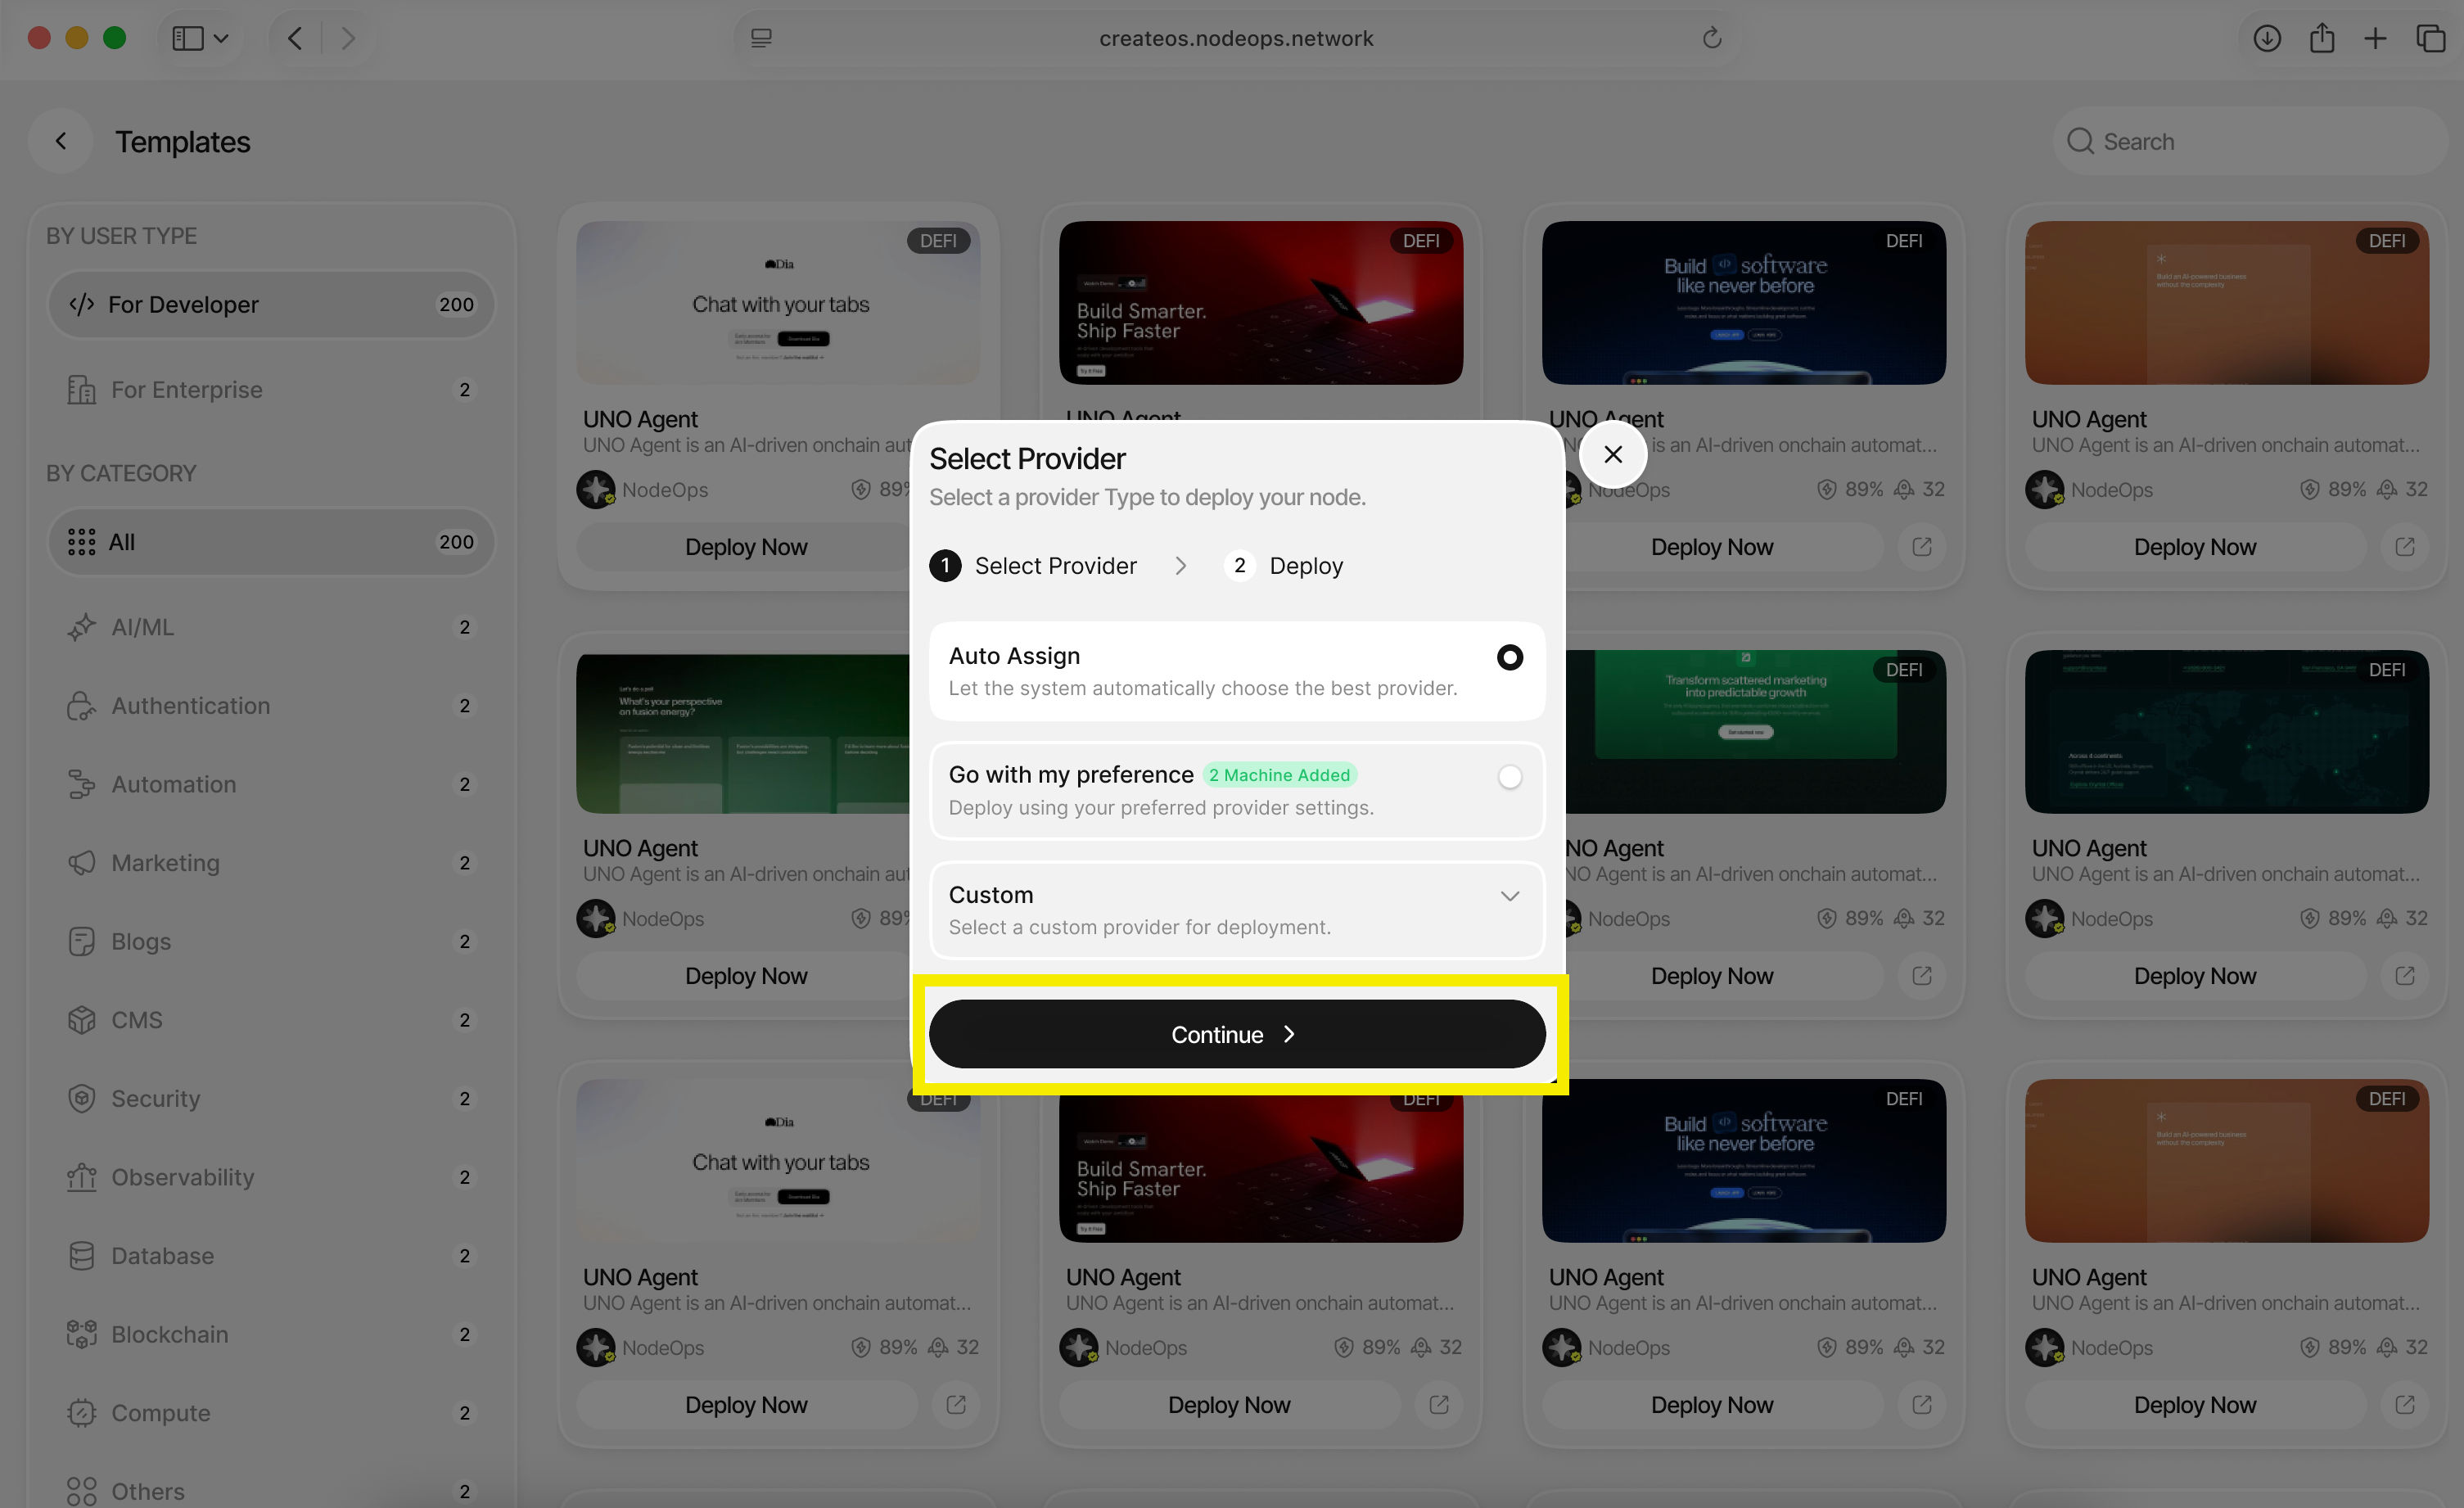
Step 3: Select a Provider
A provider is the server where your application will be deployed.
Choose one of the following options:
- Auto Assign: Let CreateOS automatically select the best provider (recommended)
- Go with my preference: Select a specific server or cluster
- Custom: Configure custom server settings
Click "Continue" after making your selection.
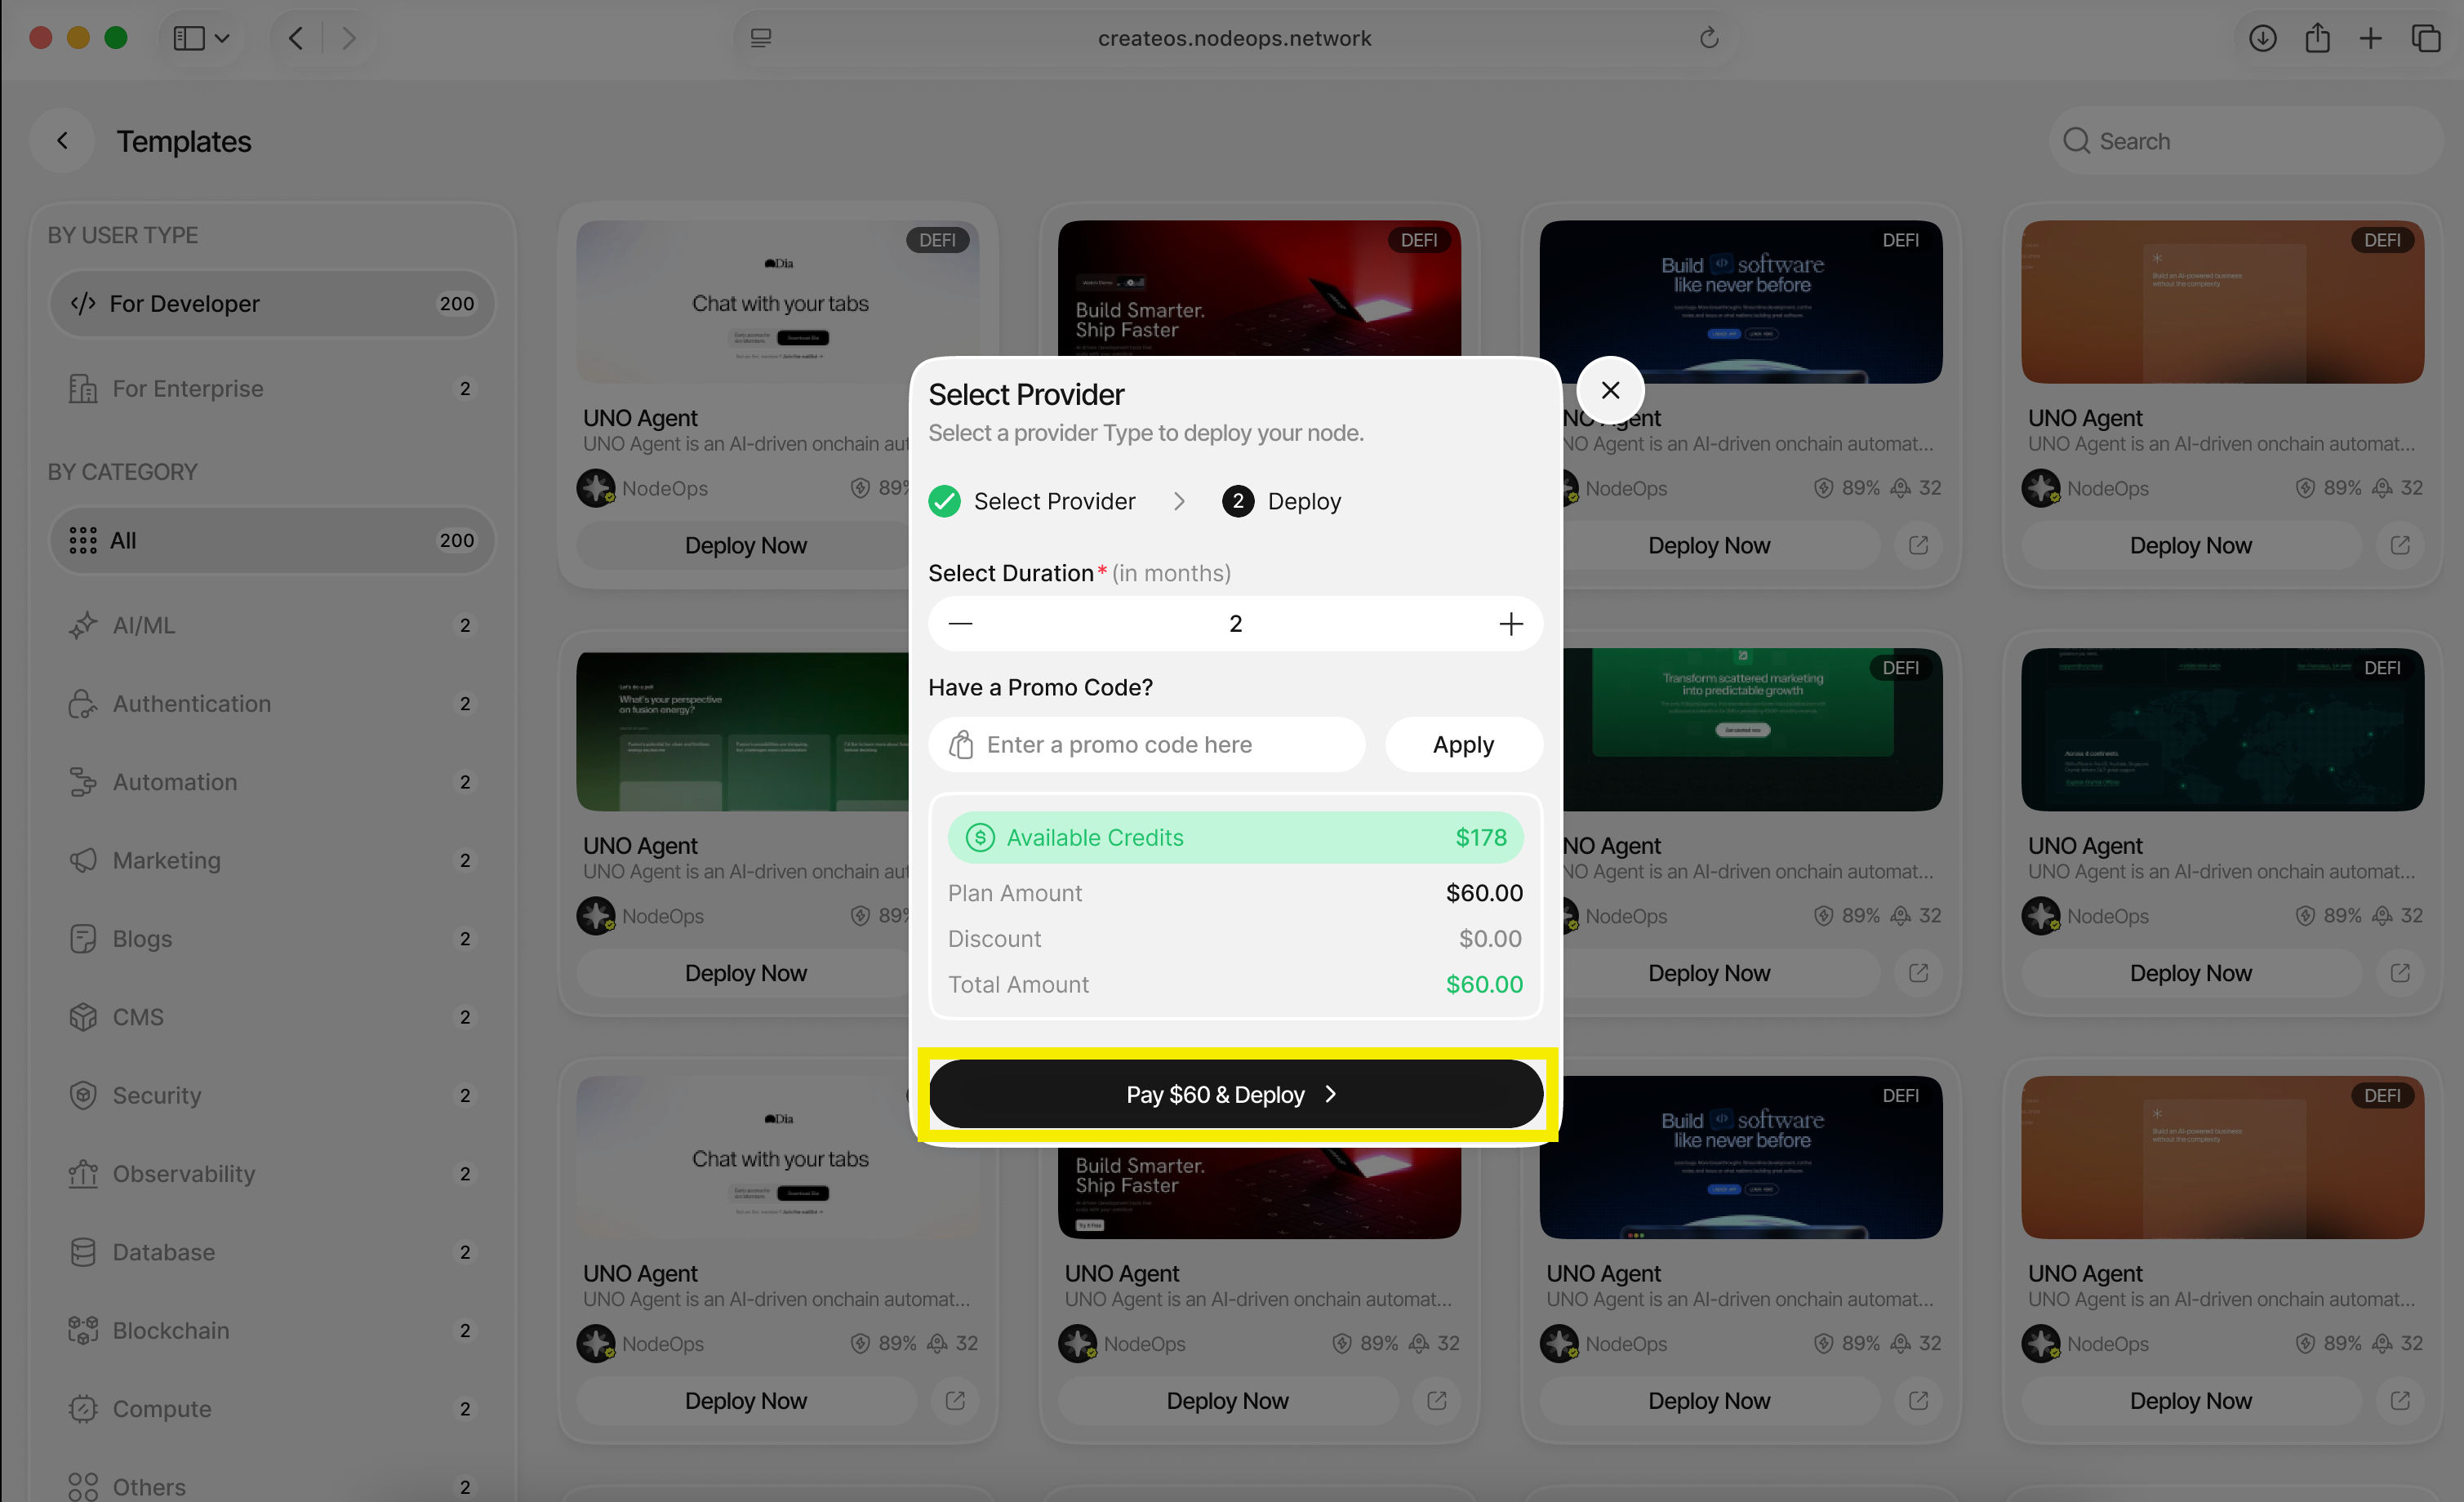
Step 4: Configure Deployment Duration
In the final dialogue:
- Select the duration you want your application to live for (in months)
- Enter a promo code if you have one
- Click "Deploy"
Step 5: Access Your Deployed Application
🎉 Your application has been deployed!
You will find it under the Deployments tab, where you can:
- View your live application URL
- Monitor deployment status
- Access the application dashboard
What's Next
Your application is now live.
In just a few steps, you've gone from selecting a template to deploying a real application with a persistent URL—without setting up servers, pipelines, or switching tools.