Migrating from Vercel to CreateOS
Do you have a project sitting in Vercel? Migrating to CreateOS is easy.
Video — 2 minutes
This video starts with a working project in Vercel, moves into CreateOS, connects the repo, and clicks deploy. In 2 minutes, the project is live on CreateOS.
Migrate with one command (CreateOS Skill)
Let your AI agent do the migration for you. Install the vercel-to-createos skill and it will detect your Vercel project, translate the config, and deploy to CreateOS.
Bash
Once installed, ask your agent to "migrate my Vercel project to CreateOS" and follow along. Prefer clicking through? The step-by-step guide below covers the manual flow.
Step by step
Every project deployed to Vercel must have a repository. You can migrate your project to CreateOS by connecting that repository.
CreateOS comes natively with GitHub integration — just connect your GitHub account and deploy. If you are coming from Bitbucket or GitLab, skip to the next section.
-
Sign into createos.nodeops.network.
-
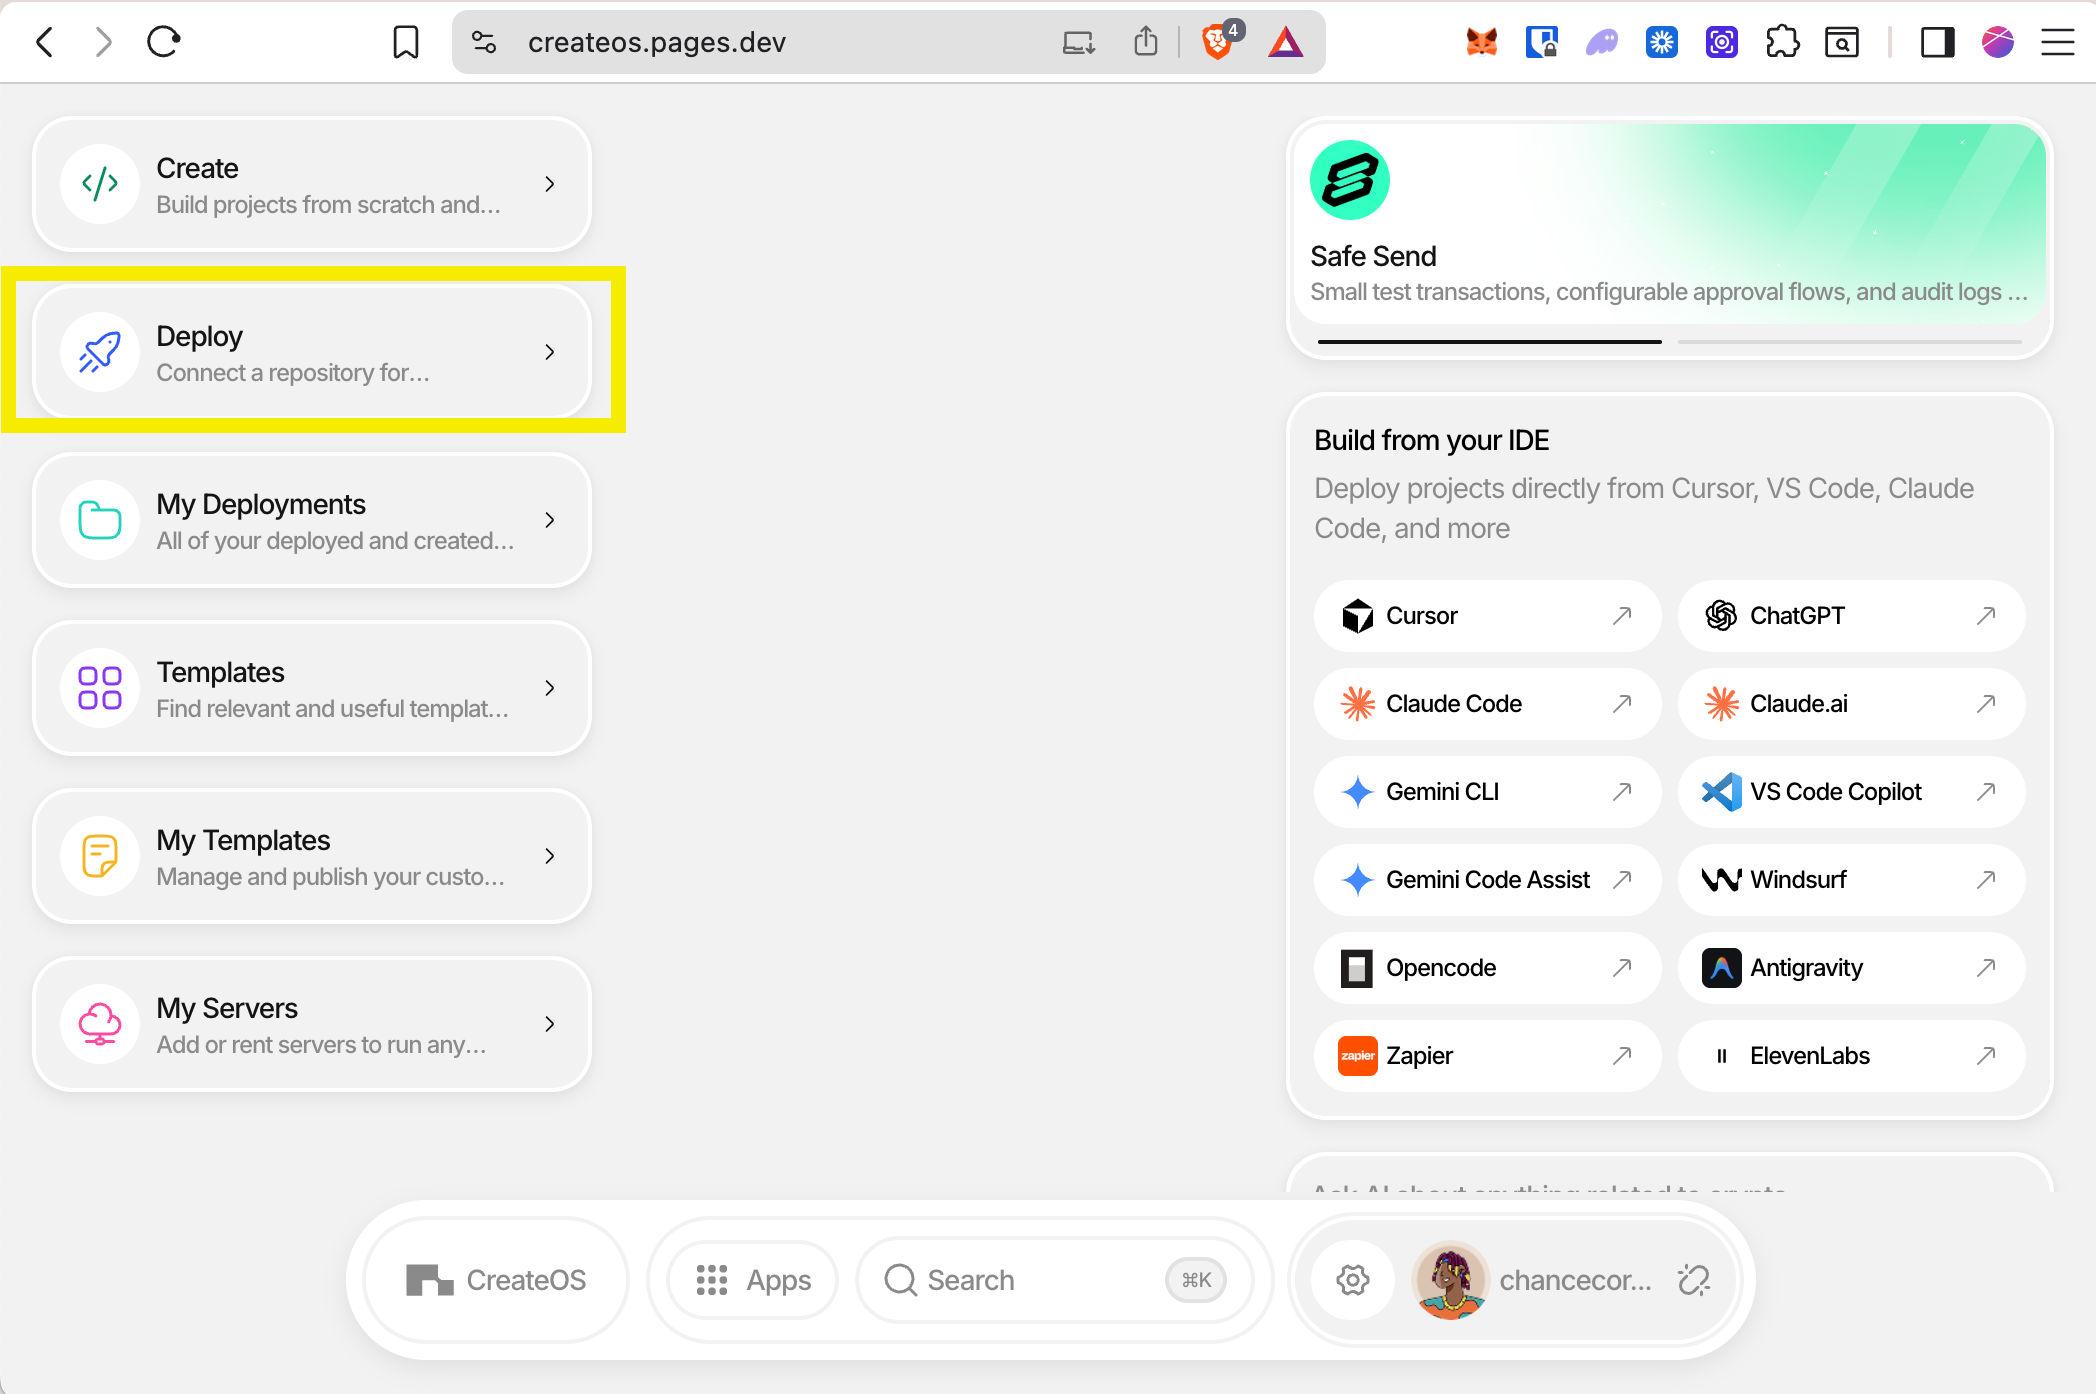
Click Deploy on the left panel.
-
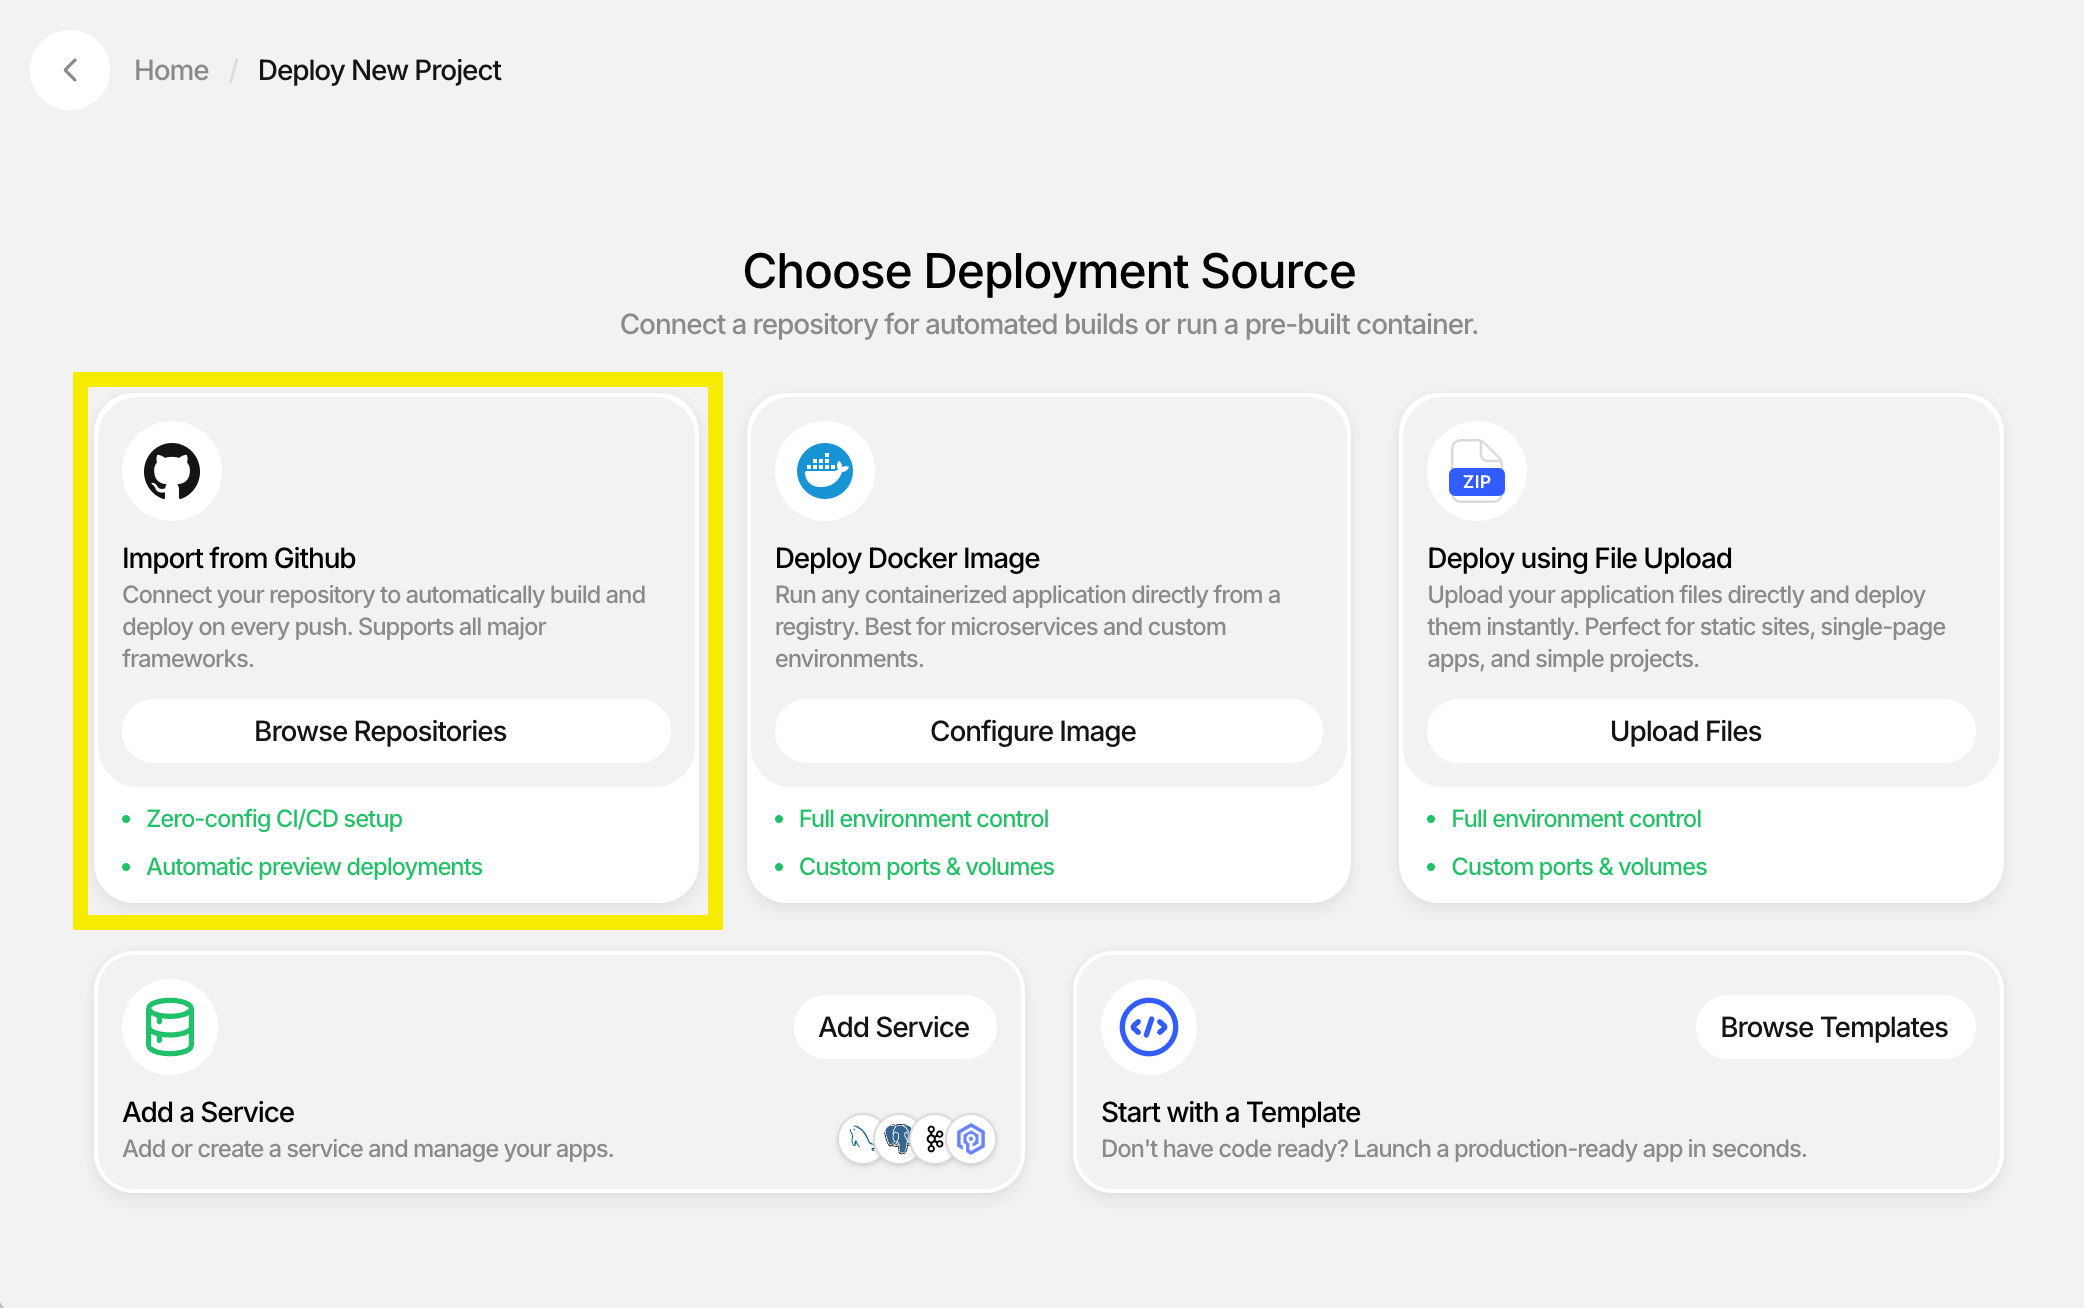
Click Import GitHub Repository if you haven't connected GitHub yet. If you've already connected it, you'll see Browse Repositories.

-
Select the repository you want to deploy and click Import.
-
Choose Manual or Build with AI:
- Manual — if you have specific install and build commands.
- Build with AI — if you want AI to automatically detect the framework, commands, and build files. You just select the branch.
-
When ready, click Deploy.
-
Build logs stream in. After a couple of minutes you should see a green Deployed message with an option to continue to the dashboard.
-
From the dashboard you can visit your live deployment, update environment variables, add a domain, and scale server resources and replicas.
Coming from GitLab or Bitbucket?
You'll export your repository as a ZIP file. Here's how.
GitLab
-
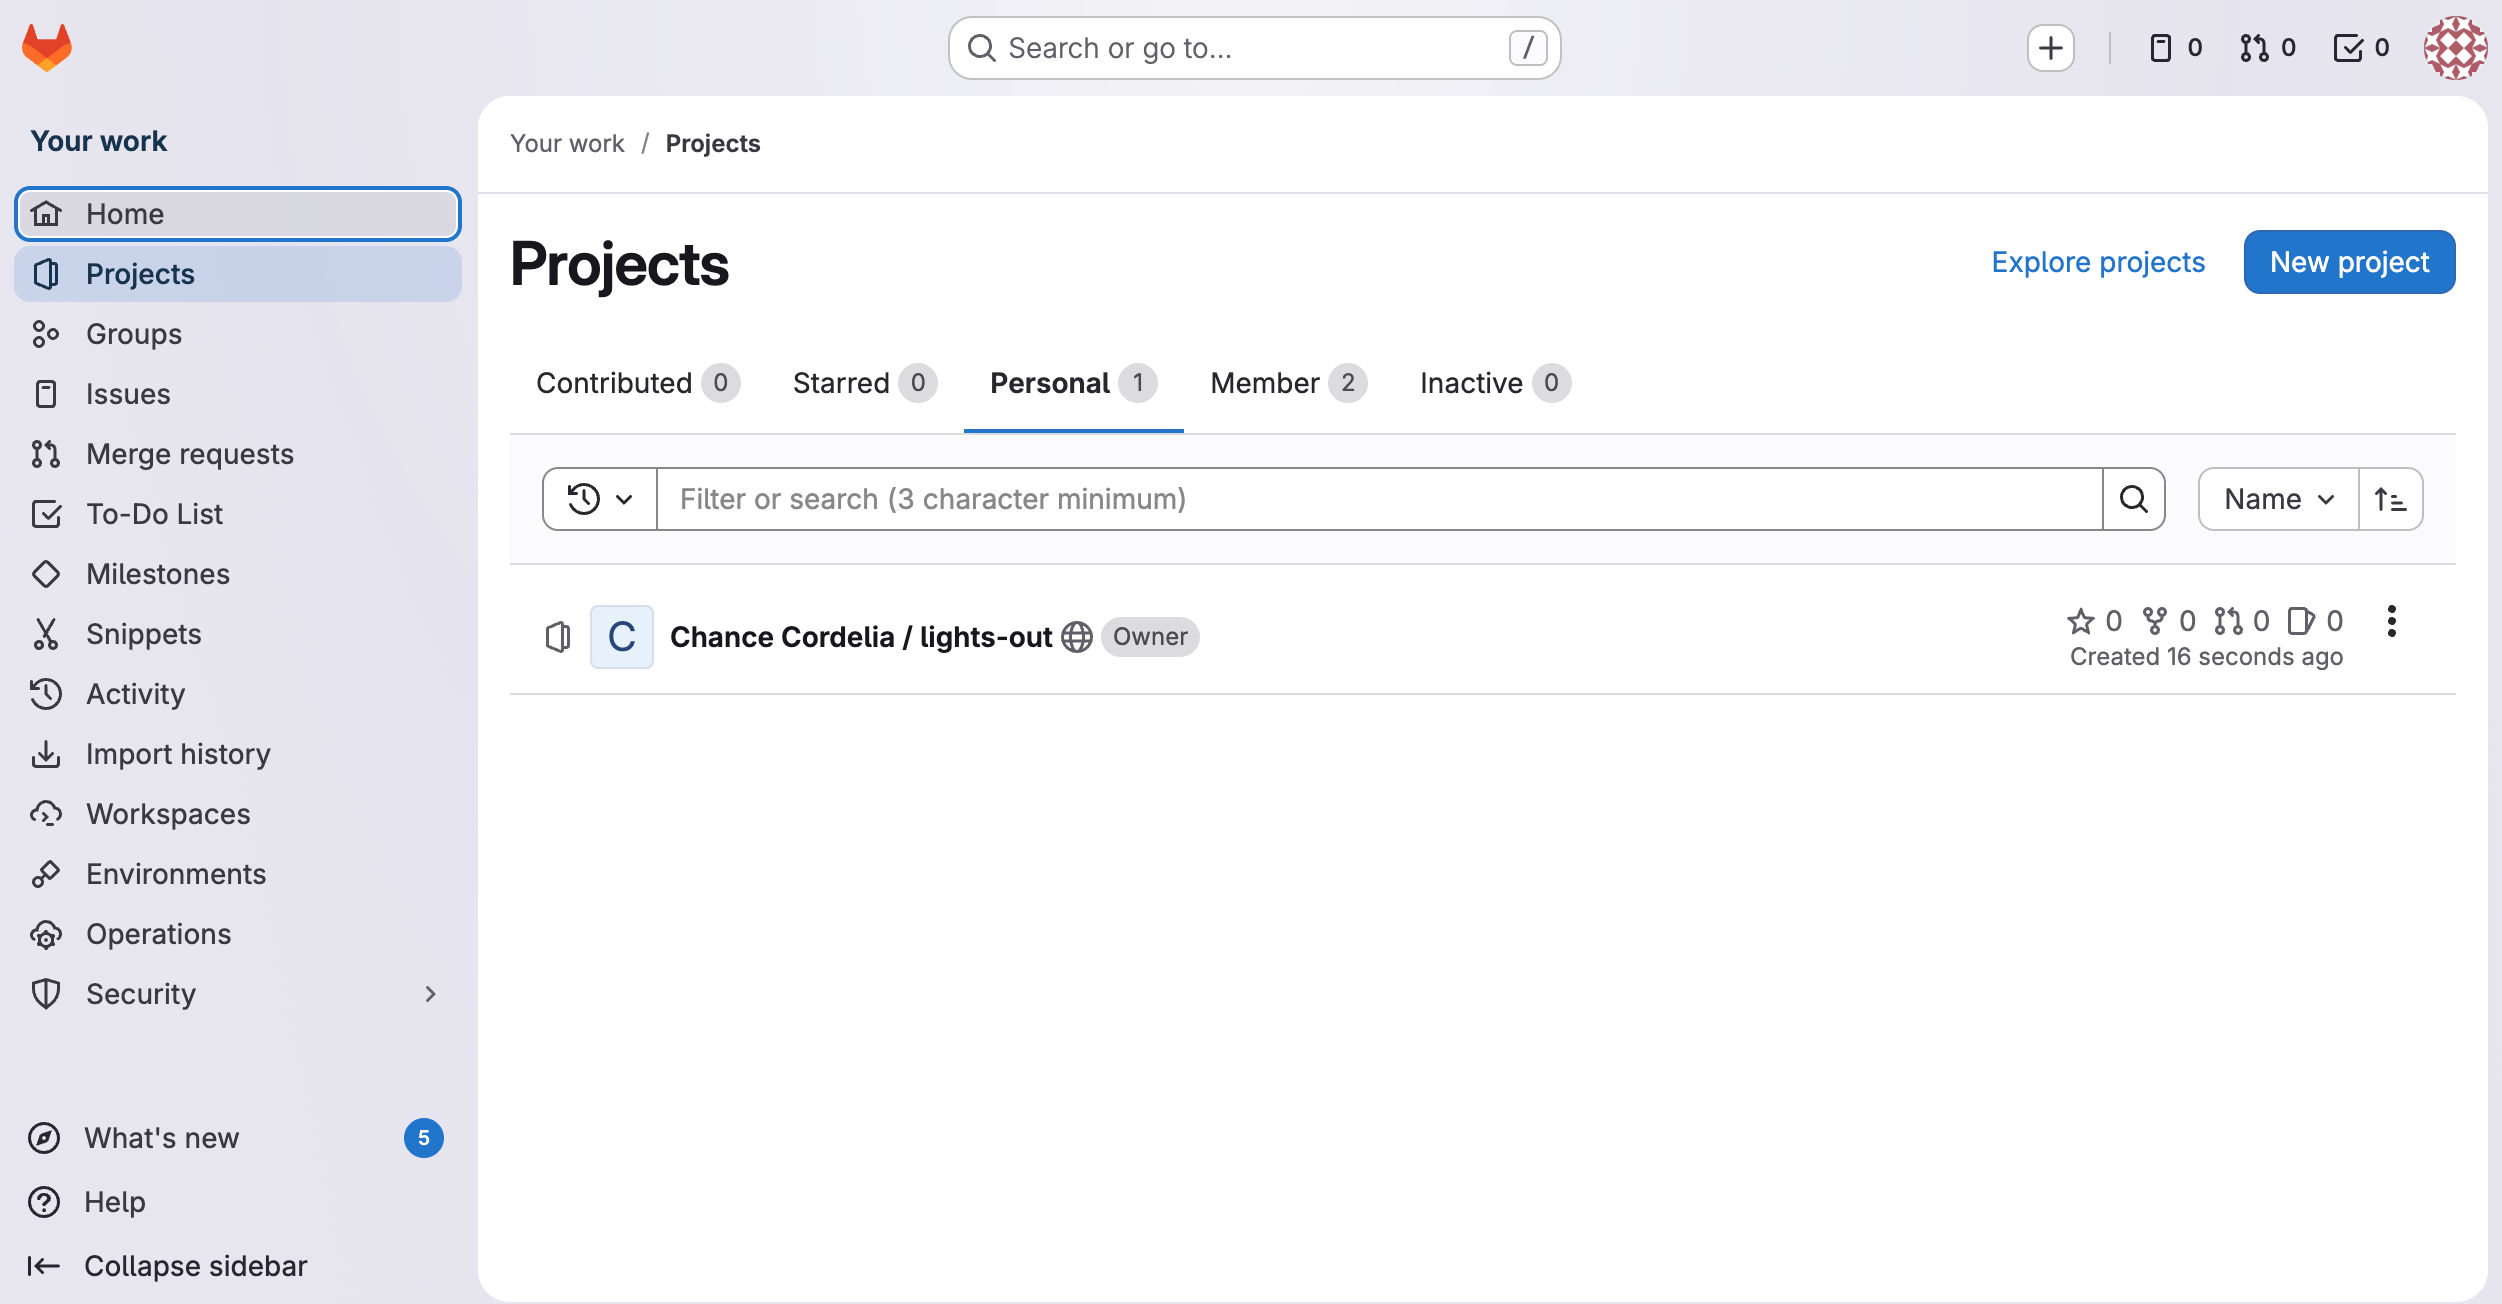
Sign into GitLab and open your repository.
-
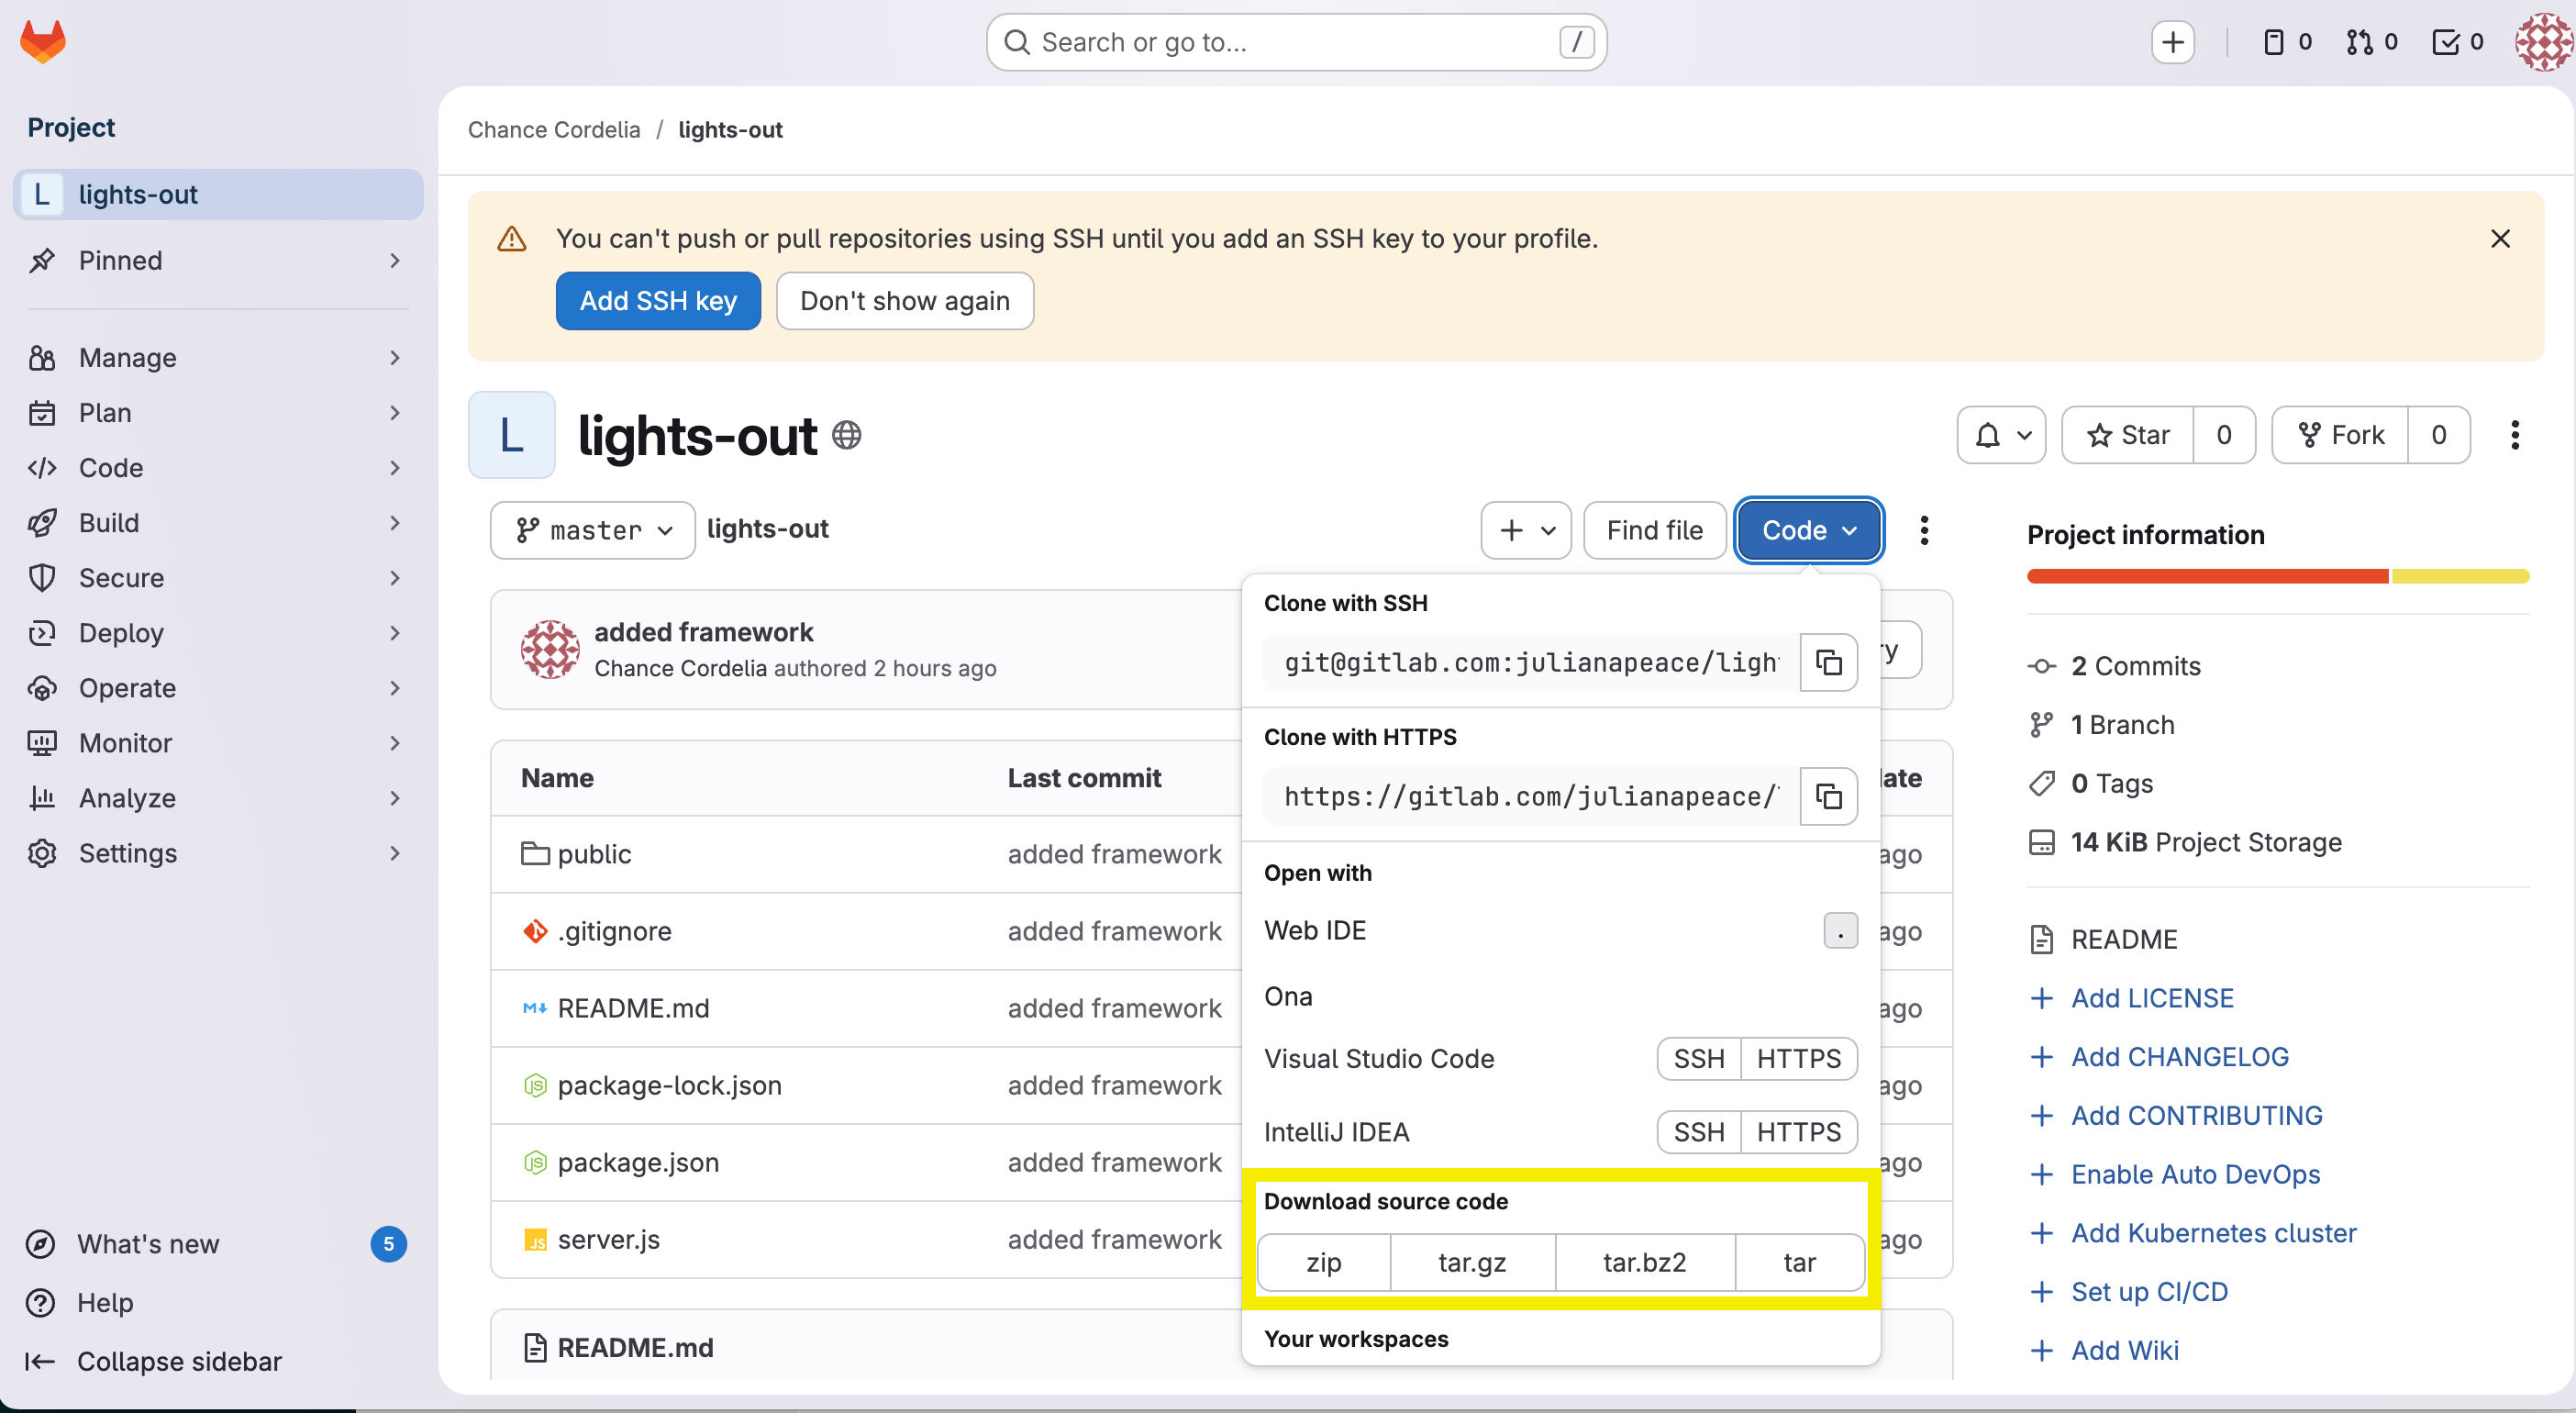
Click Code → Download → .zip.
-
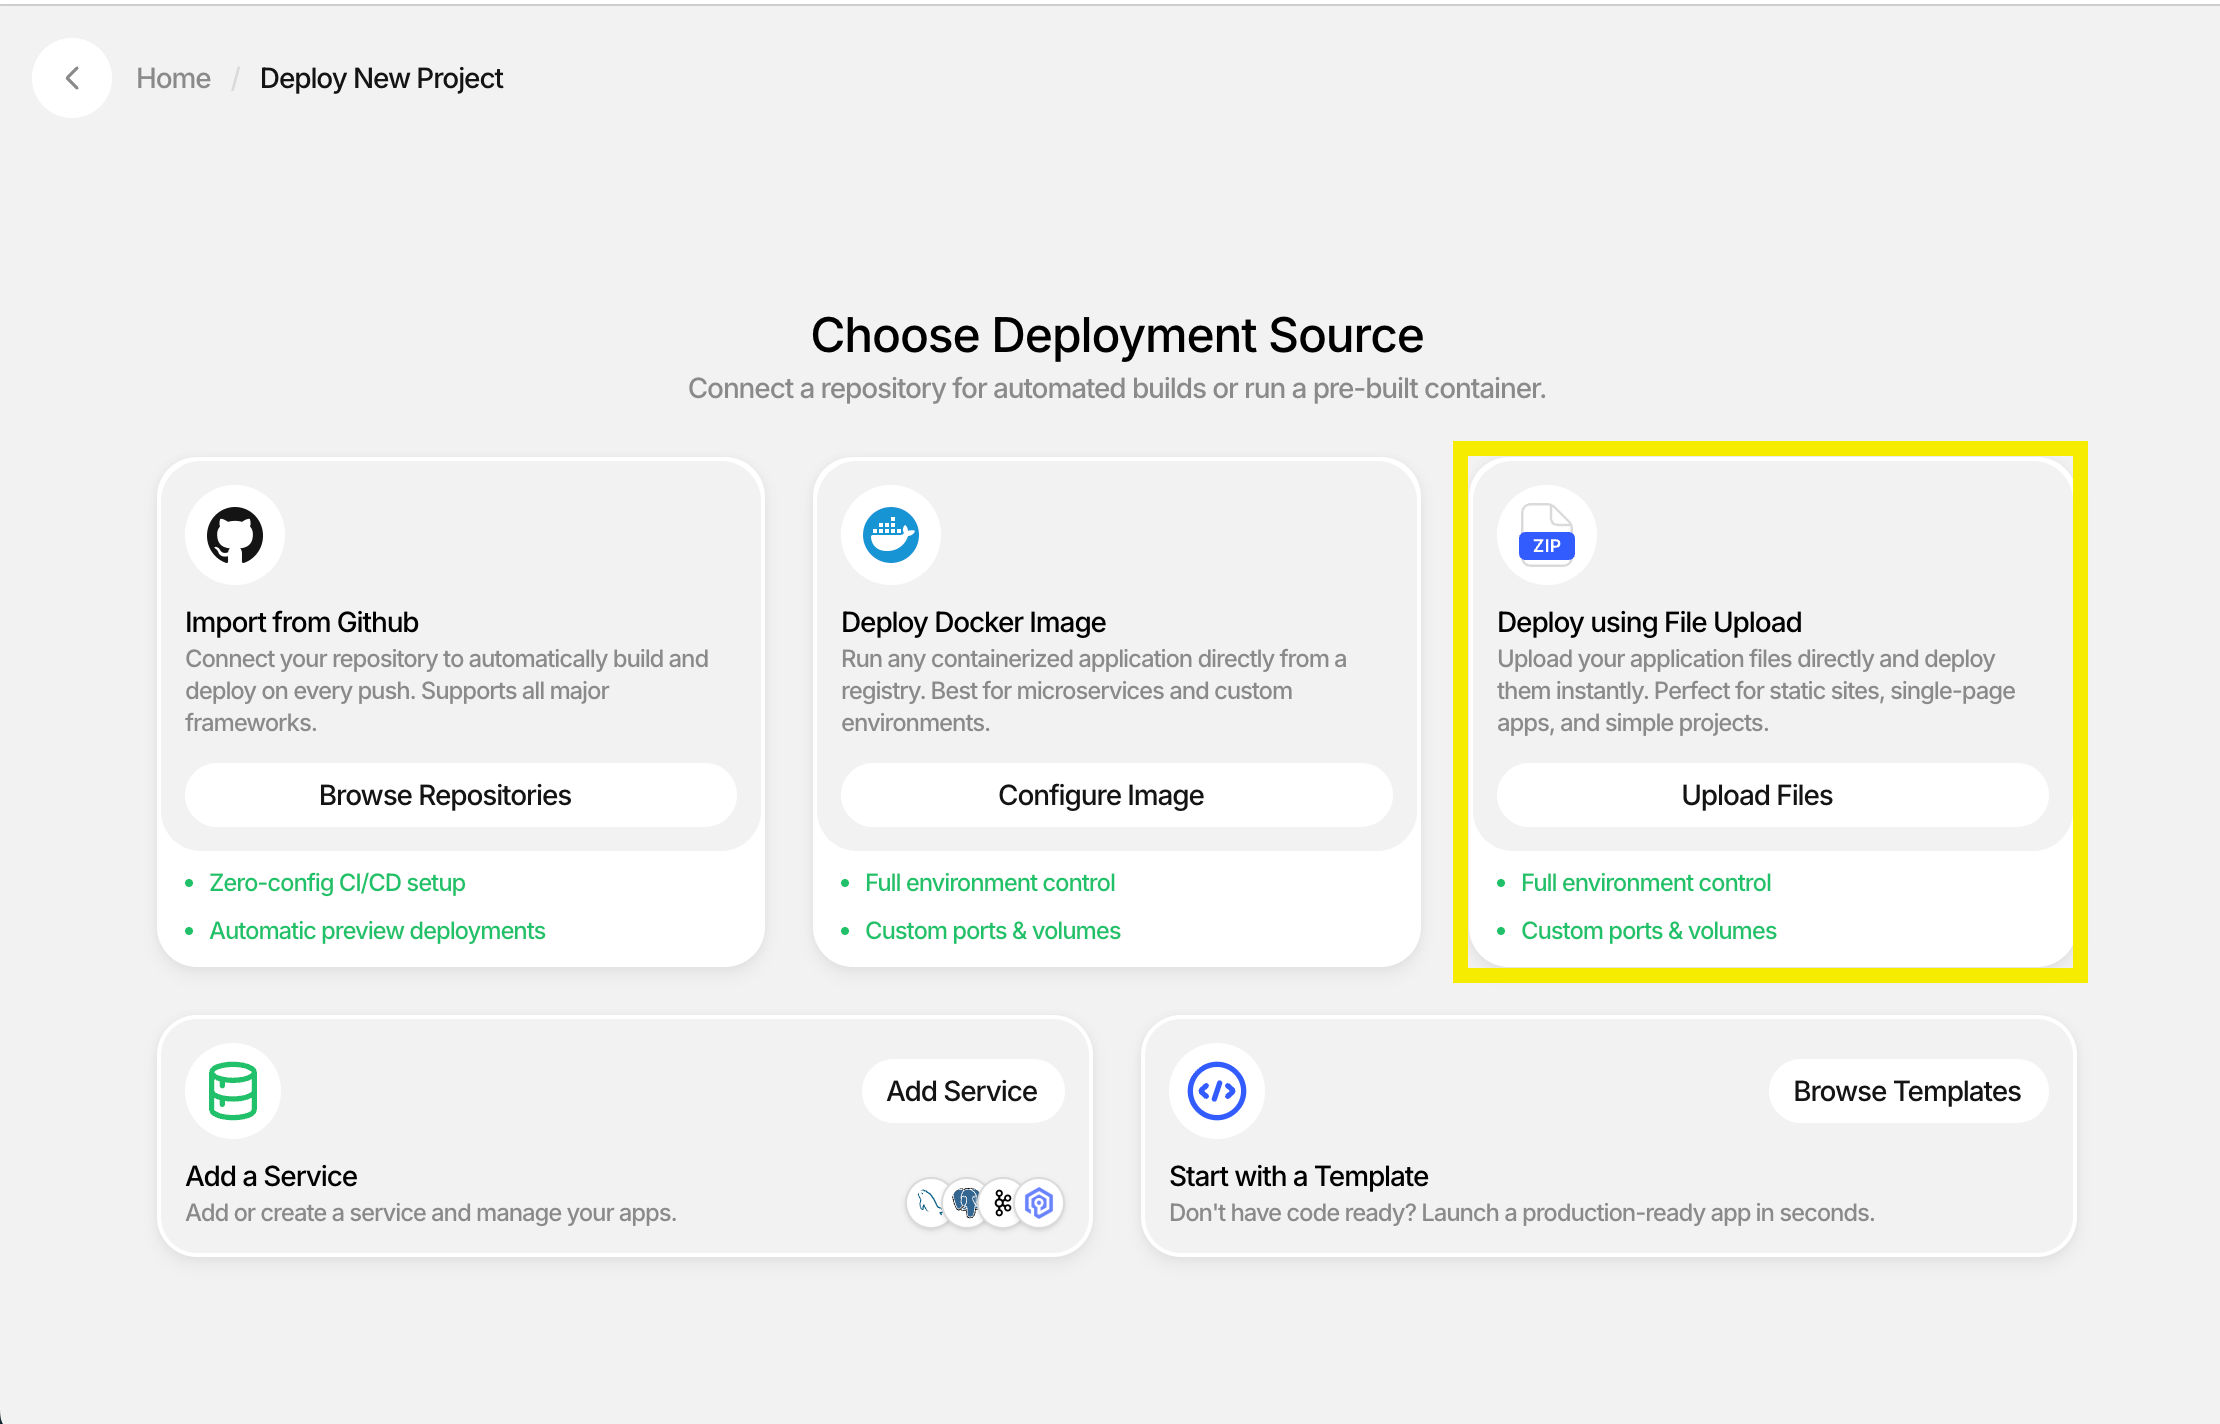
In CreateOS, instead of going to GitHub, click Deploy using File Upload.

-
Give your project a name, set the port, add any installation commands and environment variables, and click Deploy. Note: file-upload deployments always use Build with AI.
Bitbucket
-
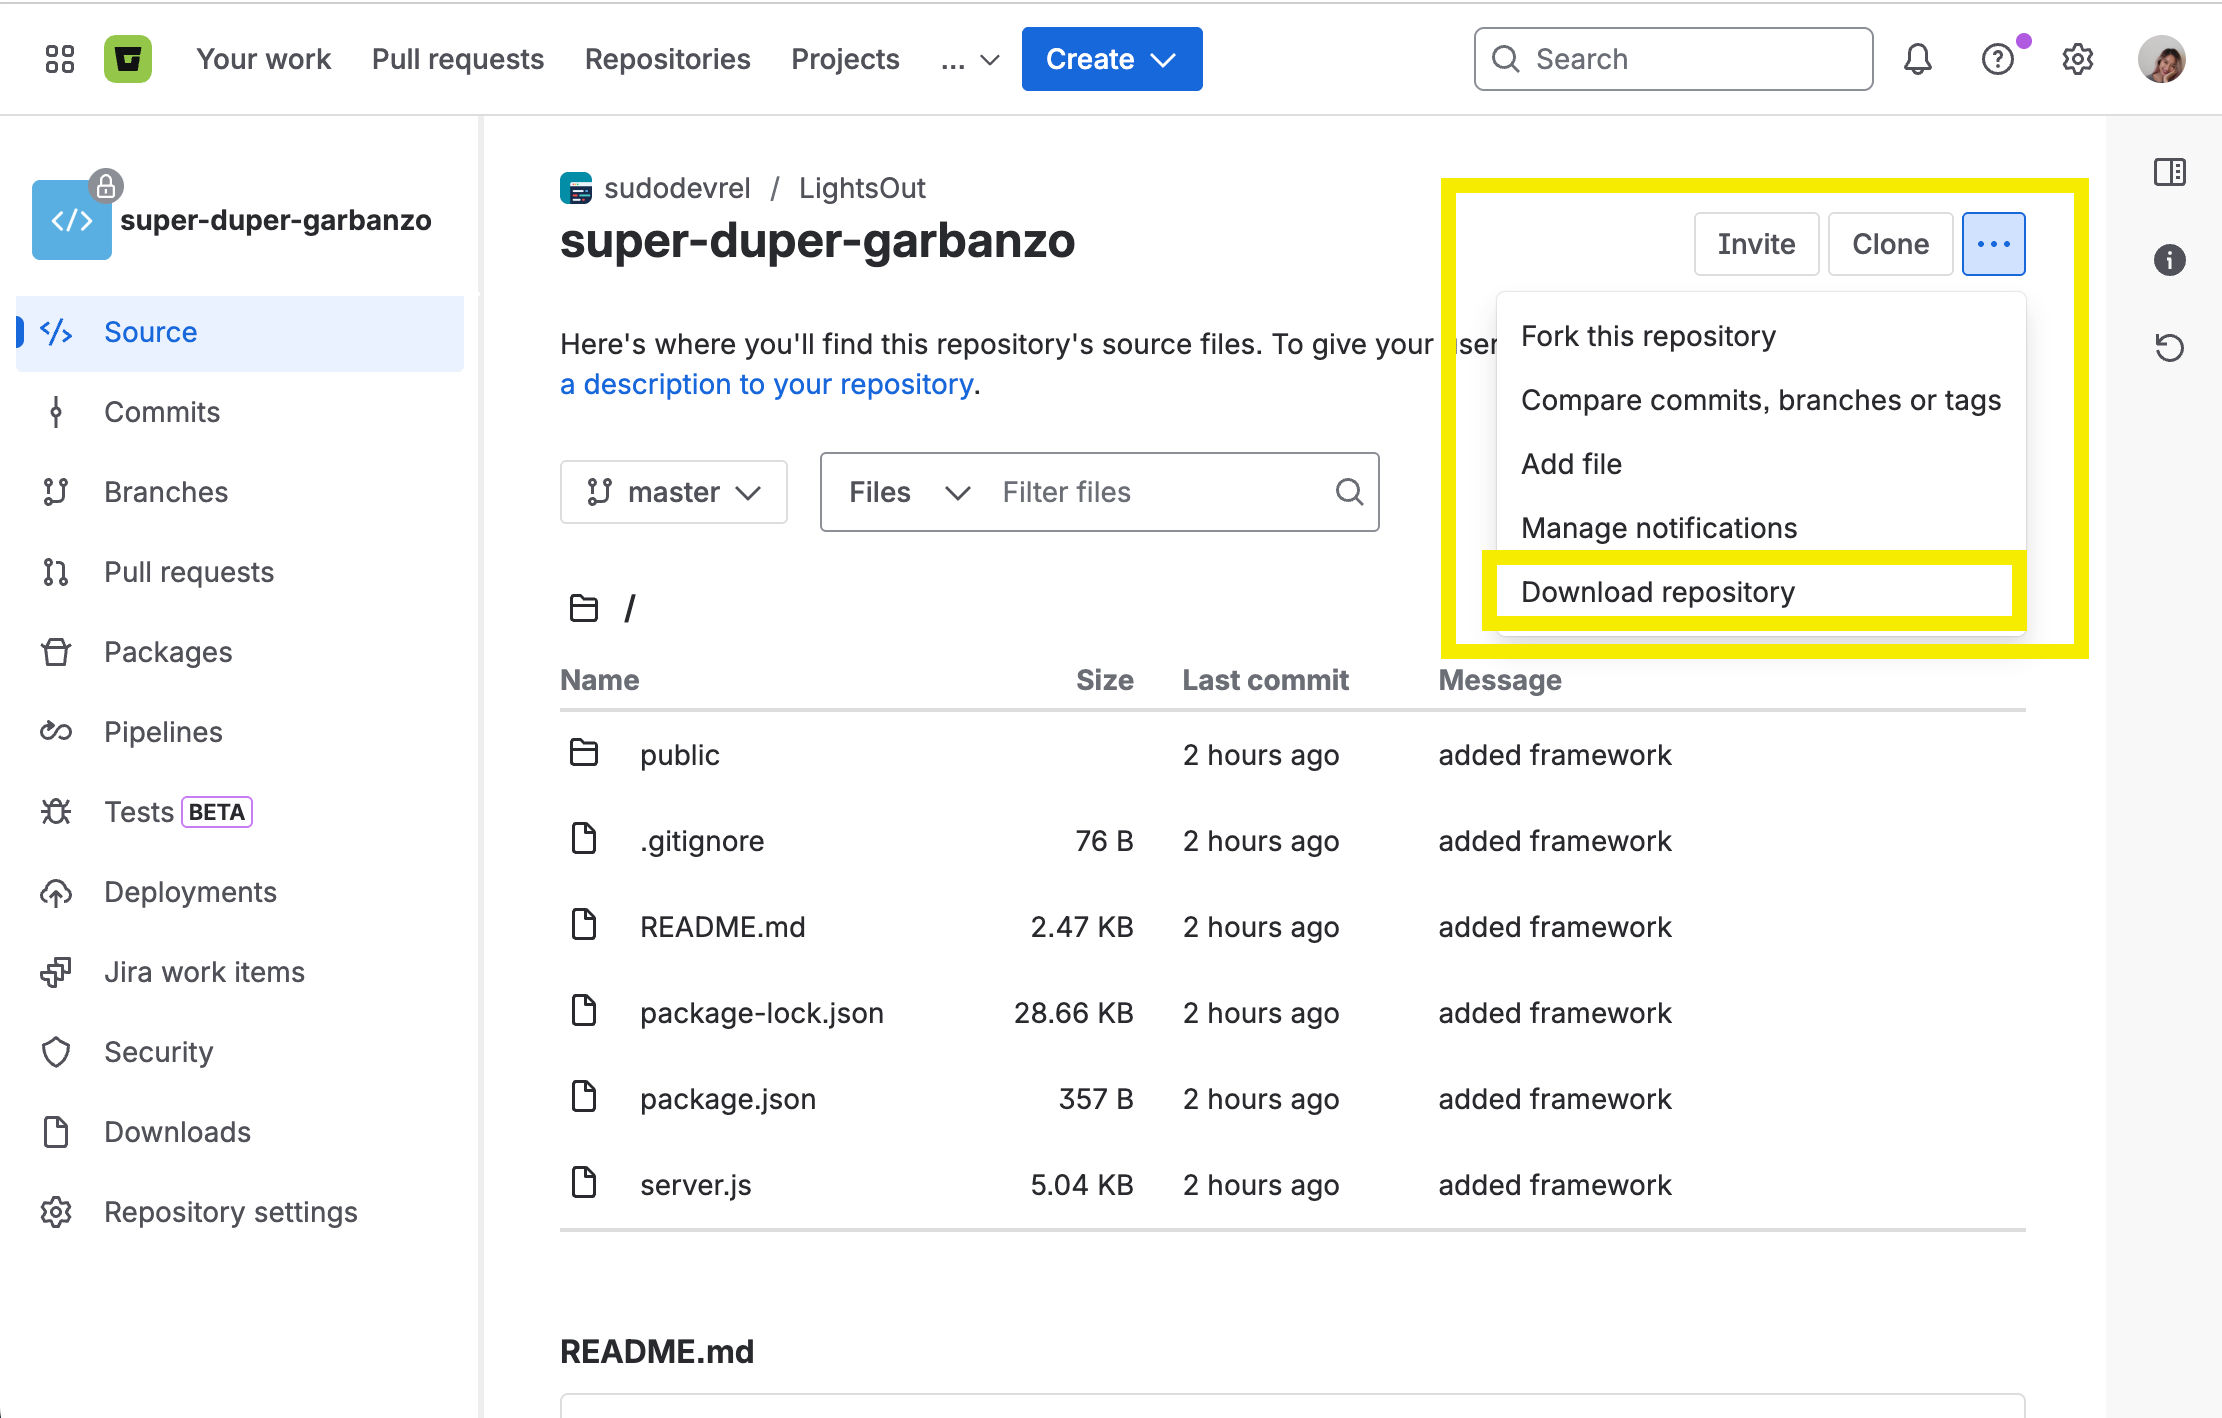
In Bitbucket, select your repository.
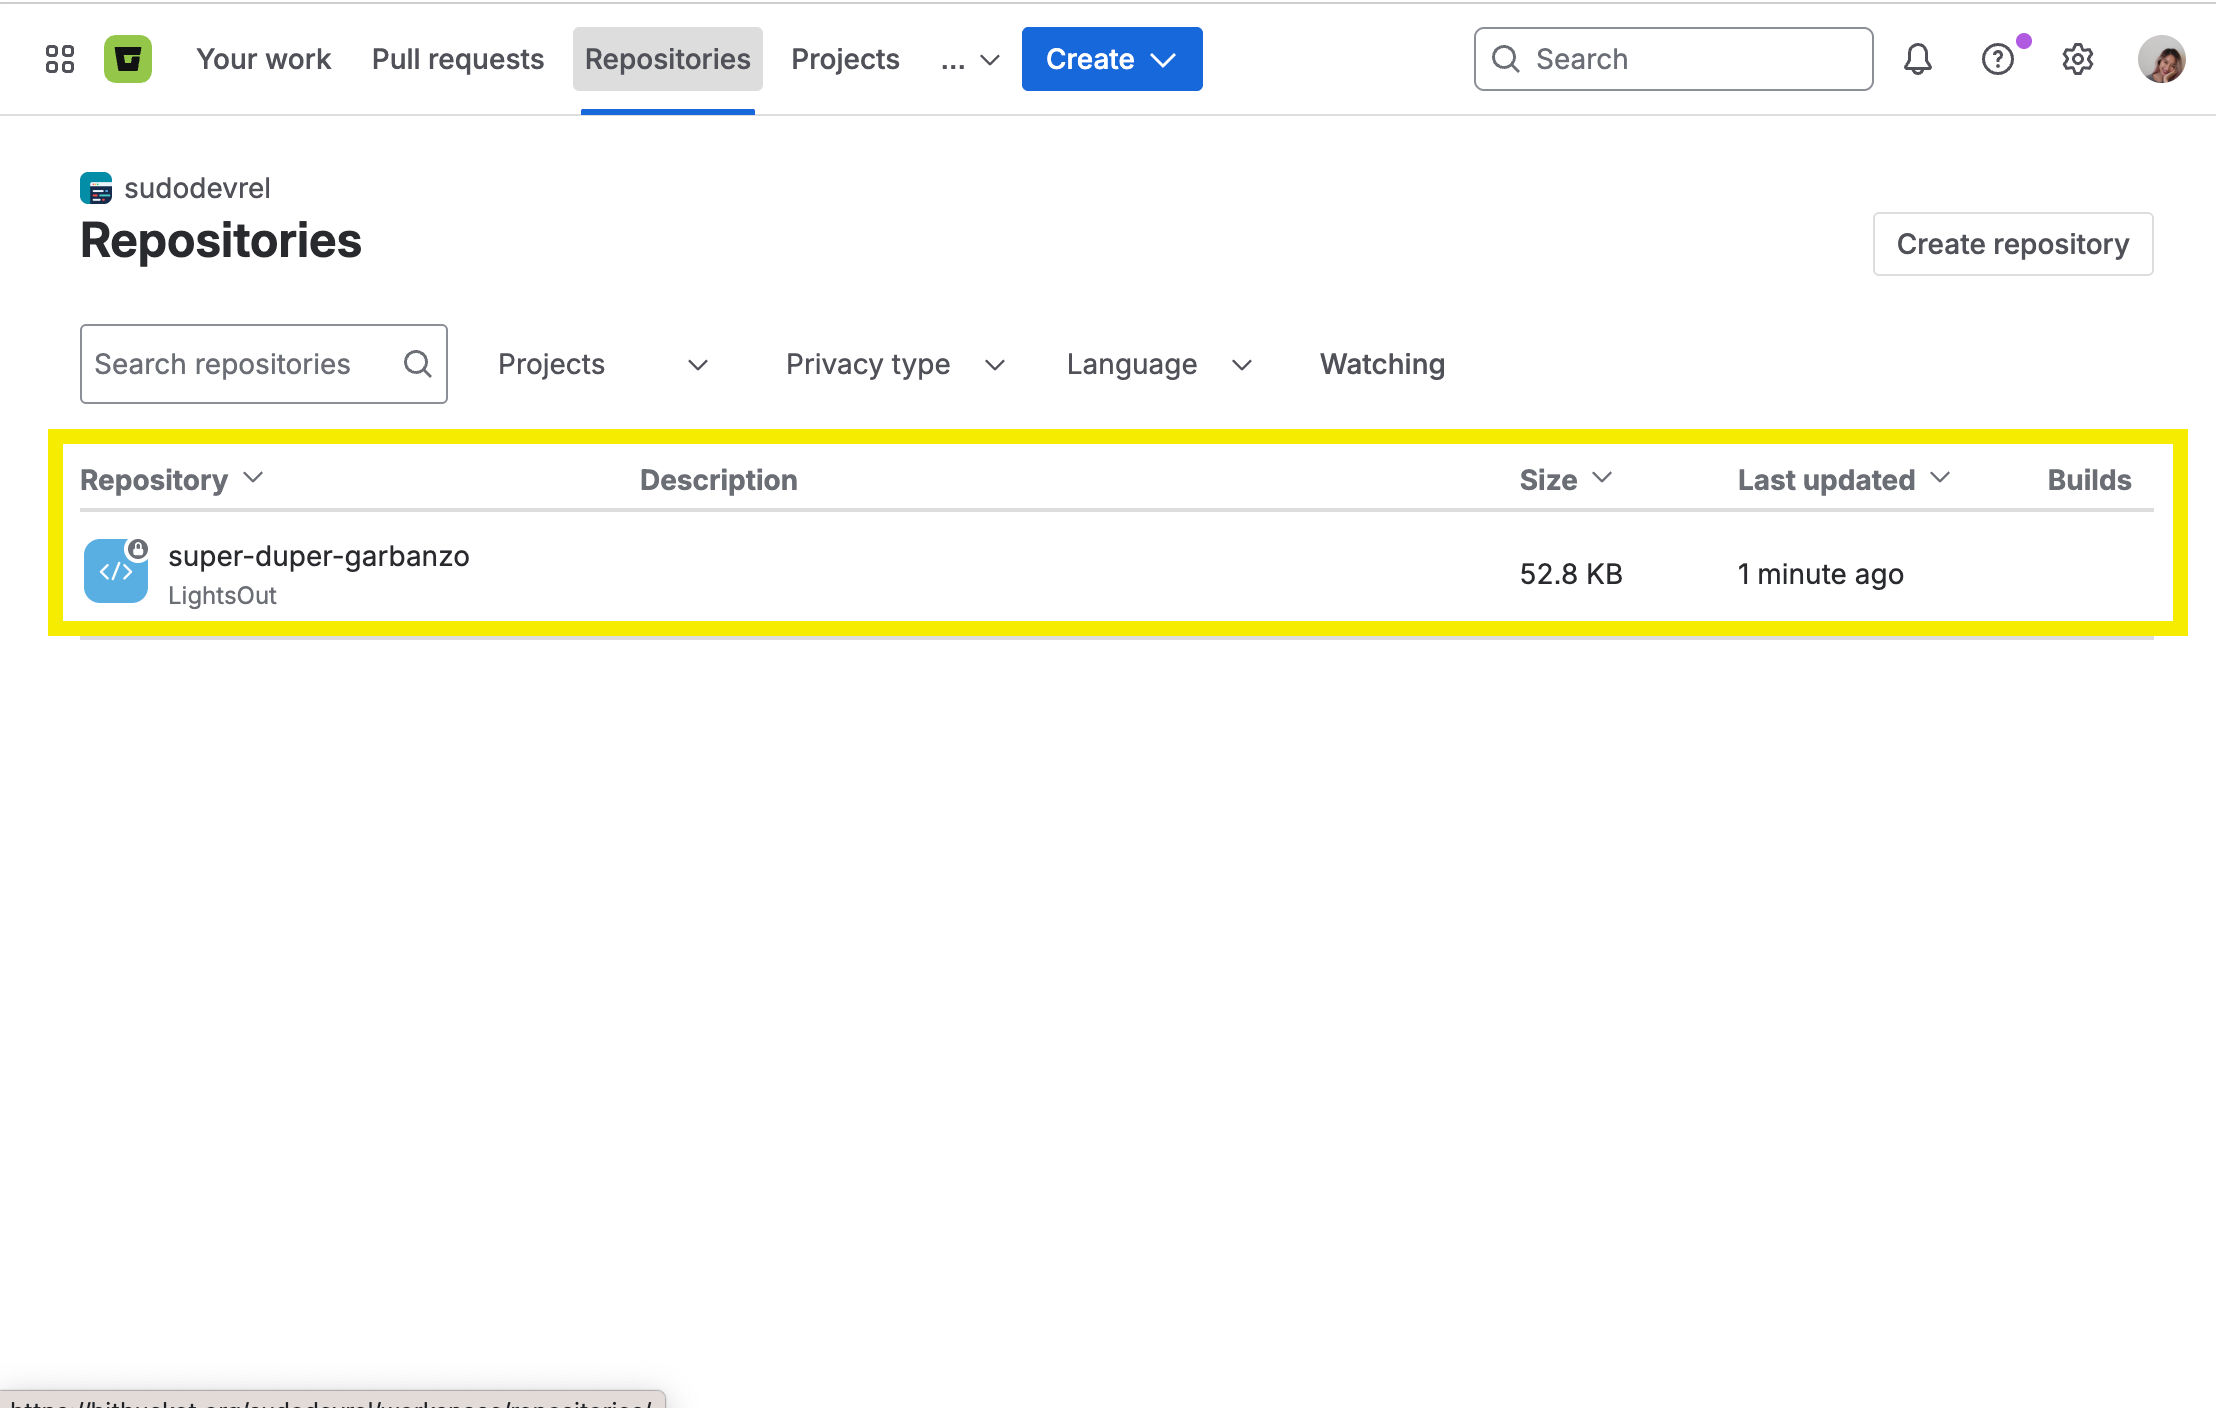
-
Inside the repo, click the three dots (…) → Download Repository.
-
This downloads a
.zipfile. -
In CreateOS, click Deploy using File Upload.
-
Give your project a name, set the port, add any installation commands and environment variables, and click Deploy. Note: file-upload deployments always use Build with AI.