How to Deploy a Database
In this tutorial, you'll learn how to deploy a production-ready database on CreateOS in just a few clicks.
By the end of this guide, you'll have a live PostgreSQL or MongoDB database and know exactly where to find your connection details—ready to plug into your app and keep building.
Steps
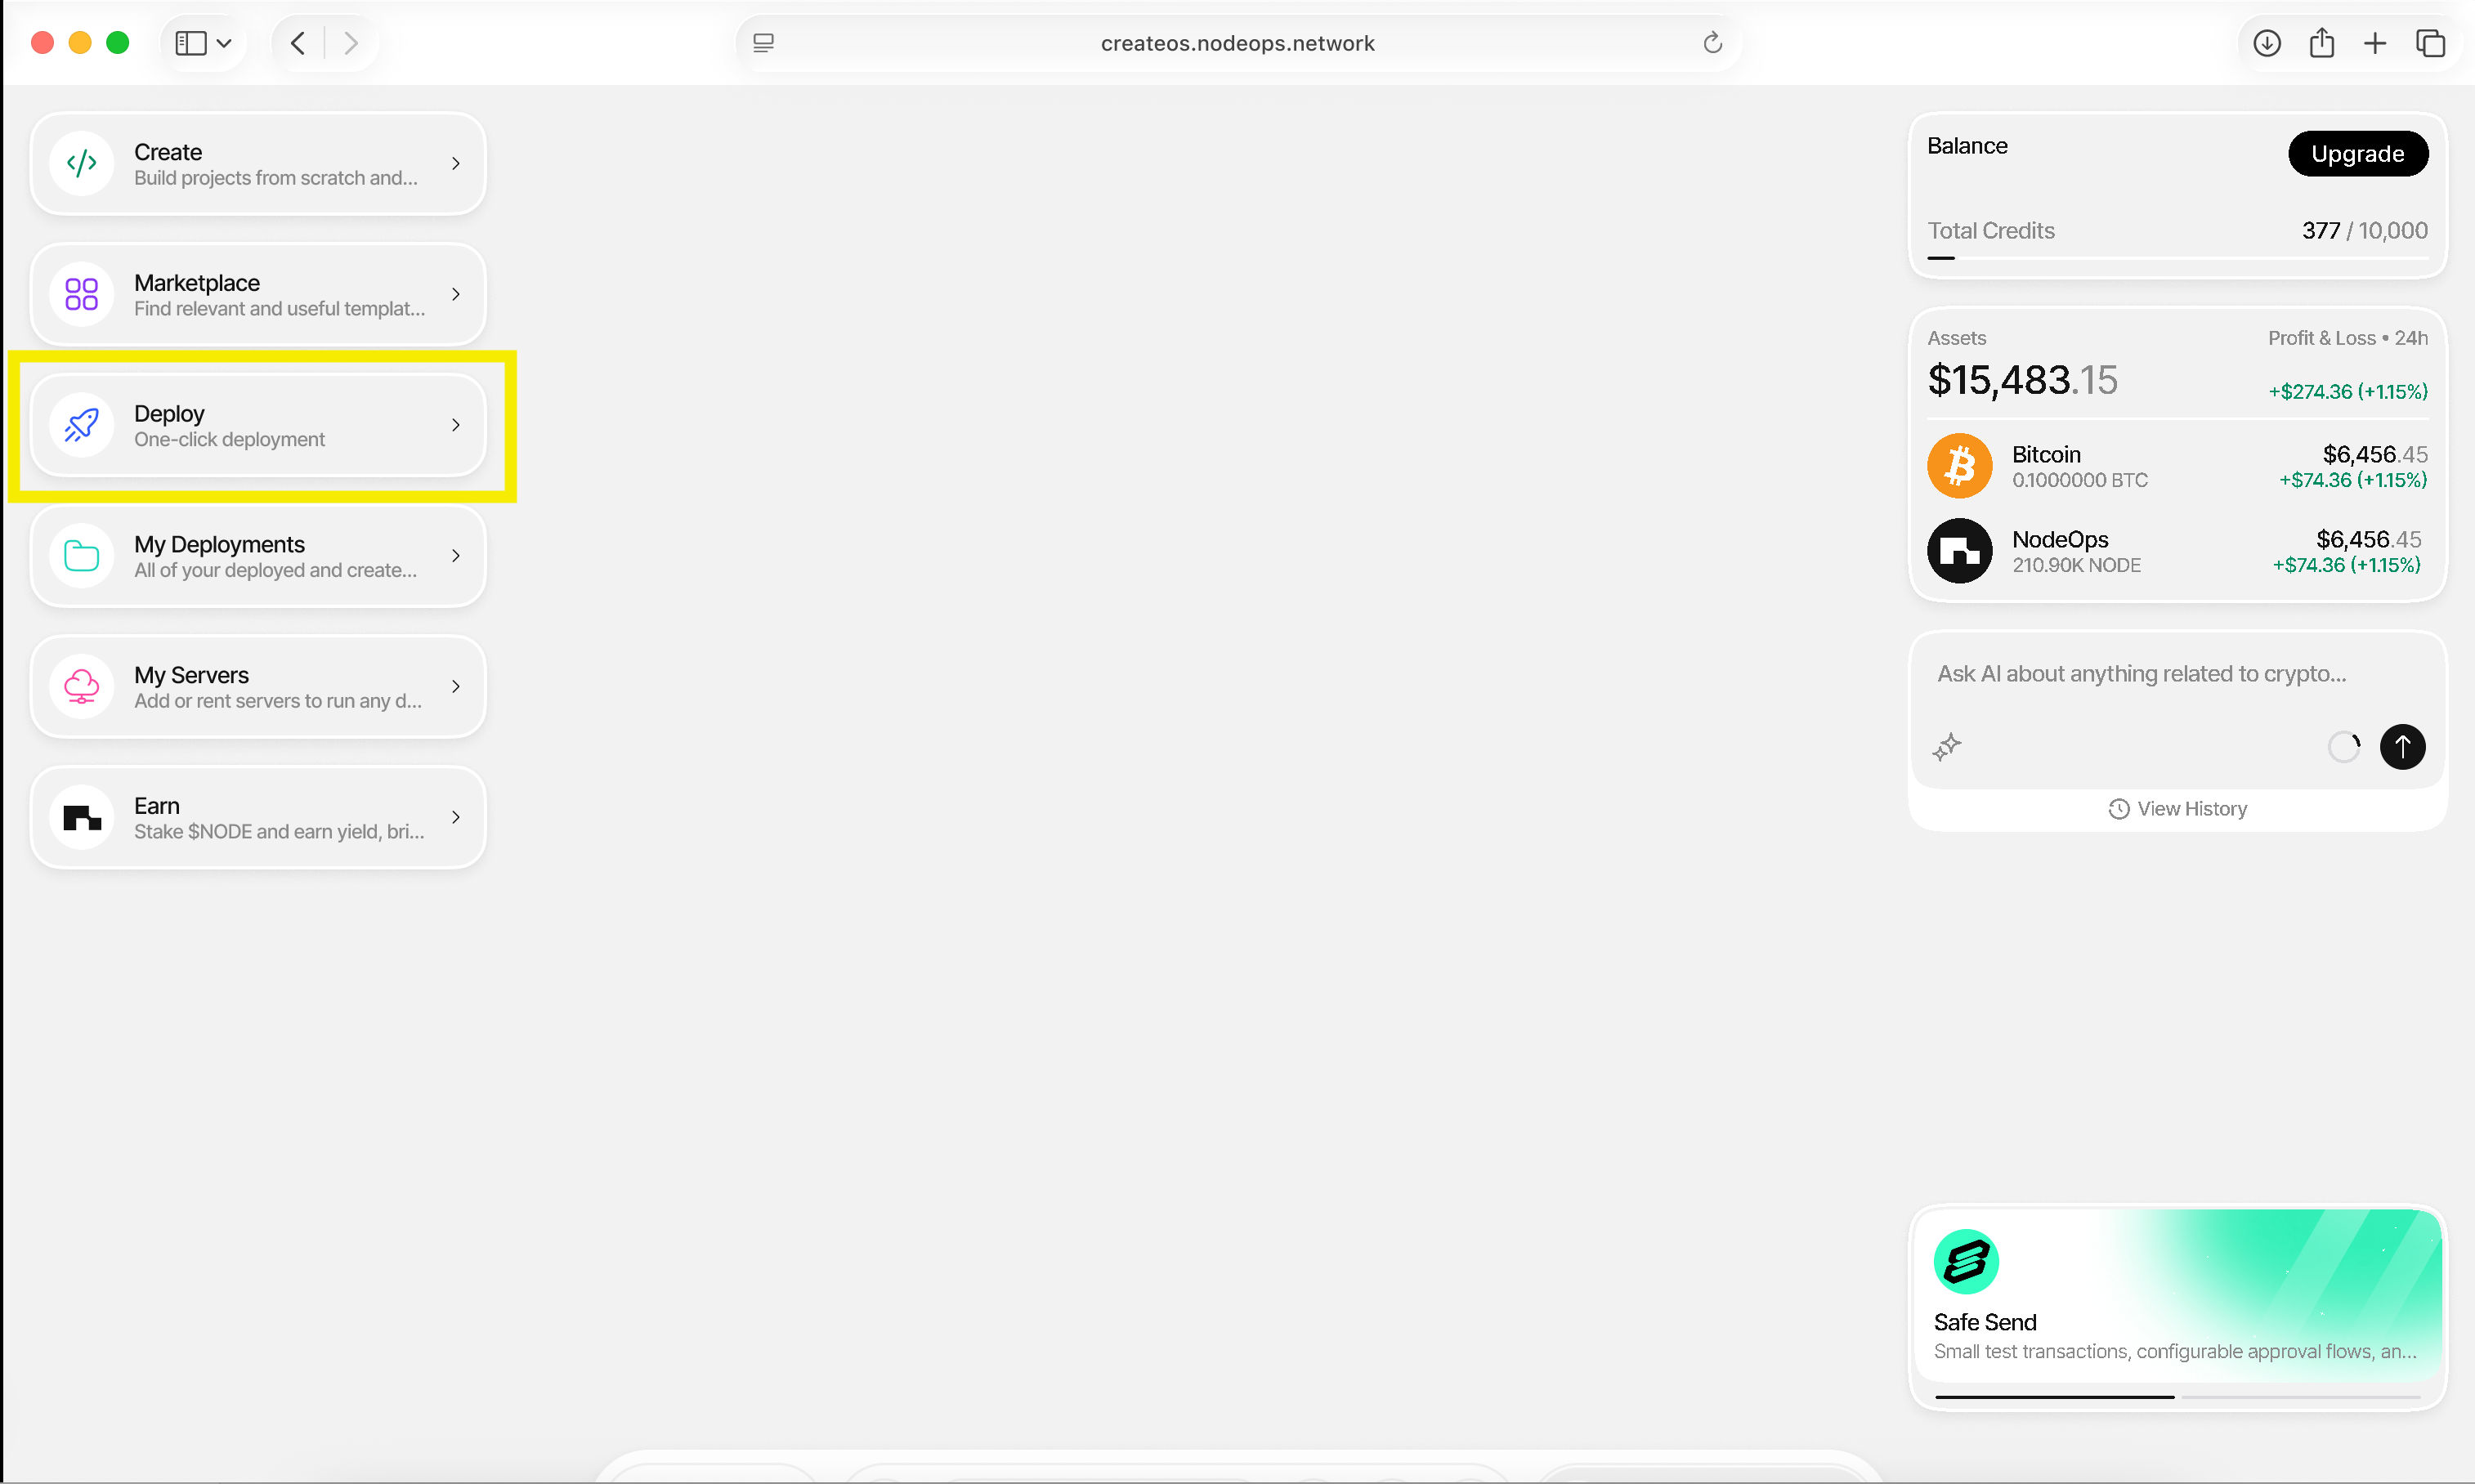
Step 1: Access the Deploy Section
- Go to CreateOS Platform and sign in
- Click "Deploy" from the menu on the left
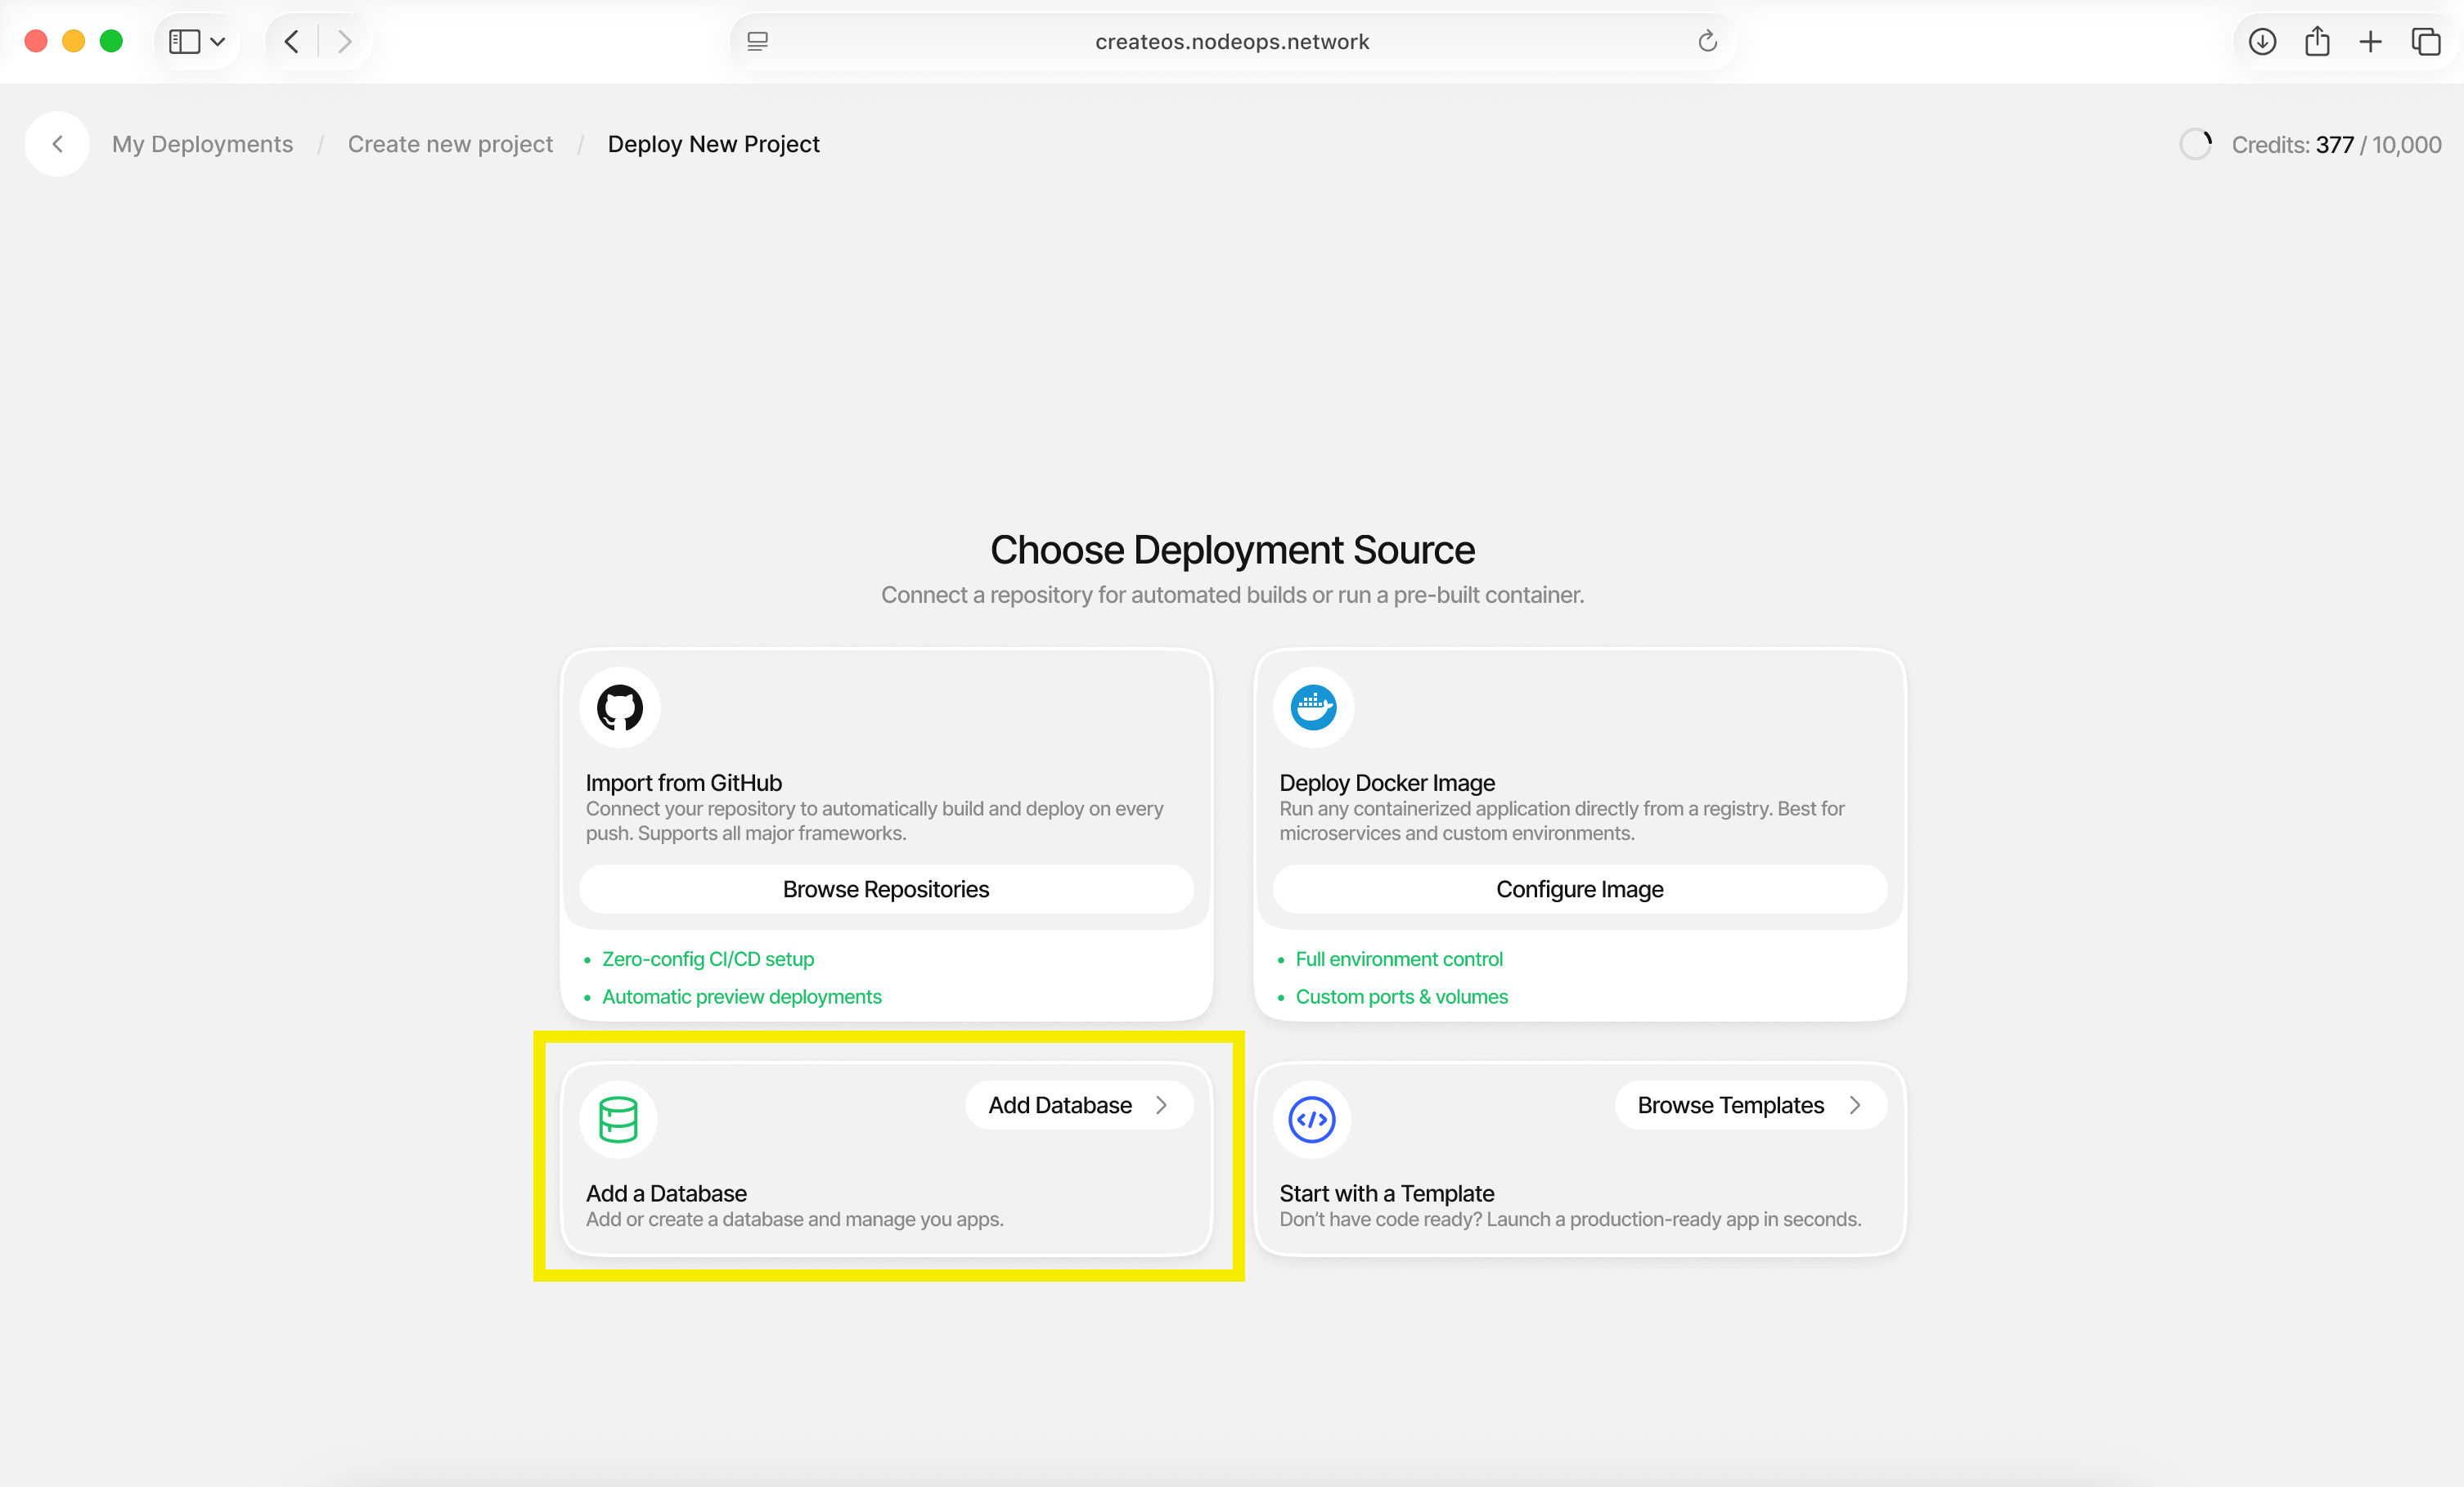
Step 2: Select Database Deployment
- Choose "Deploy a Database"
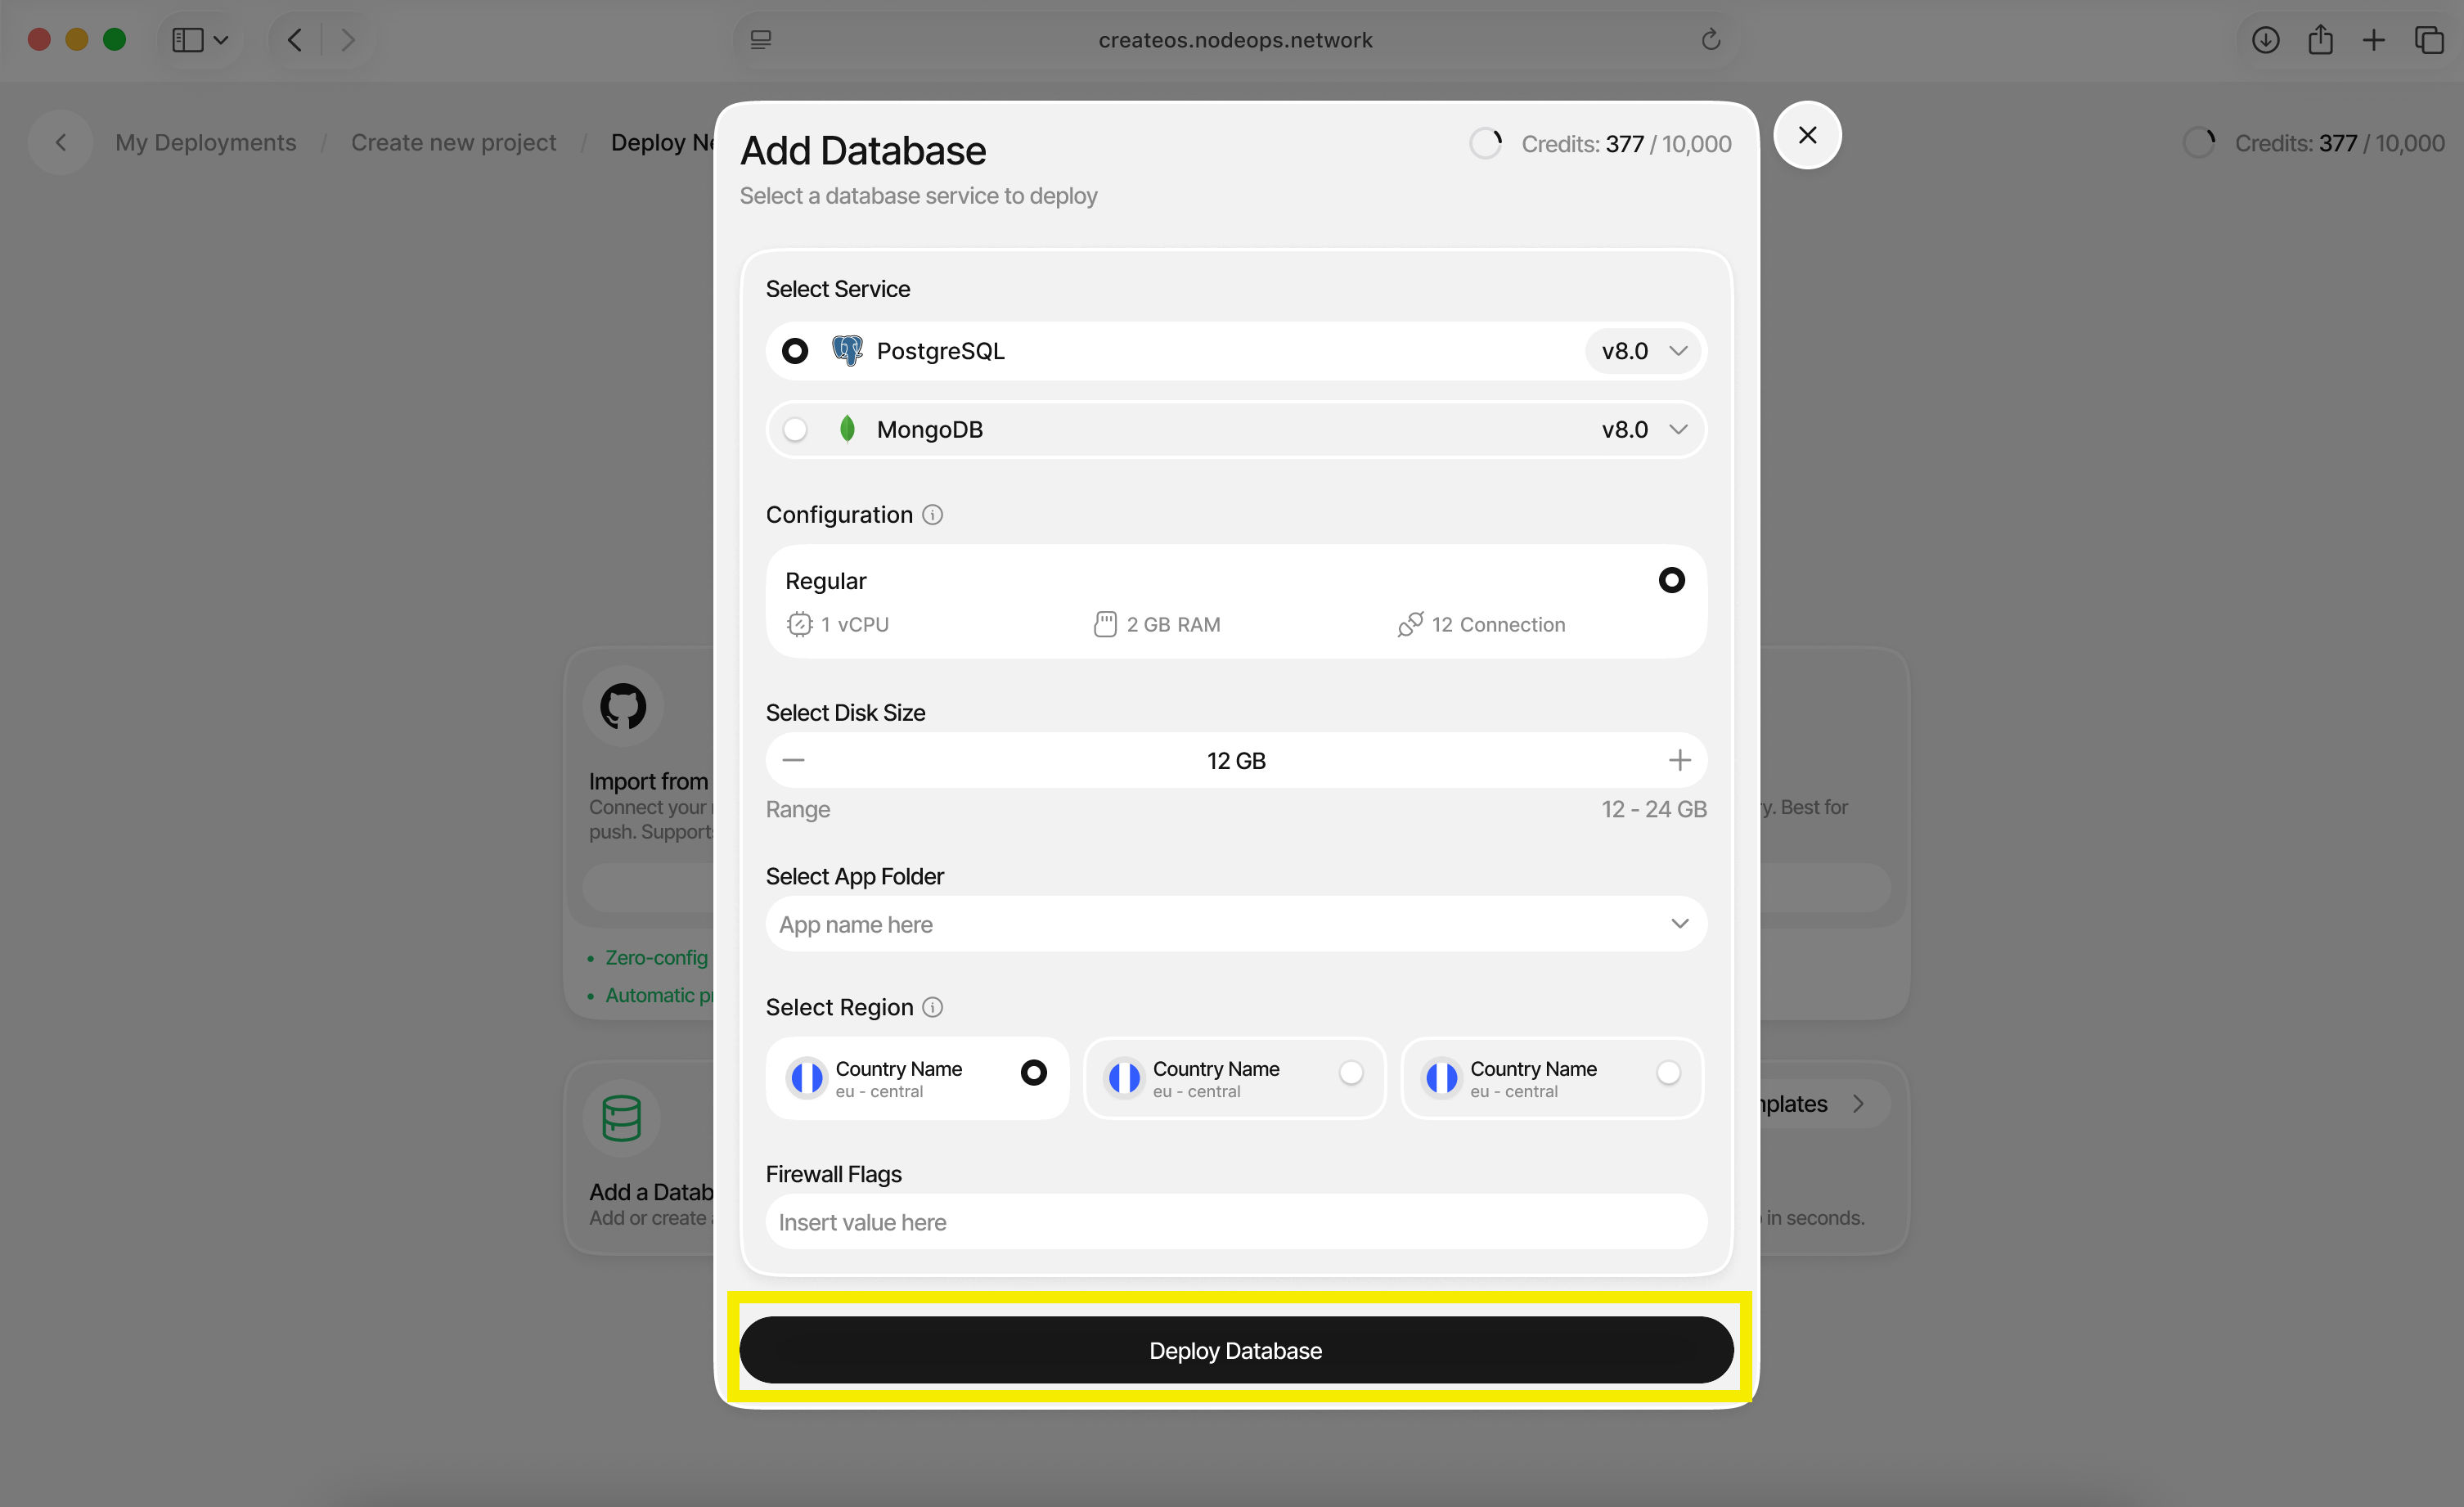
Step 3: Configure Database Settings
Configure your database with the following options:
| Setting | Description |
|---|---|
| Database Type | Choose between PostgreSQL or MongoDB |
| Disk Size | Select the storage capacity for your database |
| Application Folder | Organize your database (optional) |
| Region | Select the deployment region |
Click "Deploy Database" when ready.
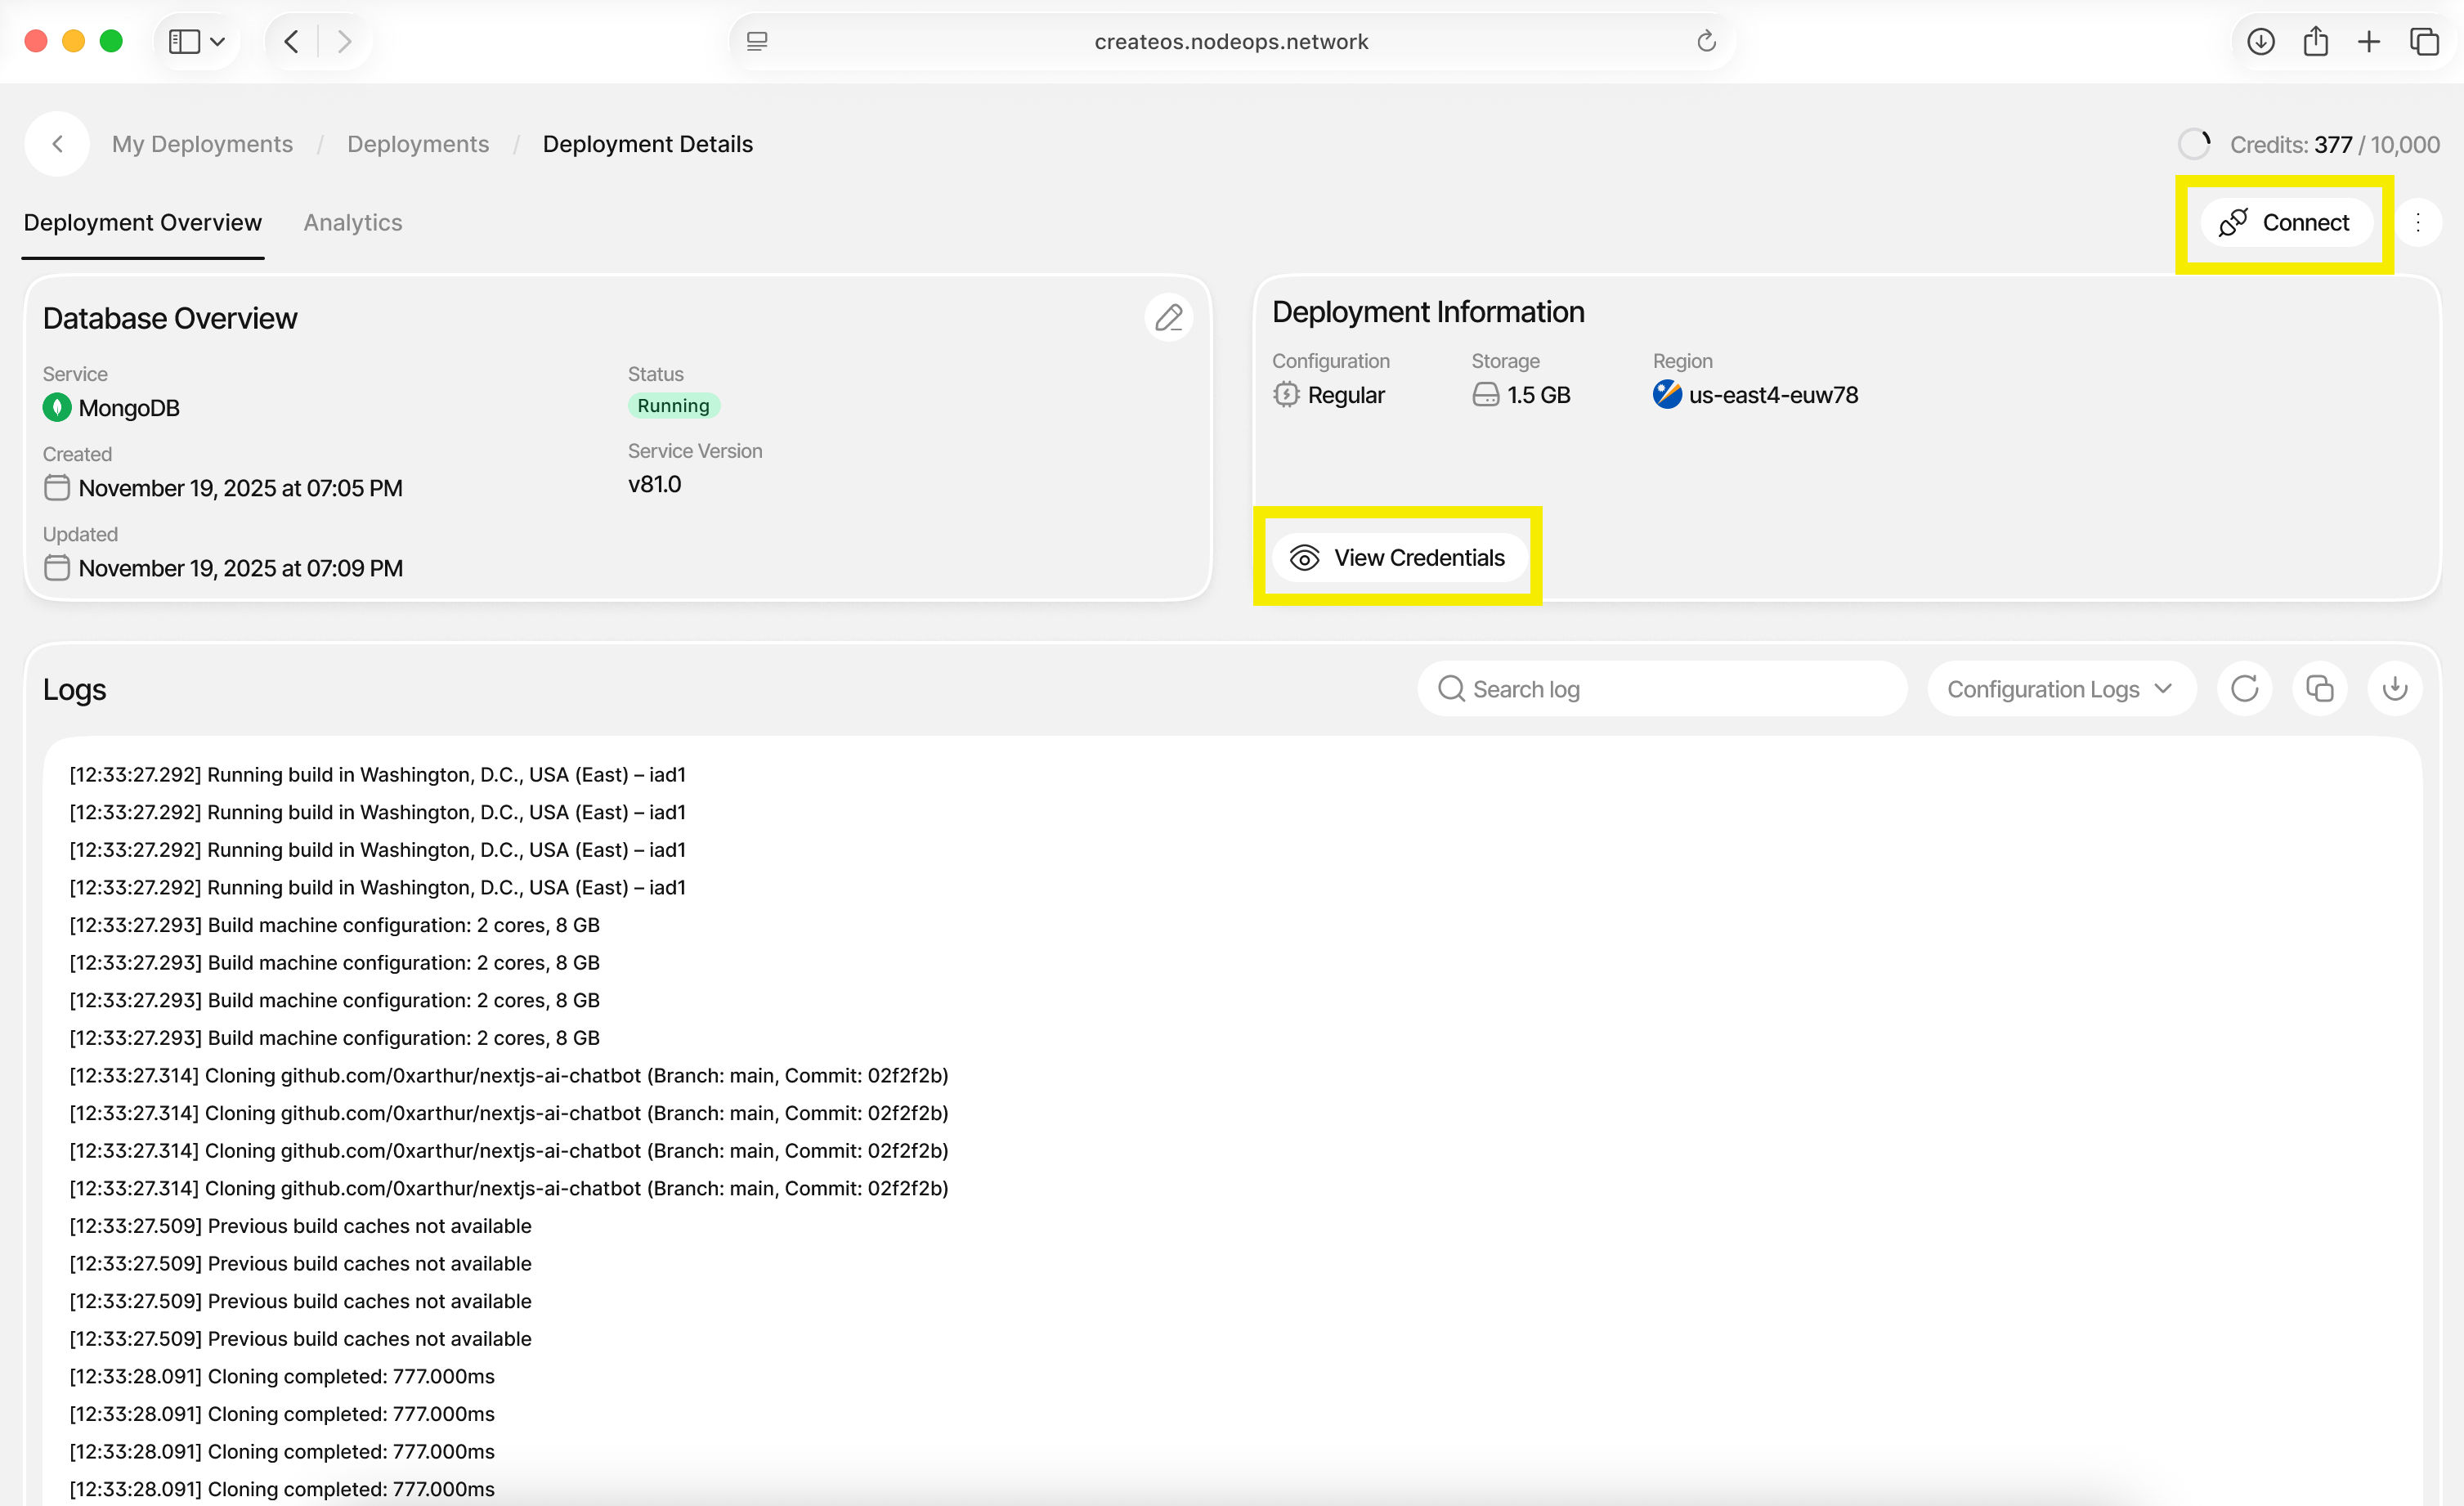
Step 4: Access Connection Details
- Once deployment is complete, you'll be redirected to the dashboard
- Click "Connect" on the top right or "View Credentials"
- Copy your connection credentials to use in your application
What's Next
That's it — your database is now live.
From here, you can copy your credentials, connect your application, and continue building without breaking your execution flow. CreateOS handles the underlying infrastructure so you can stay focused on shipping features, iterating quickly, and moving toward production.
If you haven't already, the next step is to connect this database to your deployed app or explore additional CreateOS features to extend your project.